InStitches Creative Textile Courses
  • Home
    • Courses and workshops at a glance
    • Contact us
    • Want to stay locally?
    • About us >
      • The story of InStitches
      • How to find us
      • News and events
      • What our students say
      • Gallery
    • The Small Print
    • Privacy policy
  • Bursary
  • Create your own cloth
    • Create your own cloth play days
    • Create your own cloth - with surface design
    • Create your own cloth - in a bucket
    • Create your own cloth - with a screen
    • Create your own cloth - using resists
    • Create your own cloth - Paper lamination
    • Create your own cloth - Exploring Indigo
    • Create your own cloth - Breakdown your palette
    • Create your own cloth - with earth pigments
    • Create your own cloth with Nature's colours
  • Guest tutor workshops
    • Guest tutors 2025 >
      • Judith Needham - weave your own chicken
      • Claire Benn - Intent on abstract Composition
      • Anna Woodhead - Paper lamination
      • Matthew Harris - Chain reaction
      • Sam Jones - Exploring Indigo
      • Leah Higgins - Breakdown your palette
      • Claire Benn - Out of this earth
      • Sam Jones - Nature's colours
      • Richard McVetis - A stitch drawn
      • Polly Pollock - Coiled baskets
      • Karina Thompson - Free motion for the terrified
      • Claire Benn - TEXTure
    • Want to stay locally?
    • Guest tutors 2026 >
      • Kate Findlay - Procreate for textile design
      • Sue Brown - Mixed media sketchbook
      • Leah Higgins - Breakdown your palette
  • Other courses
    • Courses and workshops at a glance
    • Creative Journeys 2025/26
    • InStitches at Home online workshop
  • Shop
    • Workshop Gift Vouchers
    • screens4printing

#institchescreative2020 - come fly with me

1/5/2020

2 Comments

 
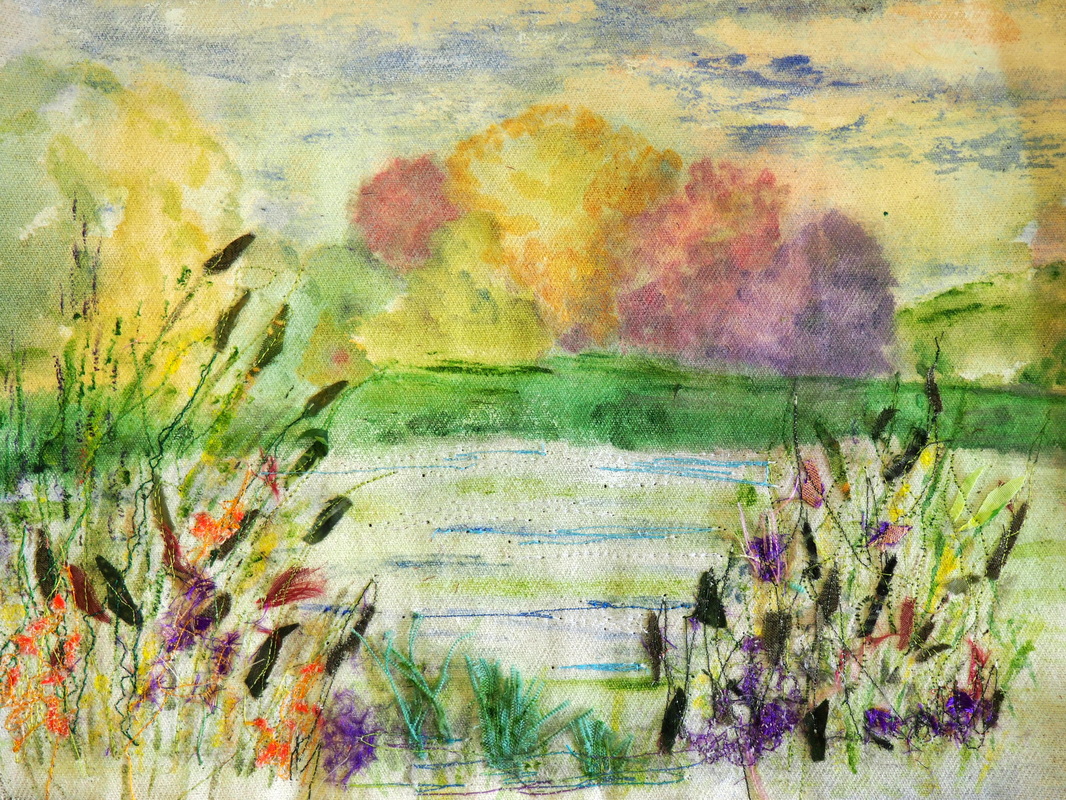
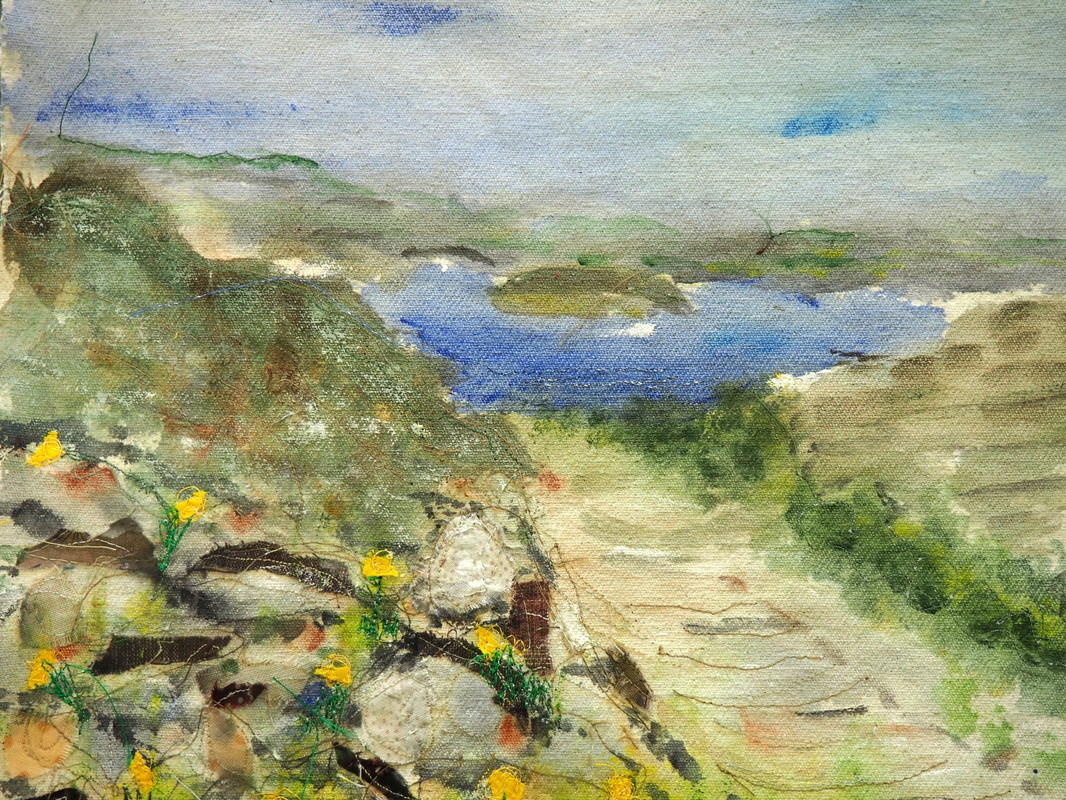
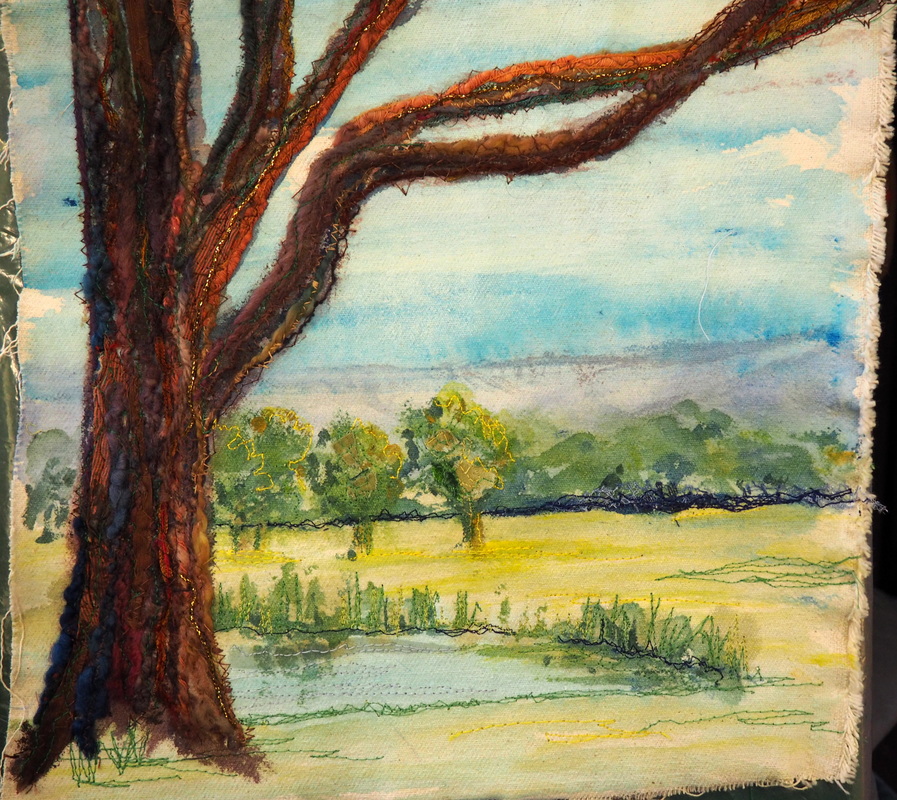
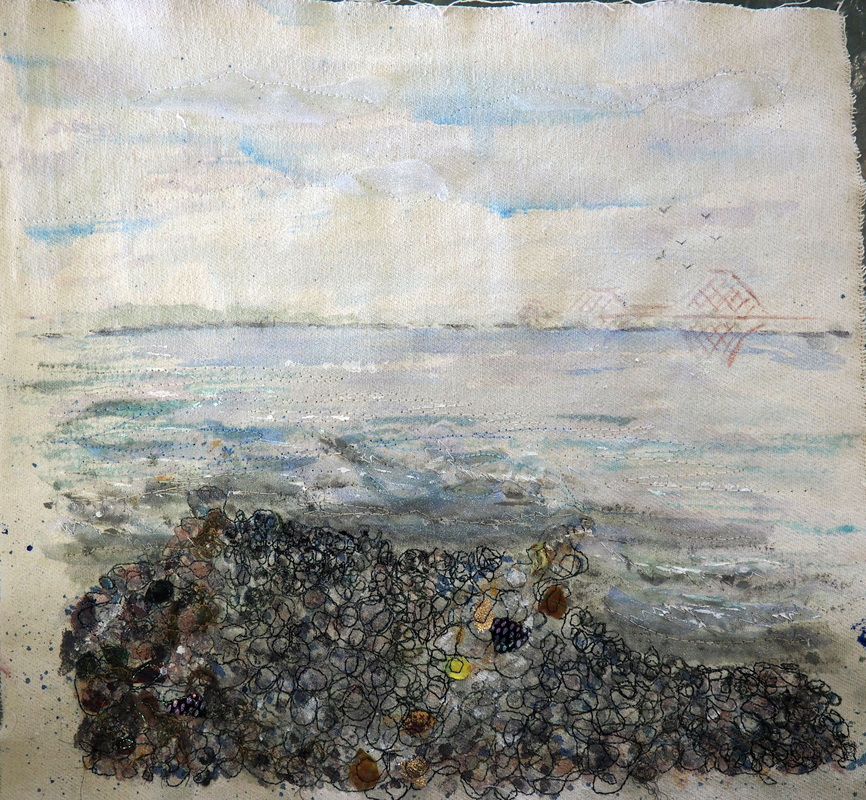
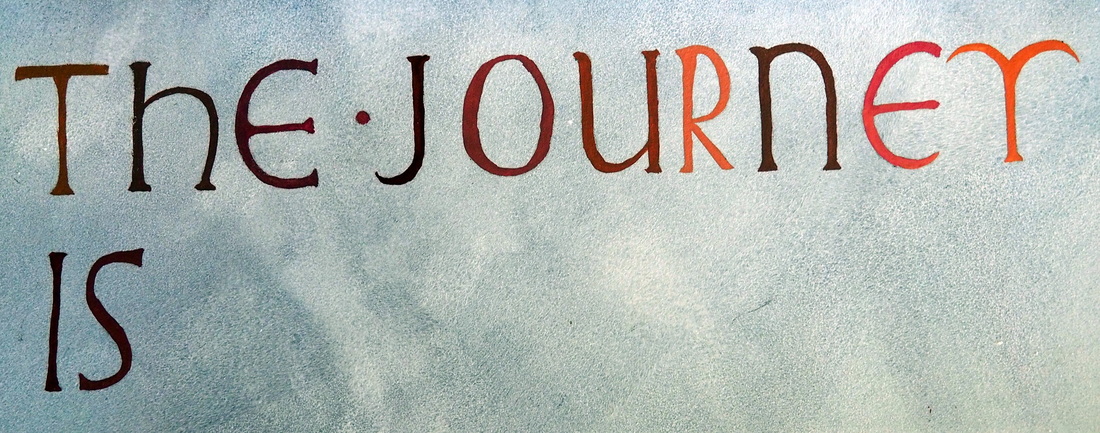
If you follow InStitches on either Instagram or Facebook you will have seen a recent post about my 10 year old niece Isla.  Along with many of the world's children, Isla and her two sisters are in lockdown.  So, no school, no meeting up and playing with friends, no visiting their beloved grandparents, Auntie (me!!) or cousins.  ​
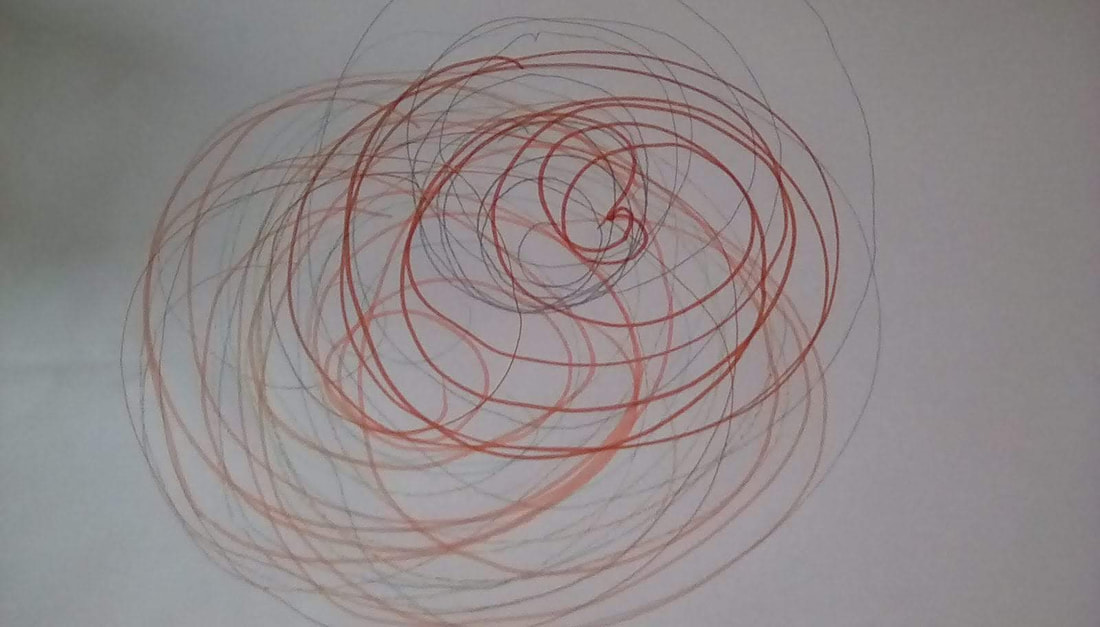
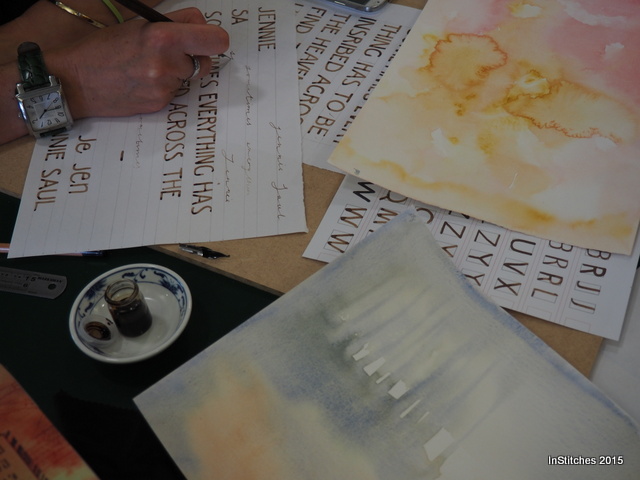
I often forward her the Terry's paper blogs and she in turn WhatsApp's her creations back.  Here's what she said about this week's one on spirals:

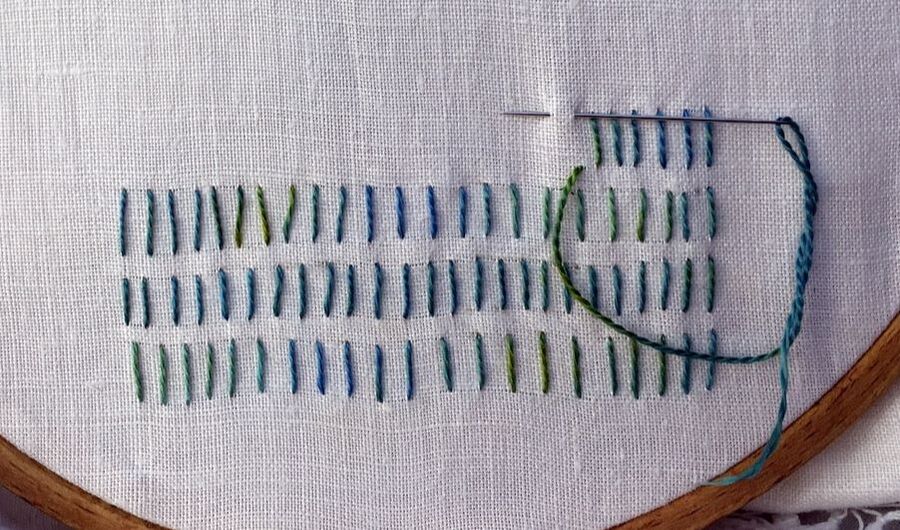
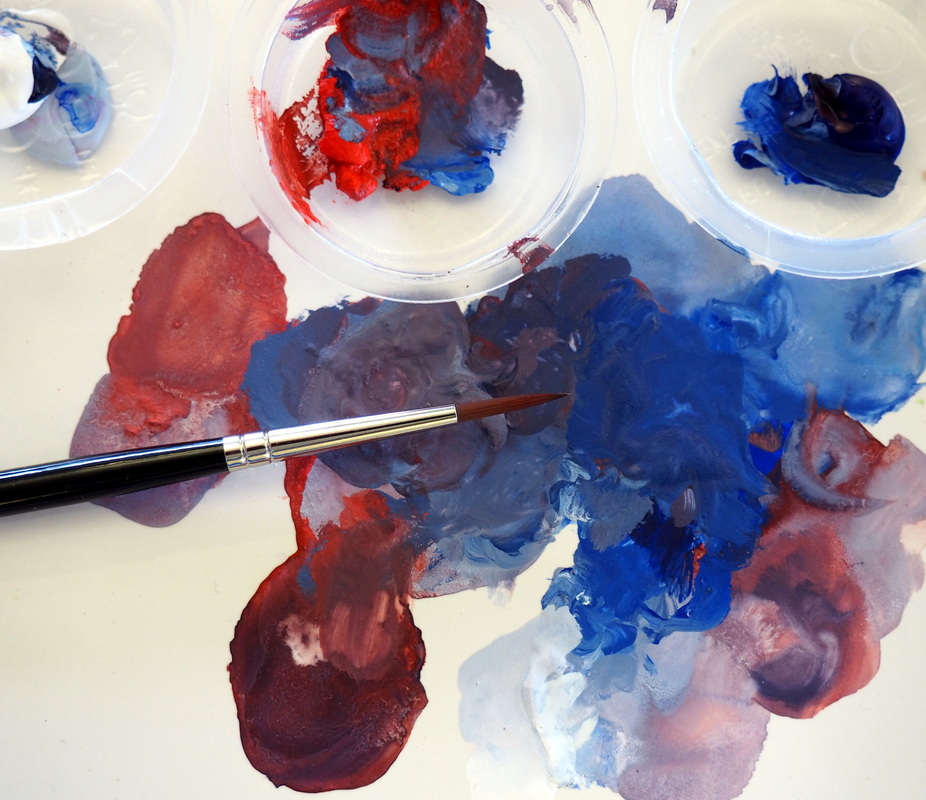
I did one of the exercises on your website, but I did it with my eyes closed and listening to music!  Thank you so much, it really relaxed and calmed me!  I picked random colours, and it actually turned out alright!

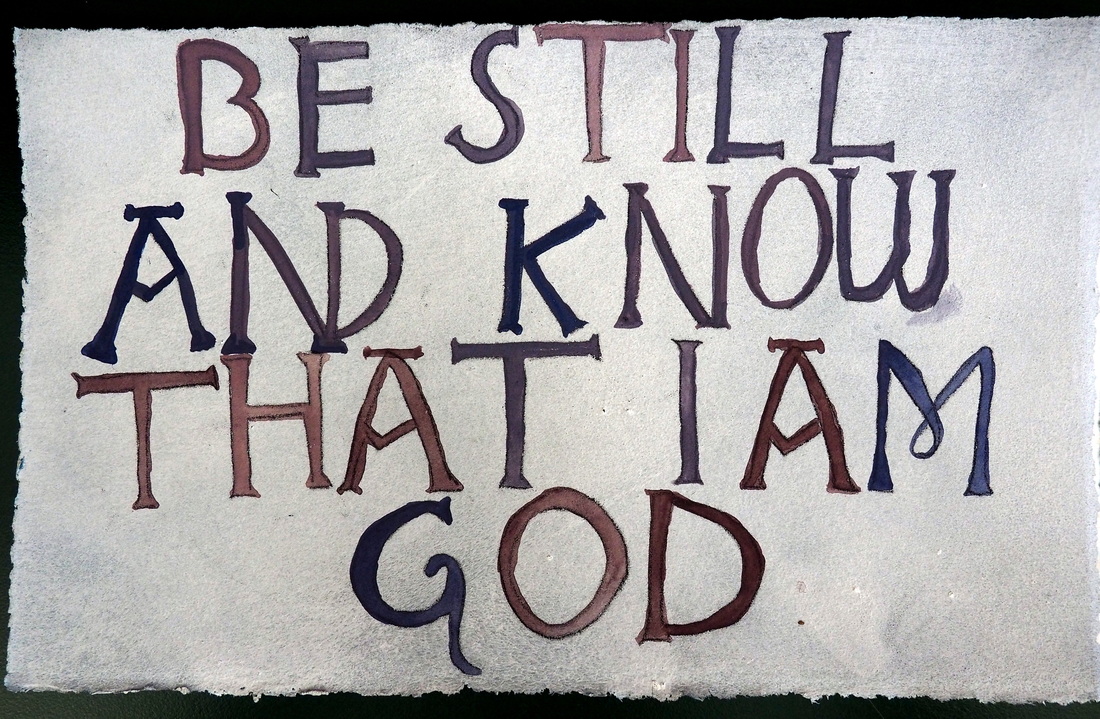
Children are resilient and adaptable but looking after their mental health is just as important as looking after ours.   We hope over the last 6 weeks we have managed to bring a spark of creative joy and that you have been able to take a moment to stop, slow down and make time to appreciate the smaller pleasures in life.  

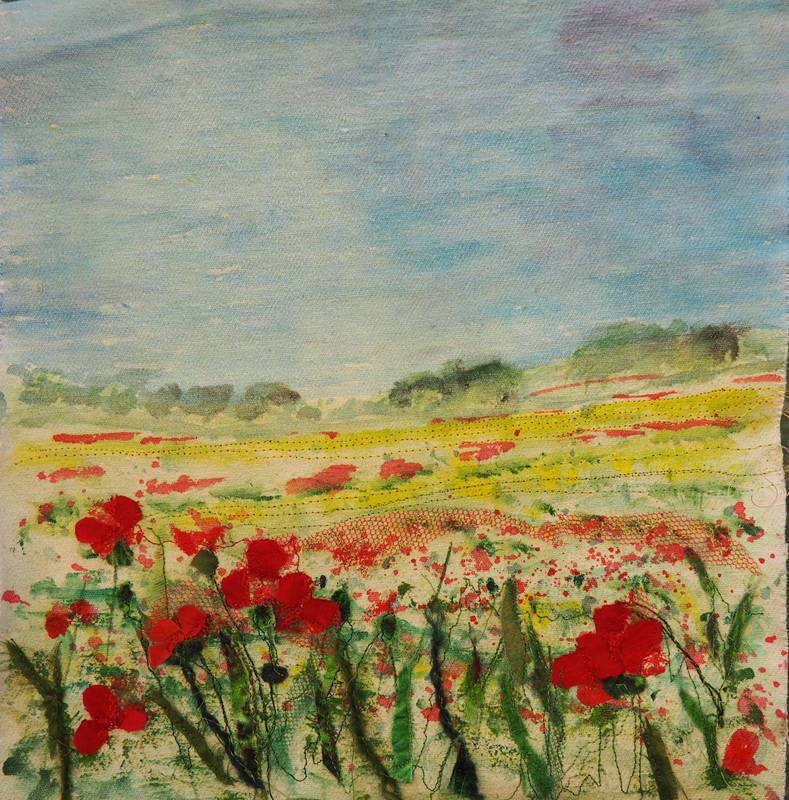
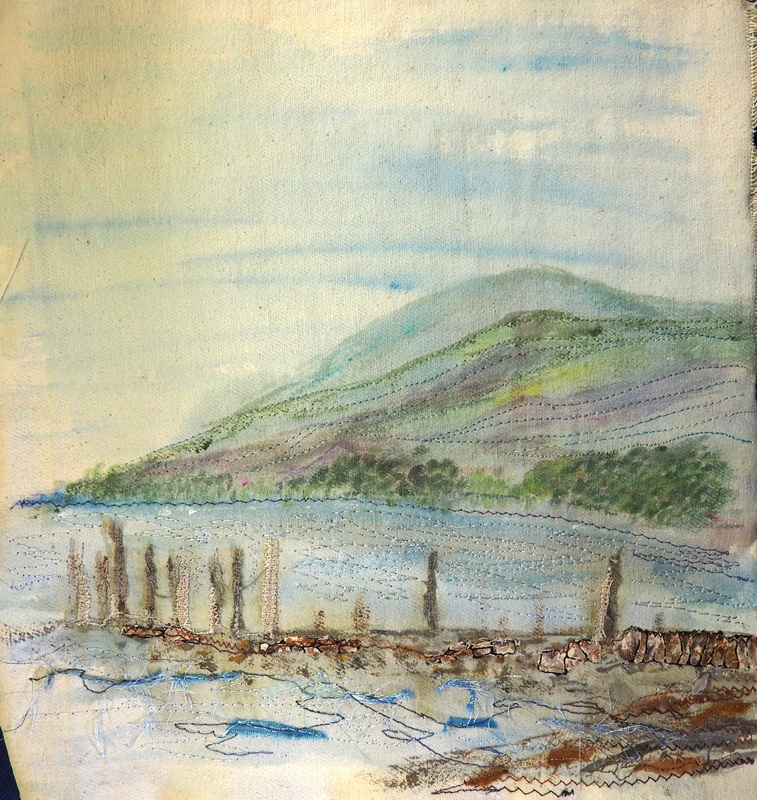
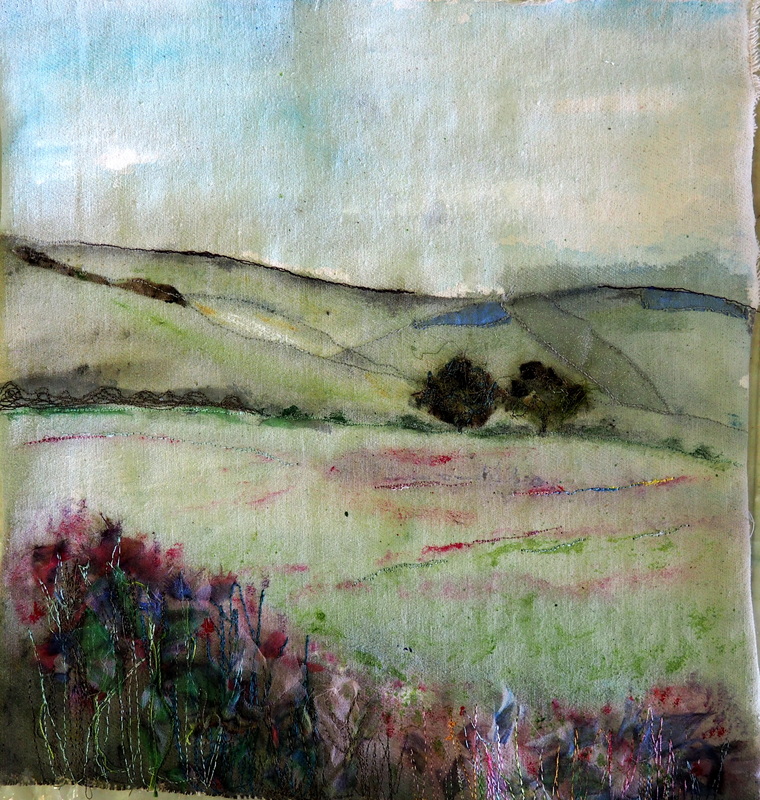
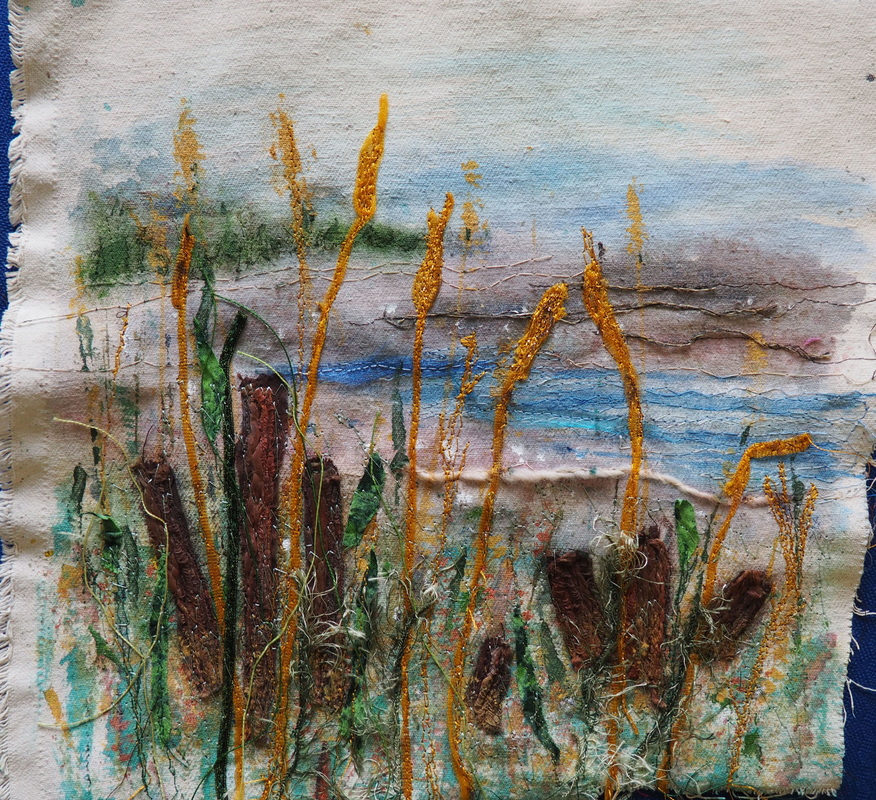
​So, settle down, pull out your stitching basket, pick up your needle and thread and come fly away with me...

Read More
2 Comments

#institchescreative2020 - stacked up and a little cross?

10/4/2020

0 Comments

 
This week we are carrying on working with a straight stitch.

Still? I hear you say,

Oh yes, I reply, keep reading!

​We are going to stack it, curve it, mix it up and generally become playful with it...have you realised yet how versatile this simplest of stitches can be?
Picture

Read More
0 Comments

and there was cake: coconut macaroons

8/3/2019

1 Comment

 
It has been a very busy week in the studio as we welcomed back the inspirational textile artist Debbie Lyddon for a two day stitched collage workshop.  If you've ever been on one of our Textile Adventures you'll know that as well as providing most of the materials we like to feed you too!  Morning coffee with homemade biscuits is ready to welcome you as you arrive in the studio and  one of our favourite recipes is  chocolate macaroons.
Picture
Anything which has coconut in it is sure to be a winner with Terry and I, but what makes this recipe really great is that I can adapt it to suit both gluten free and lactose free diets.
Picture
When baking gluten free recipes I have recently been using this flour from Cloud 9, which can be substituted weight for weight for regular flour in recipes.  I buy mine from the Costco here in the UK, but I'm sure if you search online you will be able to find it or similar.
Picture
Picture
The recipe I use is one I have adapted slightly from Sarah Leahey-Benjamin's The New Baker in The Telegraph:

MAKES
26 to 30 cookies
INGREDIENTS
4 large egg whites (I use pasteurised dried egg whites )
250g (9oz) granulated sugar
1 tbsp mild honey
210g (7½oz) unsweetened desiccated coconut
4 tbsp flour (substitute with gluten free if requitred)
½ tsp vanilla extract
½ tsp salt
200g (7oz) dark chocolate (minimum 70 per cent cocoa solids)

METHOD
  1. In a large frying-pan mix together the egg whites, sugar, honey, coconut and flour with ½ tsp salt.
  2. Place the frying-pan over a medium heat. Stir slowly but constantly to dissolve the sugar. Keep an eye on the bottom of the pan – when the mixture starts to stick remove the pan from the heat. Transfer to a bowl and stir in the vanilla extract. At this point the mixture can be left chilled, in an airtight container, for up to a week.
  3. Preheat the oven to 180°C/350°F/gas mark 4. Line a baking-tray with baking-parchment.  Damp your hands with water. Scoop a spoon of the coconut mixture into your hands and form into a ball.
  4. Place the macaroon on the baking-parchment and flatten with your hand slightly.
  5. Bake for 18 to 20 minutes. The macaroons should take on a fairly uniform golden colour all around. Remove from the oven and allow to cool for a couple of minutes on the tray before lifting them on to a wire rack to cool completely.
  6. Gently melt the chocolate in the microwave or over a bowl of warm water, then dip in the base of each macaroon, place on baking parchment and leave to set.
To make the macaroons suitable for a lactose free diet simply miss off the chocolate or use a dairy free chocolate such as the type made by Double Spiral Chocolate.

Perfect to accompany any freshly brewed pot of tea or coffee!

Hazel & Terry
1 Comment

and there was cake...

21/9/2018

0 Comments

 
The little Victoria plum tree at the bottom of the garden has given me a bumper crop of fruit this year.  
Picture
Planted about 10 years ago, to provide fruit to make my husband's favourite jam, it has had a mixed track record and quite frankly I was beginning to think its days were numbered!  
Picture
  But as you can see, Mother Nature came out trumps this year!

When you grow your own fruit and vegetables it's lovely to be able to share; although I think my neighbours still haven't recovered from the glut-to-end-all-gluts of courgettes a couple of years back...  So I've given lots of the plums away and frozen, poached, baked and crumbled many more, but there are still some left.  

This weekend we are taking part in the Wokingham Arts Trail.  
Picture
In the InStitches Studio we are hosting artists David Cotton and Nina O'Connell and jeweller Machi De Waard as well as showcasing our own work and the InStitches courses and workshops. 
Picture
 We will also be offering tea, coffee and (of course!) homemade cakes, with donations going to Macmillan:  an excellent opportunity to convert the excess plums into baked goods!  ​
Picture
 In the end I made 4 huge sticky plum Bakewell tarts using a 2013 recipe from Waitrose, with the addition of a generous layer of homemade plum jam on the bottom of the pastry case before I topped it with the almond sponge and dropped in the stoned plum halves.  To save you Googling to find it, here's my adapted recipe:

Sticky plum Bakewell tart
Serves: 12
Ingredients
250g shortcrust pastry
150g butter, at room temperature
150g golden caster sugar
3  Eggs
75g ground almonds
75g  Self-Raising Flour
½ tsp baking powder
1 tsp vanilla extract
2 tbsp (homemade) plum jam (optional)
400g  Ripe plums, stoned and quartered
2 tbsp flaked almonds
 
Method
1. Preheat the oven to 180ºC, gas mark 4. Roll out the pastry thinly on a floured surface and use to line a 23cm deep, loose-bottomed tart tin. Chill for 5 minutes. If using, spread the base with the plum jam. 
2. Meanwhile, place the butter, sugar, eggs, ground almonds, flour, baking powder and vanilla extract in a large bowl and whisk until well blended.
3.Spoon the filling into the tart case then press the plums evenly into the mixture (they will sink into the centre as the tart bakes). Scatter over the flaked almonds and bake for 40 –45 minutes until risen and golden brown.
4. Leave to cool. Cut into slices and serve.

I think I was a bit generous with filling the pastry cases so a couple of mine overflowed slightly, but that just provided a cook's treat for me to nibble with a cup of coffee - happy days!

The weather forecast doesn't look too brilliant for this weekend, but if you are free and fancy a day out why not pop in and see us at Venue 10?  All the venues on the trail are open 10.30 - 5.30 each day, and if you do manage to visit all 11 over the weekend be sure to have your trail card stamped each time to be in with a chance of winning one of 5 bundles of prizes donated by WAT artists.

Picture
Hope to see some of you this weekend,

Hazel & Terry
0 Comments

and there was cake...

23/3/2018

0 Comments

 
If you have been on an InStitches Textile Adventure you'll know that the day isn't complete without a tasty treat or two!  One of the most requested recipes is for the apricot and ginger flapjack, so by popular demand  here it is again!
Picture
Apricot & ginger flapjack

12 oz butter
10 oz soft brown sugar
8 oz golden syrup
1lb rolled oats
1 level tbsp ground ginger
A couple of handfuls of chopped soft apricots
A handful of chopped pecans (optional)
​
  1. Melt butter, sugar and golden syrup in a large pan.
  2. Stir in chopped apricots and pecans , if using.
  3. Stir in rolled oats and ginger.
  4. Pour into a greased and lined tin, 9 inch sq and flatten with the back of a spoon.
  5. Bake 30 - 35 minuites at 180°C/ gas mark 5
These Yorkshire oaty biscuits are quick and easy to make, but don’t expect them to last long in the biscuit tin.

Picture
Yorkshire oaty biscuits

3oz butter
1 tbsp golden syrup
3 oz plain flour
1/2 tsp bicarbonate of soda
3 oz caster sugar
3 oz rolled oats

  1. Melt butter and golden syrup in a large pan.
  2. Then stir in the rest of the ingredients.  Mix well.
  3. Drop dessert spoonfuls onto a baking tray lined with baking parchment.  Squash gently with the back of the spoon.
  4. Bake at 180 C for 8 - 10 minutes until golden.  
  5. Allow to cool a couple of minutes on the tray before transferring to cooling rack.
Why not try adding?
  •  a handful of desiccated coconut
  • a few chopped cherries
  • Some chocolate chips
  • Raisins!
Hope you enjoy them! 

Hazel & Terry
0 Comments

Spicy Squash Soup

19/10/2015

0 Comments


and there was cake...

Of course, sewing at this level makes you hungry so there was plenty of cake and a bowl of tasty homemade spicy pumpkin soup for lunch.  Hazel grows the squash on her allotment and this year they have become HUGE, so there will be plenty of soup for our workshops this year!
Picture

Spicy Squash Soup

1 heaped teaspoon coriander seeds
 1 heaped teaspoon cumin seeds
 6 whole cardamom pods (seeds only)
 1½ oz (40 g) butter
 1 tablespoon groundnut oil
 2 cloves garlic, chopped
 1 heaped teaspoon turmeric


1 heaped teaspoon ground ginger
1 pumpkin, weighing 3-31/2 lb (1.35-1.6 kg)
 1 tablespoon groundnut oil
 1 large onion, peeled and finely chopped
 11/2 pints (850 ml) stock, vegetable or chicken
 15 fl oz (425 ml) whole milk
  salt and freshly milled black
 

Begin by heating a small frying pan and dry roasting the coriander, cumin and cardamom seeds – this is to toast them and draw out their flavour. After 2-3 minutes they will change colour and start to jump in the pan. Remove them from the pan and crush them finely with a pestle and mortar.
 
Cut the pumpkin in half through the stalk, then cut each half into 4 again and scoop out the seeds using a large spoon. Then brush the surface of each section with the oil and place them on the baking sheet.

Season with salt and pepper, and then pop them on a high shelf of the oven, gas mark 9, 475 F (240 C) to roast for 25-30 minutes or until tender when tested with a skewer.
Meanwhile melt the butter in a large saucepan over a high heat, add the onion, stir it round and when it begins to colour round the edges, after about 5 minutes, turn the heat down. Let it cook very gently without a lid, giving it a stir from time to time, for about 20 minutes.

Then remove the pumpkin from the oven and leave it aside to cool.
Now add the stock and the milk to the onions, and leave them with the heat turned low to slowly come up to simmering point. Next scoop out the flesh of the pumpkin with a sharp knife and add it to the stock together with a seasoning of salt, pepper and nutmeg. Then let it all simmer very gently for about 15-20 minutes. Next the soup should be processed to a puree.

Because there's a large volume of soup, it's best to do this in two halves. What you need to do is whiz it until it's smoothly blended, but as an extra precaution it's best to pass it through a sieve as well in case there are any unblended fibrous bits.

Taste and season well, then when you're ready to serve the soup, re-heat it gently just up to simmering point, being careful not to let it boil.  We like to serve our soup with a swirl ofcrème fraiche and cubes of creamy feta cheese.

This recipe is a combination of two from Delia's winter collection

0 Comments

and here are the recipes...

12/10/2015

0 Comments


Devonshire Scones

  • 450g (1 lb) self-raising flour
  • 2 rounded teaspoons baking powder
  • 75g (3 oz) butter, at room temperature
  • 50g (2 oz) caster sugar
  • 2 eggs
  • about 225 ml (8 fl oz) milk
Picture
Makes about 20 scones
  1. Lightly grease two baking trays. Pre-heat the oven to 220°C/425°F/Gas 7.
  2. Measure the flour and baking powder into a large bowland then rub in  the butter using your fingertips until the mixture resembles fine breadcrumbs. Stir in the sugar.
  3. Beat the eggs together until blended and make up to a generous 300ml (1/2 pint) with the milk, then put about 2 tablespoons of the egg/milk aside in a cup for glazing the scones later. Gradually add the egg/milk mixture to the dry ingredients until you have a soft dough. It is far better that the scone mixture is on the wet side, sticking to your fingers, as the scones will rise better.
  4. Turn the dough onto a lightly floured surface and flatten it out with your hand, or use a rolling pin, to a thickness of 1-2 cm (1/2 – ¾ inch). Use a 5 cm (2 inch) fluted cutter to stamp out the dough by pushing the cutter straight down into the dough (as opposed to twisting the cutter) then lift it straight out. This ensures that the scones will rise evenly and keep their shape. Gently push the remaining dough together, knead very lightly then re-roll and cut more scones out as before.
  5. Arrange the scones on the prepared baking trays and brush the tops with the reserved beaten egg/milk mixture to glaze. Bake for about 10-15 minutes or until the scones are well risen and golden. Cool on a wire rack, covered with a clean tea towel to keep them moist. Serve as fresh as possible, cut in half and spread generously with strawberry jam and top with a good spoonful of thick cream.
This is a tried and tested recipe from the every delightful Mary Berry.

Raspberry muffins

Picture
  • 2 cups self raising flour
  • 3/4 cup firmly packed brown sugar
  • 1 cup fresh or frozen raspberries (or blueberries)
  • 1 egg, beaten
  • 3/4 cup buttermilk
  • 1/2 cup vegetable oil

  1. Sift dry ingredients into a large bowl and then stir in remaining ingredients.
  2. Spoon mixture into 12 large muffin cases or 48 mini muffin cases (we had the mini ones!)
  3. Bake for 18-20 minutes at 200c or Gas mark 5
A recipe often made by our lovely friend Anne!

Banana Bread

Picture
350g caster sugar
110g soft unsalted butter,
2 large eggs, at room temperature
225g plain flour
1/4 teaspoonbaking powder
1/2 teaspoonbicarbonate of soda
3 large over-ripe bananas, peeled and flesh mashed
1 teaspoonvanilla extract
75g chopped pecans (optional)

  1. Preheat the oven to 180°c. Lightly grease and line the tin with greaseproof paper.
  2. Beat the sugar and butter for 3–4 minutes until soft and fluffy. Add the eggs one at a time, beating continuously. Sift the flour, baking powder and bicarbonate of soda into the mixture and fold in. Now stir in the mashed bananas and vanilla extract. Add the pecans, if using.
  3. Pour the mixture into the prepared loaf tin and bake in the oven for 1 hour 15 minutes. Check if it’s ready by inserting a skewer into the centre of the bread – if it does not come out clean, return it to the oven for another 10 minutes.
  4. Let the banana bread cool completely before turning it out of the tin. Serve sliced, toasted with butter and enjoy for breakfast, lunch or dinner!
This amazing recipe for banana bread comes from the Three Sisters Bake cook book

0 Comments

Mixing it up

9/10/2015

0 Comments

 
Hot on the heels of Lin Kerr's workshops, this week we had the pleasure of a two-day workshop with Arleen Wild. For those of you who aren't familiar with her work, Arleen is a mixed media artist, and her work is an energetic mix of painting, free motion stitch and fabric.  She produces stunning landscapes, seascapes and flowers some of which are huge! You can see more of her work on her website.
Arleen is a very generous tutor, with a wealth of knowledge and tips about the media and processes she uses. We started by priming the canvas and while it was drying Arleen helped everyone select a suitable image or elements from several images as a jumping off point. The idea was to produce a unique piece of artwork, and not a slavish copy of the photograph.  Next we added a subtle wash of paint to form the background. Hers is a very loose style and I think one of the things that most people took away was the message that less is most definitely more! The tiniest amount of paint, or fabric and thread used in a painterly way, can really lift a piece. The day was all about layering materials to achieve the desired effect and give the work energy and focus. A dab of paint here, a couched thread there, then perhaps a tiny piece of fabric, caught down on one edge only, all the time paying attention to composition, and definitely no straight lines!
Don't you agree that all the work looks amazing? Some aren't quite finished yet but all are well on the way.

and there was cake . . .

You will have spotted that there are scones and home-made jam with clotted cream in the picture. Well we couldn't let all these lovely people work so hard without some kind of reward, so over the two days there were raspberry muffins, banana and pecan loaf and chocolate oat biscuits and the aforementioned scones. Recipes will follow!
Picture
If you have been inspired by the work shown, and fancy a creative day out with friends (and cake!) why not check out our Textile Adventures workshops.  There are three left this year and we will soon be adding next year's programme.

That's all for now - thanks for reading! ​

Hazel & Terry
0 Comments

Time flies...

7/10/2015

0 Comments

 
Just where does time go to?  If you know, please drop me an email letting me know!  We are so busy here at InStitches that keeping up with our blog seems to drop to the bottom of the list.  But I just wanted to show you the work from another creative  workshop with calligrapher, Lin Kerr.  Two days this time, exploring the work of David Jones.
Picture
With examples of David Jones' texts as inspiration we first drafted our own texts before transfering them to prepared paper.  Lin has painted these beforehand using gesso and acrylic paints to give the impression of an old distressed wall.
So many letter choices for some!
Then it was time to paint in the letters.  Using a limited colour palette suggested by Lin we never the less were able to create an array of schemes!

and there was cake...

Of course there was cake, how could you think there wouldn't be! 
Picture
Today it was a chocolate and sweet potato loaf cake from a Waitrose recipe card.  you can find the recipe and 'how to' video here: https://www.waitrose.com/content/waitrose/en/home/recipes/recipe_directory/c/chocolate-sweet-potatoloafcake.html
0 Comments

Alphabet Soup

17/9/2015

4 Comments

 
Both Terry and I love text: in books, on quilts, in letters, as fonts, in stitch and as marks made by pen and brush.  So we were delighted to welcome artist and calligrapher Lin Kerr to run a Guest Tutor workshop for InStitches the other week.  
Picture
This was no ordinary calligraphy class though because after a brief introduction to letter shapes and forms Lin had us busy learning how to use a round tipped Brause ornamental nib.   We then prepared a piece of watercolour paper with a watercolour wash background before setting out our chosen text and committing nib to paper!
Unfortunatly I didn't take a note of who did what...but I think we all really well especially as none of us had used this nib before.
Picture
Picture
But here's Becs with her cycling inspired quote!
Picture
Lin will be back with us later this week when we shall be exploring writing in the style of David Jones, can't wait!  If you would like to see more of Lin's work then visit her web site:  www.linkerrdesign.co.uk

and there was cake...

We do like homemade cake and the one served on this workshop was a new recipe - to help use up the glut of beetroot from Hazel's allotment!  Apologies for the lack of photograph, I wasn't quick enough and there were few crumbs left!

This recipe is from Hugh Fearnley-Whittingstalls book Veg every day!  The original recipe was for a pumkin and raisin loaf but he suggested using beetroot instead – it gives the most amazing purple/pink colour!  The loaf itself is rich and sweet but also light as it doesn’t contain any butter or oil.

Beetroot & raisin tea loaf

Preparation time: 30 mins
Cooking time: 1 hour

Ingredients
200g light muscovado sugar
4 large eggs, separated
200g finely grated beetroot
finely grated zest and juice of 1 lemon
100g raisins
100g ground almonds
200g self-raising flour
a pinch of fine sea salt
1 tsp ground cinnamon
A generous grating of nutmeg

Method
Preheat the oven to 170°C/Gas mark 3.  Lightly grease a loaf tin, about 20 x 10 cm, and line with baking parchment.  Using an electric whisk, beat the sugar and egg yolks together for 2-3 minutes until pale and creamy.  Lightly stir in the grated beetroot, lemon zest and juice, raisins and ground almonds.  Sift the flour, salt and spices together over the mixture and then fold them in, using a metal spoon.  In a large clean bowl, beat the egg whites until they hold soft peaks.  Stir in a heaped tablespoon of the egg white into the cake mixture to loosen it a little, then fold in the rest as lightly as you can.  Tip the mixture into the prepared loaf tin and gently level the surface.  Bake for about one hour, or until a skewer inserted into the centre comes out clean.  Leave to cool in the tin for 10 minutes, then transfer to a wire rack to cool completely before slicing.
4 Comments
<<Previous

    Welcome to our blog! Here you'll find out what's been going on, plus plenty of ideas and inspiration and the odd cake recipe!

    Check back often to see what we're up to - it's great to have you along

    Hazel & Terry
    Picture

    Enter your email address:

    Delivered by FeedBurner

    RSS Feed

    Categories

    All
    #10minutedrawingproject
    And There Was Cake!
    Artists To Inspire You
    Blog Changeover
    Bringing Colour To Life
    Colour
    Craft Ptoject
    Creative Play
    Creative Warm Ups
    Creative Warm-ups
    Festival Of Quilts
    Finding Inspiration
    How To...
    Inspired By Cloth
    #institchescreative2020
    Line
    Places To Inspire You
    Quilt Shows
    Take Two Stitches
    Text
    Texture
    The Story Behind The Quilt
    Tools Of The Trade

    InStitches travelblog
    InStitches textiles travel blog
    Picture
    Picture

    Archives

    June 2020
    May 2020
    April 2020
    March 2020
    February 2020
    April 2019
    March 2019
    February 2019
    January 2019
    December 2018
    November 2018
    October 2018
    September 2018
    August 2018
    July 2018
    June 2018
    May 2018
    April 2018
    March 2018
    February 2018
    January 2018
    December 2017
    April 2016
    March 2016
    October 2015
    September 2015
    August 2015
    July 2015
    June 2015
    May 2015
    April 2015
    March 2015
    February 2015
    January 2015
    December 2014
    November 2014
    October 2014
    September 2014
    August 2014
    July 2014
    June 2014
    May 2014
    April 2014
    March 2014
    January 2014
    November 2013
    October 2013

    Visit InStitches's profile on Pinterest.
InStitches: exciting courses for people who love textiles, dyeing, design, stitching and sketchbooks

Connect with us

follow us on Facebook
read our blog
Instagram inspiration
Pinterest pinnings
newsletter signup
follow us on Facebook
read our blog
Instagram inspiration
Pinterest pinnings
newsletter signup

Courses and workshops

Courses and workshops at a glance
Create your own Cloth
Creative Journeys
Guest tutors 2025
​Online workshop


InStitches

About
How to find us

Support

Contact
​
The small print
Privacy policy

Our address

Sunfield Studio,
Unit 12, Sunfield Business Park
New Mill Road
Finchampstead
Wokingham
RG40 4QT
We support
Just a Card logo
Copyright © InStitches 2010-2025
All rights reserved.