It's just started to rain...so may be our next colour will be green!
Best wishes
Hazel & Terry
That it exists is beyond doubt, but is gold actually a colour? Throughout time artist the world over have used gold in their art work, to symbolise extravagance, wealth, riches and excess. 
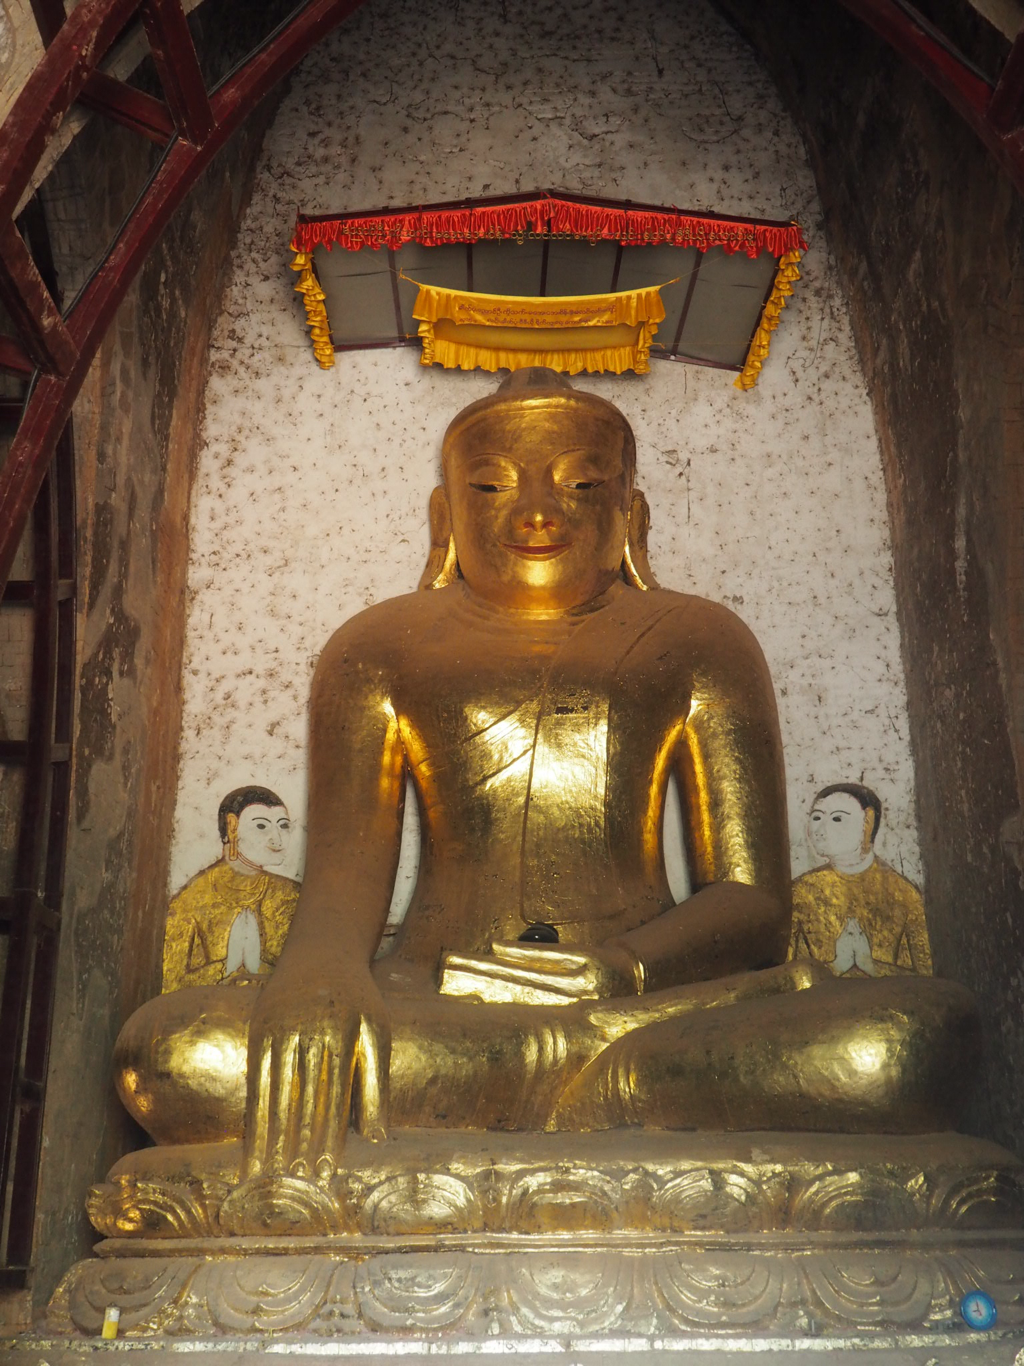
The colour gold is a warm colour that can be either bright and cheerful, like on these Burmese statutes ,or it can be more sombre and traditional; mind you, in this photograph Buddha looks as though he's smiling! In all of these the gold colouring is from the application of gold leaf not an actually pigment paint. Part of the allure of gold is it's colour and as it's a metal it's scarcity and therefore value. Cloth woven with gold threads has been around since Roman times and is often associated with wealth and Royalty - imagine how sumptuous and glittering the meeting of King Henry VIII and Francis I of France would have been in what became known as the Field of the Cloth of Gold in 1520. Henry is reported to have had a marquee made entirely from golden cloth! Gold has also been used to inspire awe and wonder; is seen as the colour of reverence and is often used in religious iconography and on statues. Last year in Myanmar I lost count of the number of golden Buddhas I saw. 
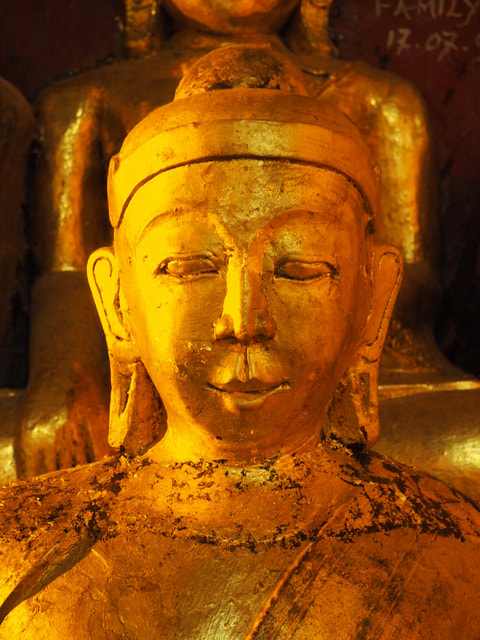
Despite living very economically challenged lives I was amazed as hundreds of people bought small squares of gold leaf to apply to the surface of an already glittering Buddha. 
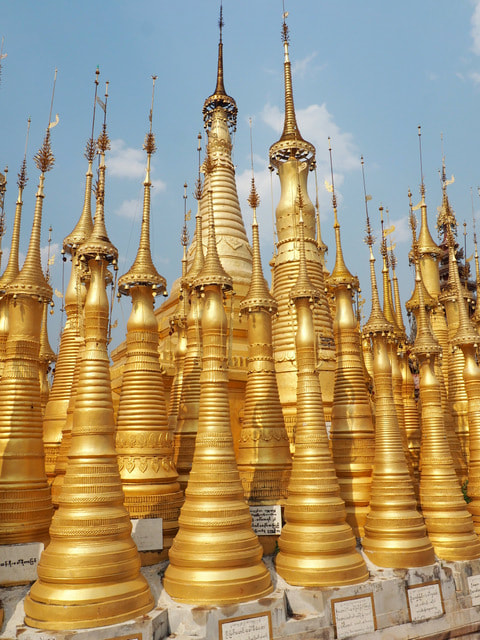
And the sight of so many golden stupas in the harsh mid day sun was enough to burn the image onto the back of your eyes. 
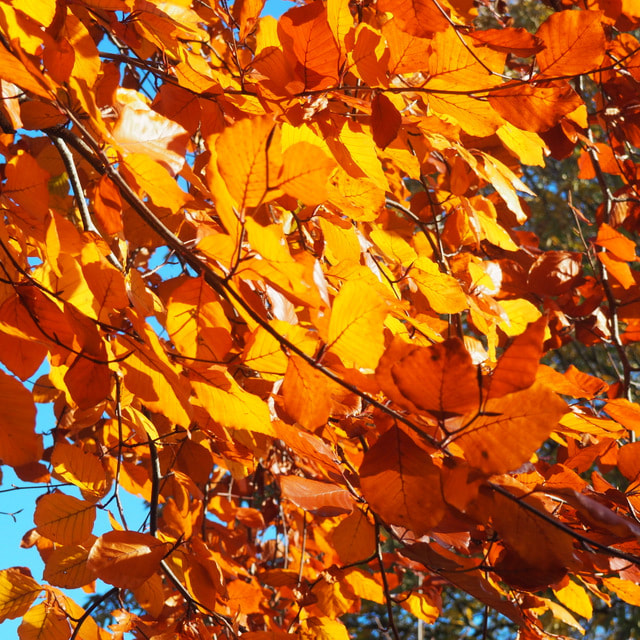
The colour gold is closely associated with yellow and brown. Closer to home, think of the golden canopy of autumnal leaves against the cooling blue autumnal sky or 
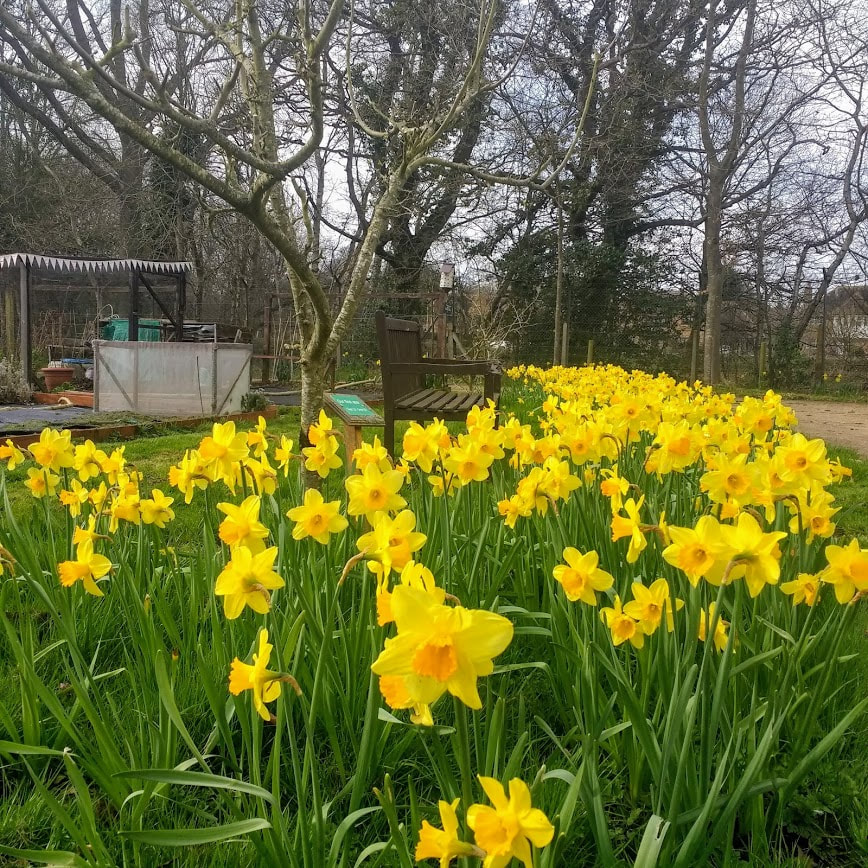
a host of golden daffodils in springtime! 
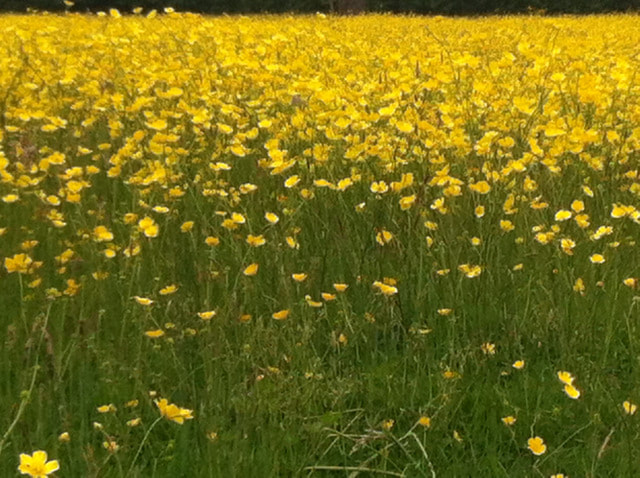
A meadow full of buttercups, nodding their golden heads or as they are just now - golden brown (or more accurately Wheatabix brown, and no, that isn't a Farrell & Ball colour! 
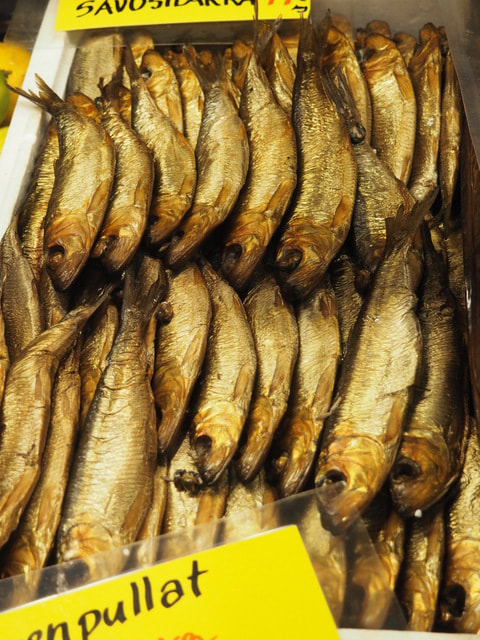
From the golden skins of Finnish smoked fish to 
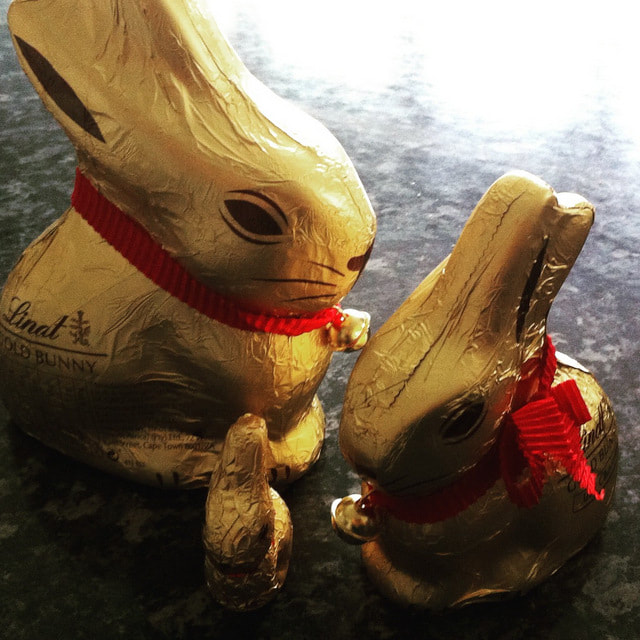
golden Easter bunnies, gold is an enduring choice of colour.
It's just started to rain...so may be our next colour will be green! Best wishes Hazel & Terry
2 Comments
I’ve been good to my promise so far and have been using my tiny traveller’s sketchbook. Each evening, after the day’s cycling is done I set aside 10 minutes to quickly record the days events - what I’ve seen and done. It won’t win any prizes I know, but that isn’t the point. On one side of the concertina I’m making a little sketch of what had happened in the day and on the reverse I’m adding a brief note (mainly copied from the travel itinerary it has to be said!) Mostly I’m doing what I always do when I travel - taking photographs. If you follow us on Instagram (InStitches2013) you will have seen the images, but if not, then here are a few that I’ve been showing. Hand knitted mittens from Lithuania Door furniture in Riga Colour and texture Pattern from the ordinary in Estonia Even the graffiti in Latvia was colourful and creative!
So what ever you are doing over this summer, try and fit in a little creative time - you’re worth it! Best wishes, Hazel Last year when I went travelling I took along a piece of vintage table linen and some stranded black embroidery floss and recorded my adventures in stitch as I cycled through the Mekong Delta and Myanmar. If you follow me (hazel.ryder) or InStitches (InStitches2013) you’ll have seen the pictures. It was a fun way to record my adventure. At first I was a little shy about stitching in public but soon everyone I was travelling with wanted to look and were quick to suggest what to record that day! But for this adventure (I’m cycling through Estonia, Latvia and Lithuania) I didn’t want to stitch so I’m going to give a travel sketchbook a try - after all I’m often suggesting it to our students. I don't have a great track record with travel sketchbooks it has to be said. I take the sketchbook and have high hopes, only to return home with just as many blank pages as when I went! So instead of taking a large, bought sketchbook I thought I’d make my own tiny one! Much less daunting! To make the concertina book I’ve used cartridge paper cut into strips (9.5cm x 53 cm) which I connected with paper hinges. Here’s the kit I’m taking, I don't have room for more. As well as my concertina sketchbook I’ve got a couple of permanent waterproof pigment pens (0.5 & 0.2) and the new travel Derwent Inktense paint set. It comes with a synthetic brush with water reservoir but I’ve e also included my own travel brush too.
So fingers crossed I actually use it. But then, I’ve told you all now of my intention...so how can I not?! Best wishes Hazel I just can’t resist a bit of indigo dyeing (yes, that pun was fully intended ;-) ) and this week there’s been a lot of folding, scrunching and dipping going on here in the InStitches studio. As you can see from the photograph above, I already have quite a collection of indigo fabrics amassed over the years of teaching! And the funny thing is it’s always a beautiful day when we start an indigo vat, which is a good thing because the vats are a bit smelly and besides which it’s always great to do the actual dipping outside. We like to demonstrate several folded resist techniques so I thought I’d share the paper exercise we do as it’s always easier to do these first before going into fabric. To ensure an even grid fold the paper/fabric in half first, unless of course you are working to an exact size. Then keep folding each section in half until the whole page/ fabric is neatly stacked, you may have to reverse a fold to ensure they are folding alternate ways. Whether it’s paper or fabric, make sure you firmly crease the edges and keep all the layers square and true. The dips are called valley folds and the peaks are mountain folds. Several different type of clamps can be used to hold the fabric securely and these will leave white, undyed patterns across the fabric’s surface. Alternativley the pleated strip can be folded, above it has just been folded in half and half again which will create a chequerboard effect. Here we’re using some craft shapes top and bottom to act as a resist, held in place with some huge plastic DIY clamps....and a peg for additional effect! The accordion folded strip can also be concertinaed into right angled triangles, take care to make sure the folds are as sharp as possible so the resulting grid is as regular as can be.... so that will mean getting the iron out, but when you see the results I’m sure you’ll agree it’s worth it. Sometimes we tie the stack bundles and other times we use thin rubber bands. It is possible to create an equilateral triangle grid and the easiest way to do this is to mark the accordion strip with the help of your quilters’ ruler. Then fold and iron sharply! This time we used three laundry pegs to hold the folds in place. The ‘bite’ of the peg will also act as a resist and yes, we’re peg snobs here in the studio... as you’ll know if follow us on Instagram! because this special delivery brought a smile to my face as I know the ‘bite’ will be a lovely little dot! If you want a fan resist then start with a square and make the accordion folds on the diagonal. Just take care to keep the point neat, which I must admit is easier said than done! ![]() The accordion folded strip can also be concertinaed into right angled triangles, take care to make sure the folds are as sharp as possible so the resulting grid is as regular as can be.... And here are some of the fabrics after dipping in the indigo vat, aren’t they wonderful? These folded and clamped resists aren’t just for use with an indigo vat, they’ll work a treat with procion dyes too.
So perhaps you’ll have a go this summer and if you do we’d love to see. If you post to Instagram tag us: @institches2013 or why not drop us a comment below? I often wonder if anyone actually joins us each week and reads the blog! Best wishes Hazel & Terry |
Welcome to our blog! Here you'll find out what's been going on, plus plenty of ideas and inspiration and the odd cake recipe! Check back often to see what we're up to - it's great to have you along Hazel & Terry Categories
All
Archives
June 2020
|
InStitches: exciting courses for people who love textiles, dyeing, design, stitching and sketchbooks
Courses and workshops |
InStitchesSupport |
Copyright © InStitches 2010-2024
All rights reserved. |