InStitches Creative Textile Courses
  • Home
    • Courses and workshops at a glance
    • Contact us
    • Want to stay locally?
    • About us >
      • The story of InStitches
      • How to find us
      • News and events
      • What our students say
      • Gallery
    • The Small Print
    • Privacy policy
  • Bursary
  • Create your own cloth
    • Create your own cloth play days
    • Create your own cloth - with surface design
    • Create your own cloth - in a bucket
    • Create your own cloth - with a screen
    • Create your own cloth - using resists
    • Create your own cloth - Paper lamination
    • Create your own cloth - Exploring Indigo
    • Create your own cloth - Breakdown your palette
    • Create your own cloth - with earth pigments
    • Create your own cloth with Nature's colours
  • Guest tutor workshops
    • Guest tutors 2025 >
      • Leah Higgins - Breakdown your palette
      • Claire Benn - Out of this earth
      • Sam Jones - Nature's colours
      • Richard McVetis - A stitch drawn
      • Polly Pollock - Coiled baskets
      • Karina Thompson - Free motion for the terrified
      • Claire Benn - TEXTure
    • Want to stay locally?
    • Guest tutors 2026 >
      • Kate Findlay - Procreate for textile design
      • Sue Brown - Mixed media sketchbook
      • Leah Higgins - Breakdown your palette
  • Other courses
    • Courses and workshops at a glance
    • Creative Journeys 2025/26
    • InStitches at Home online workshop
  • Shop
    • Workshop Gift Vouchers
    • screens4printing

Creative play: Monoprinting

1/3/2019

0 Comments

 
Before you get excited and think that this is a definitive tutorial on how to monoprint - it isn't!  More of a peek into my tentative journey in the technique.  
Picture
Picture
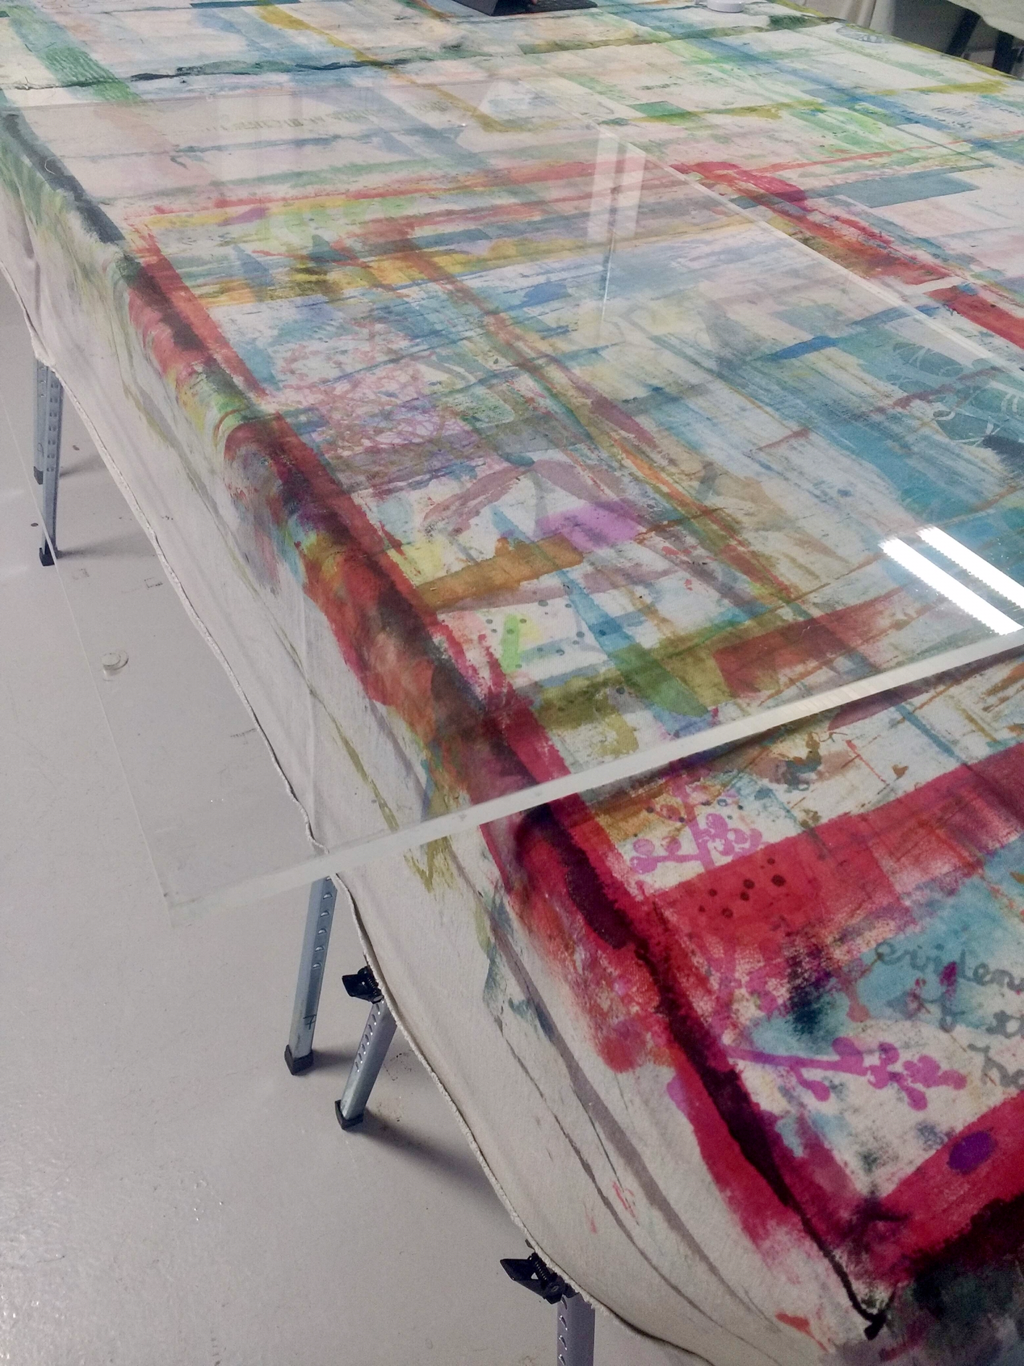
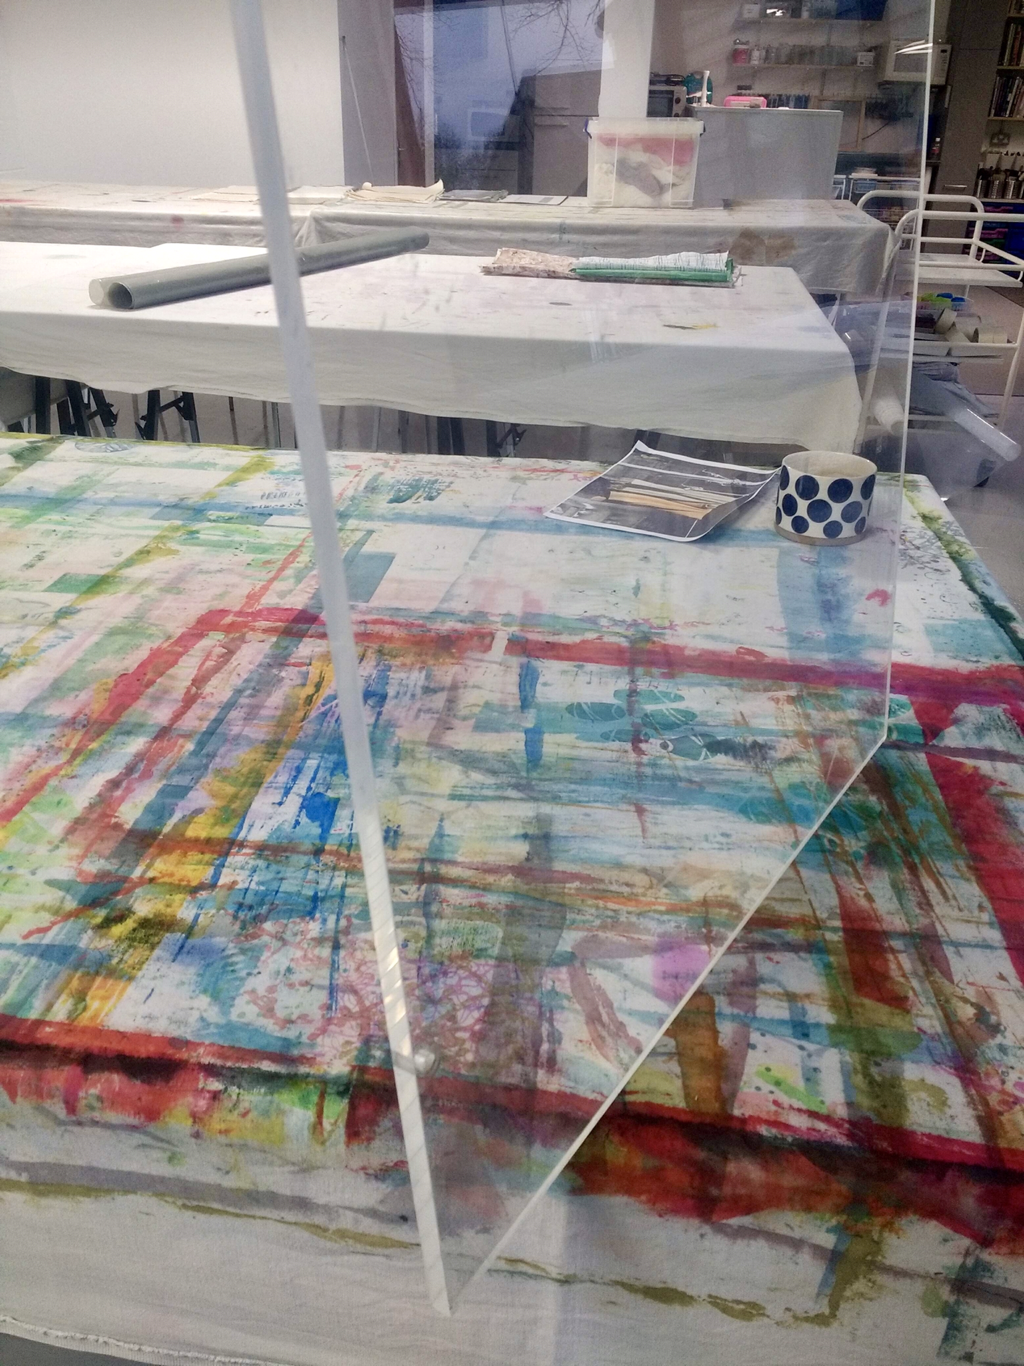
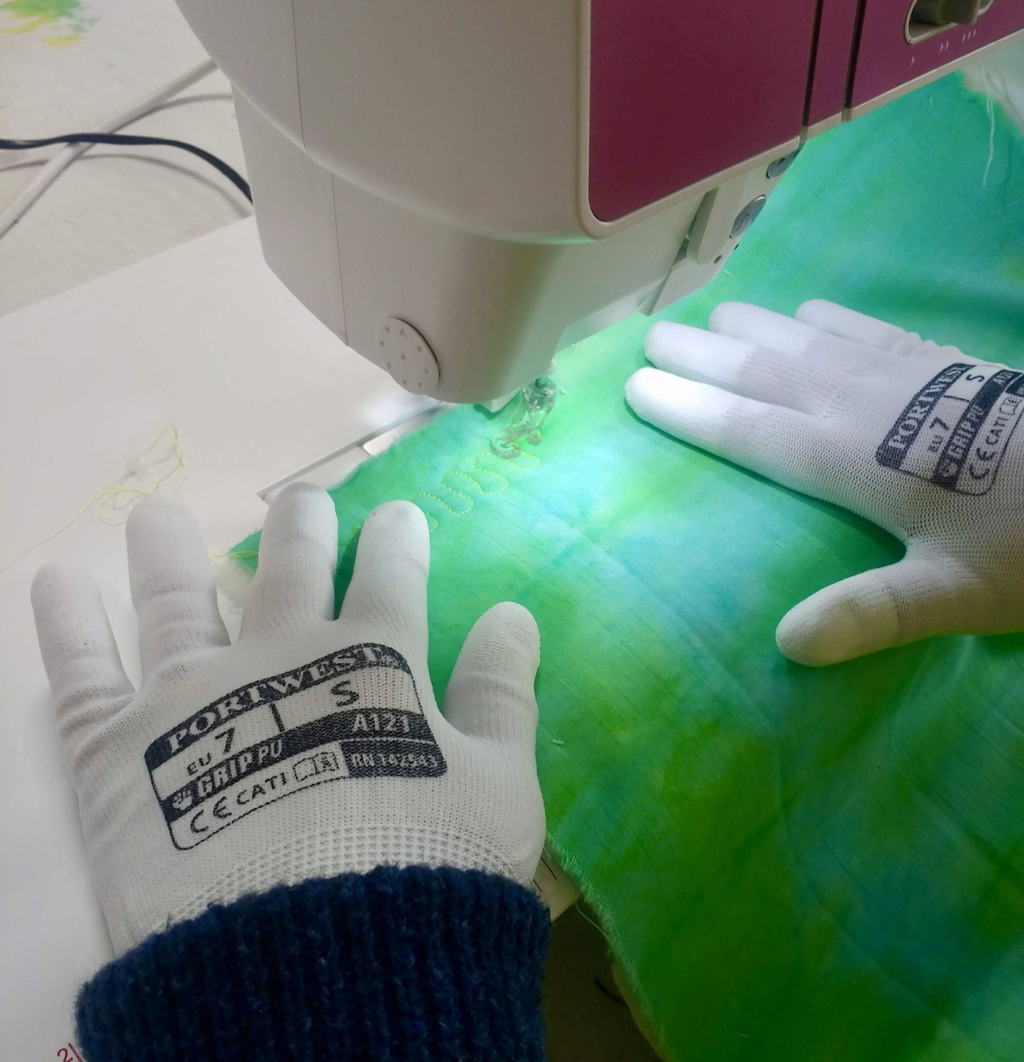
We've acquired* several large thick Perspex sheets and think that they'd be great for Monoprinting, but the only way to be sure would be to actually have a go.  We've dabbled with Monoprinting on and off over the years, mainly using old laminated sheets or small pieces of thin Perspex, and used a safe wash block printing ink form Seawhite,  this is a  great product and is easy to use - but isn't fast once dry, so you can't add further wet processes.
Picture
Picture
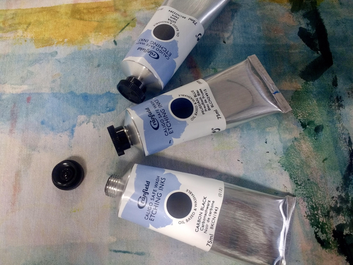
When we moved studio earlier this year one of the (many...) things we found were several tubes of  Caligo safe wash inks from Cranfield. Bought and forgotten (and how many of you have done this too?) However, having recently read an article on the Caligo inks it appears that these inks will become permanent on fabric and paper after a curing process; it was high time I tried them out.
Picture
Picture
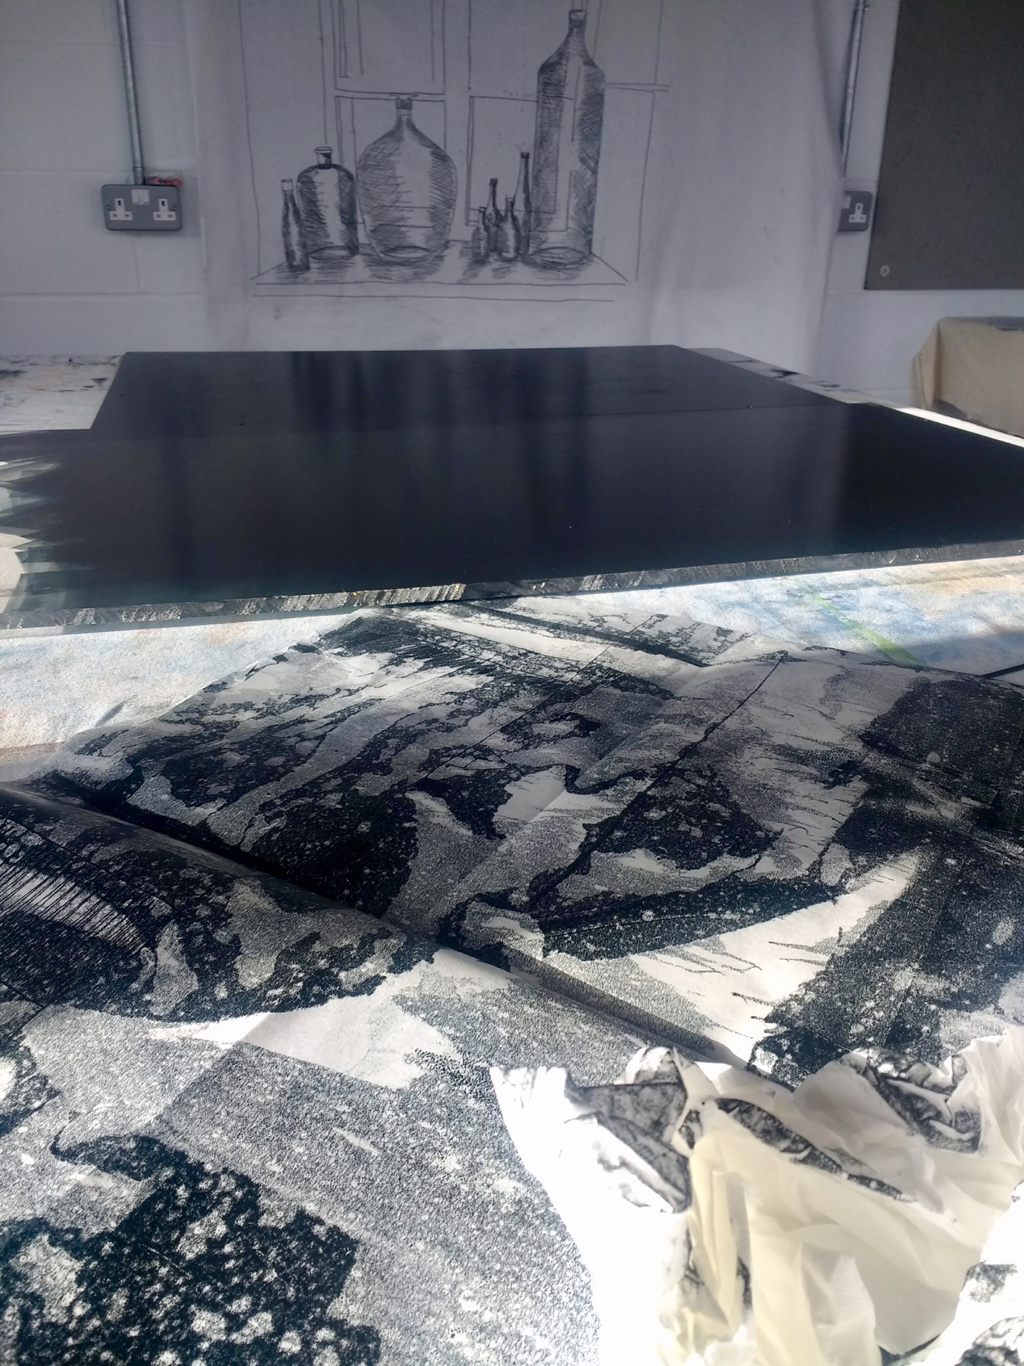
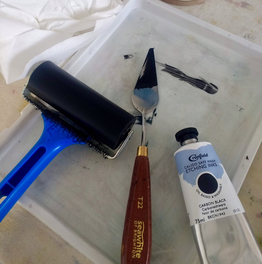
How much ink to put onto the plate is difficult to gauge and only by actually having a go can you really get the feel.  Inking up is also really tricky on such huge plates, it needs to be spread much thinner than you'd imagine, as I found out with my first (paper) tries.  In fact I actually only inked the plate once the whole day (yes - that's how much ink I'd put on!)  and between prints just rerolled with the brayer to smooth the surface again.
Picture
Picture
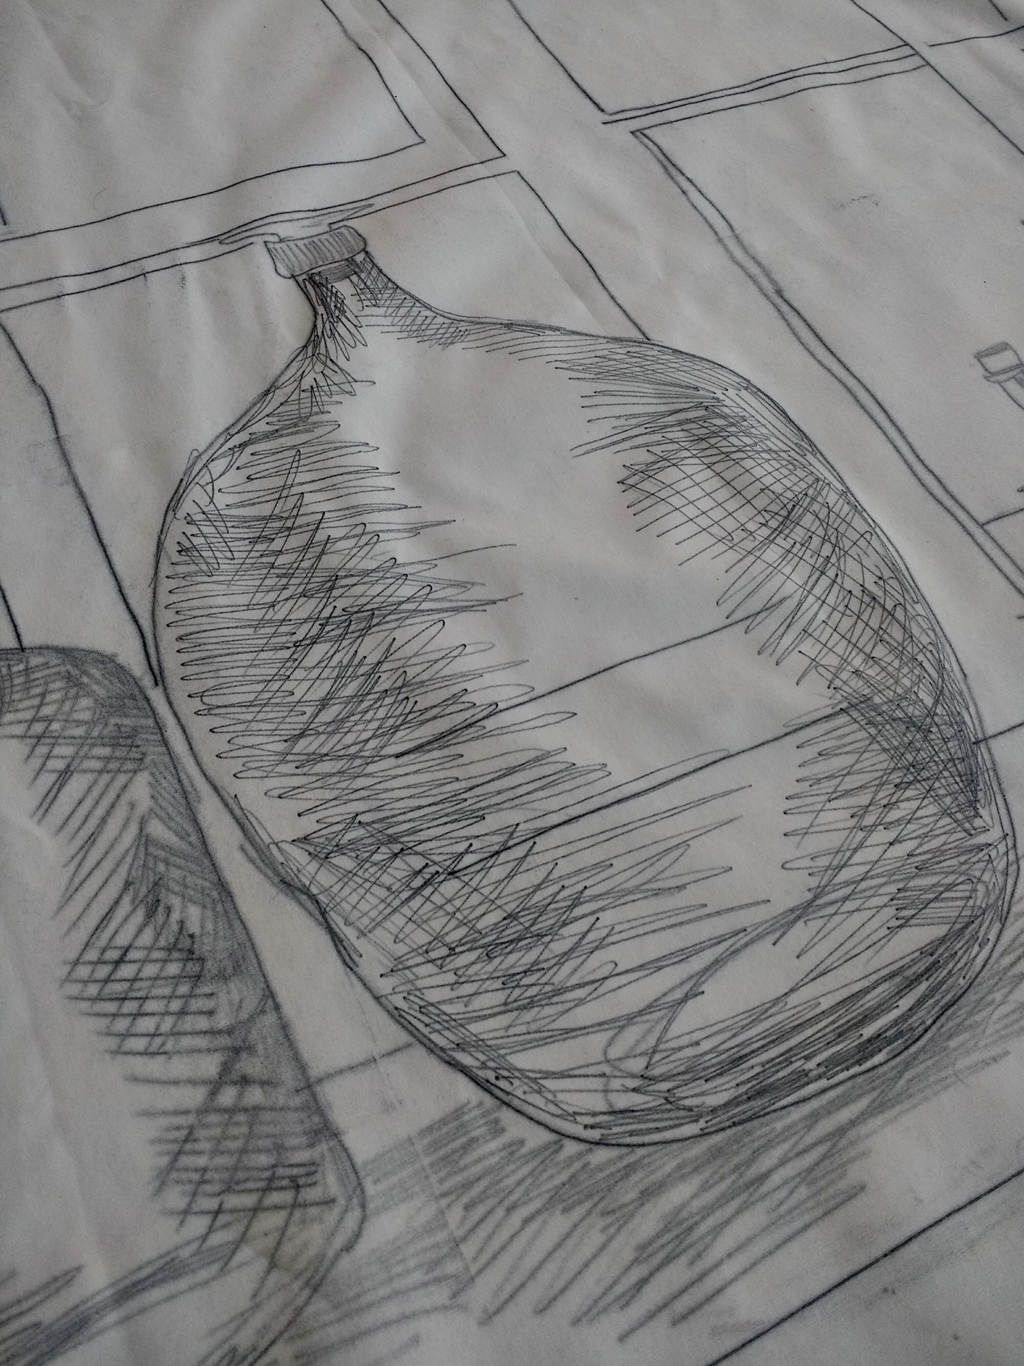
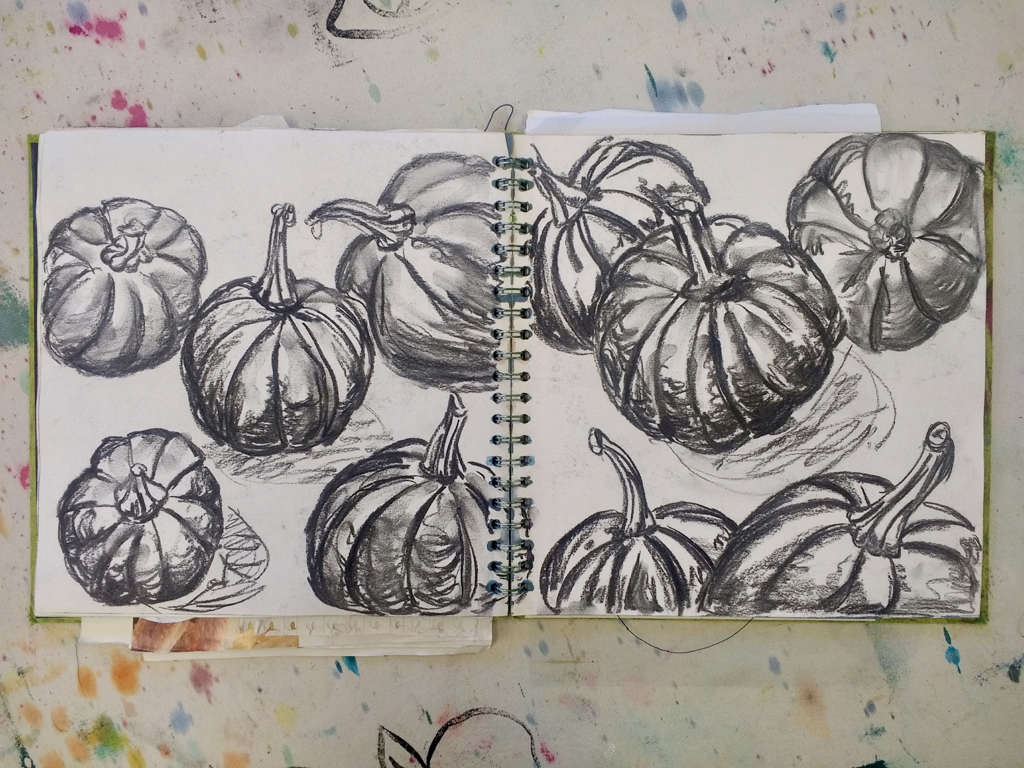
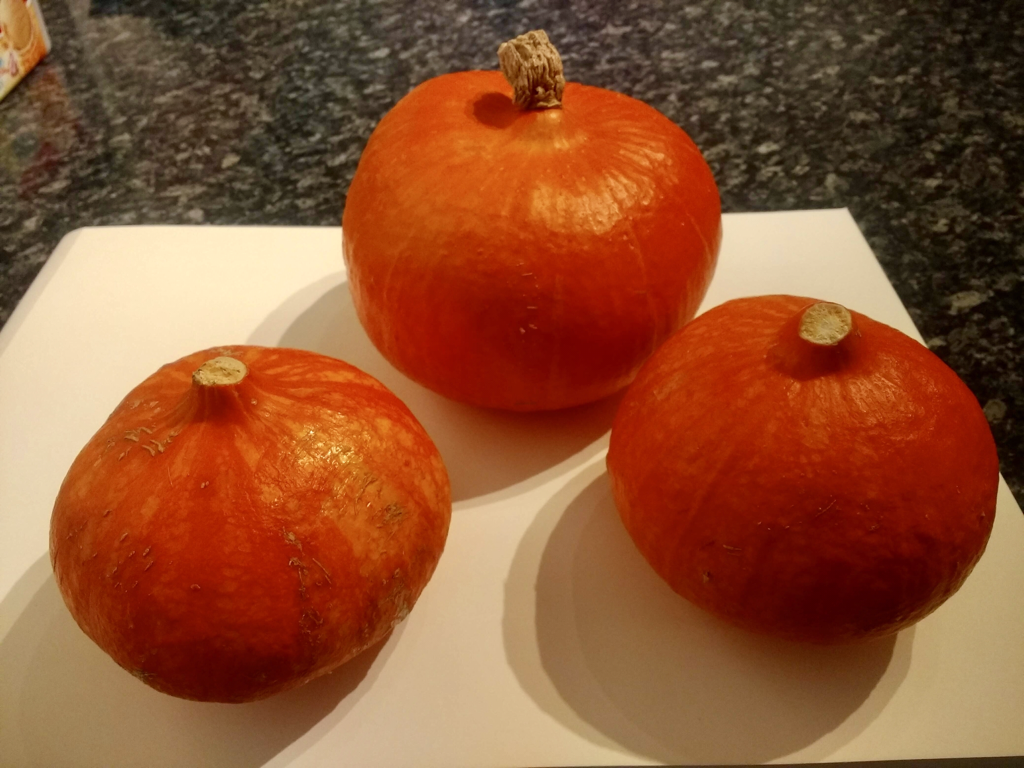
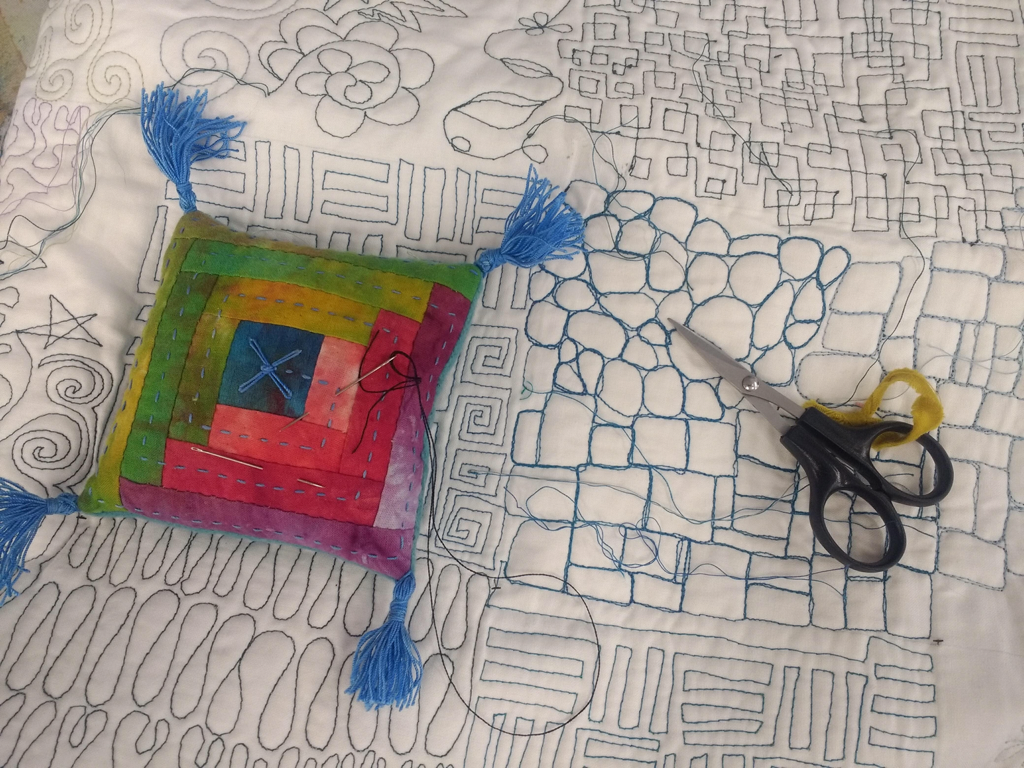
My first attempts were very disappointing (but at least they didn't stick to the plate). To begin with I was using a very light pure greaseproof paper ('deli' paper) and it was only once I was happy that the plate was behaving did I moved on to fabric.
Picture
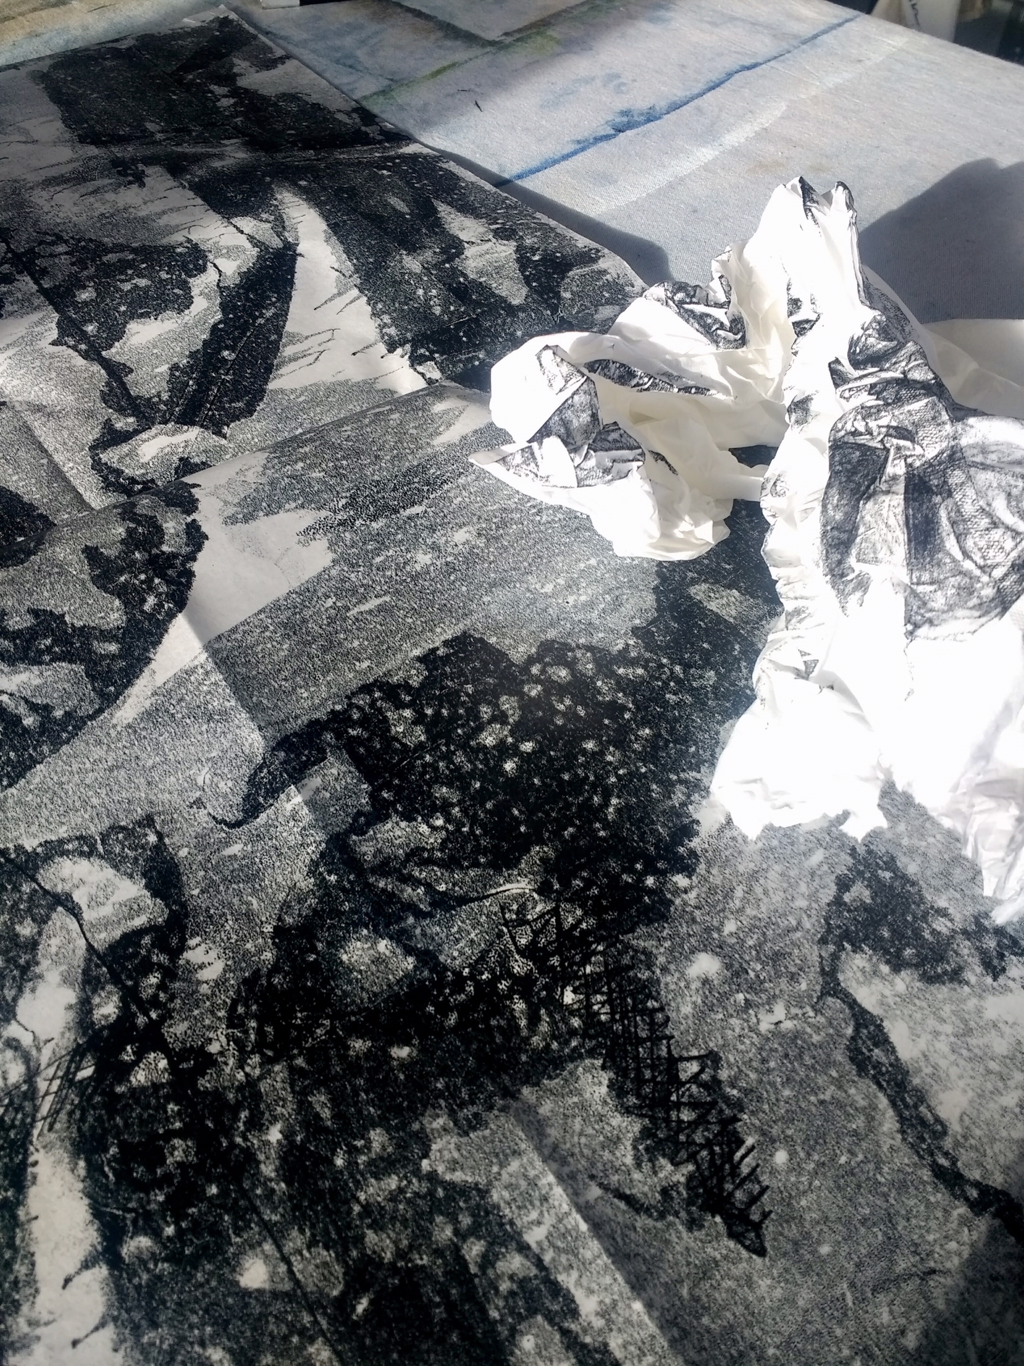
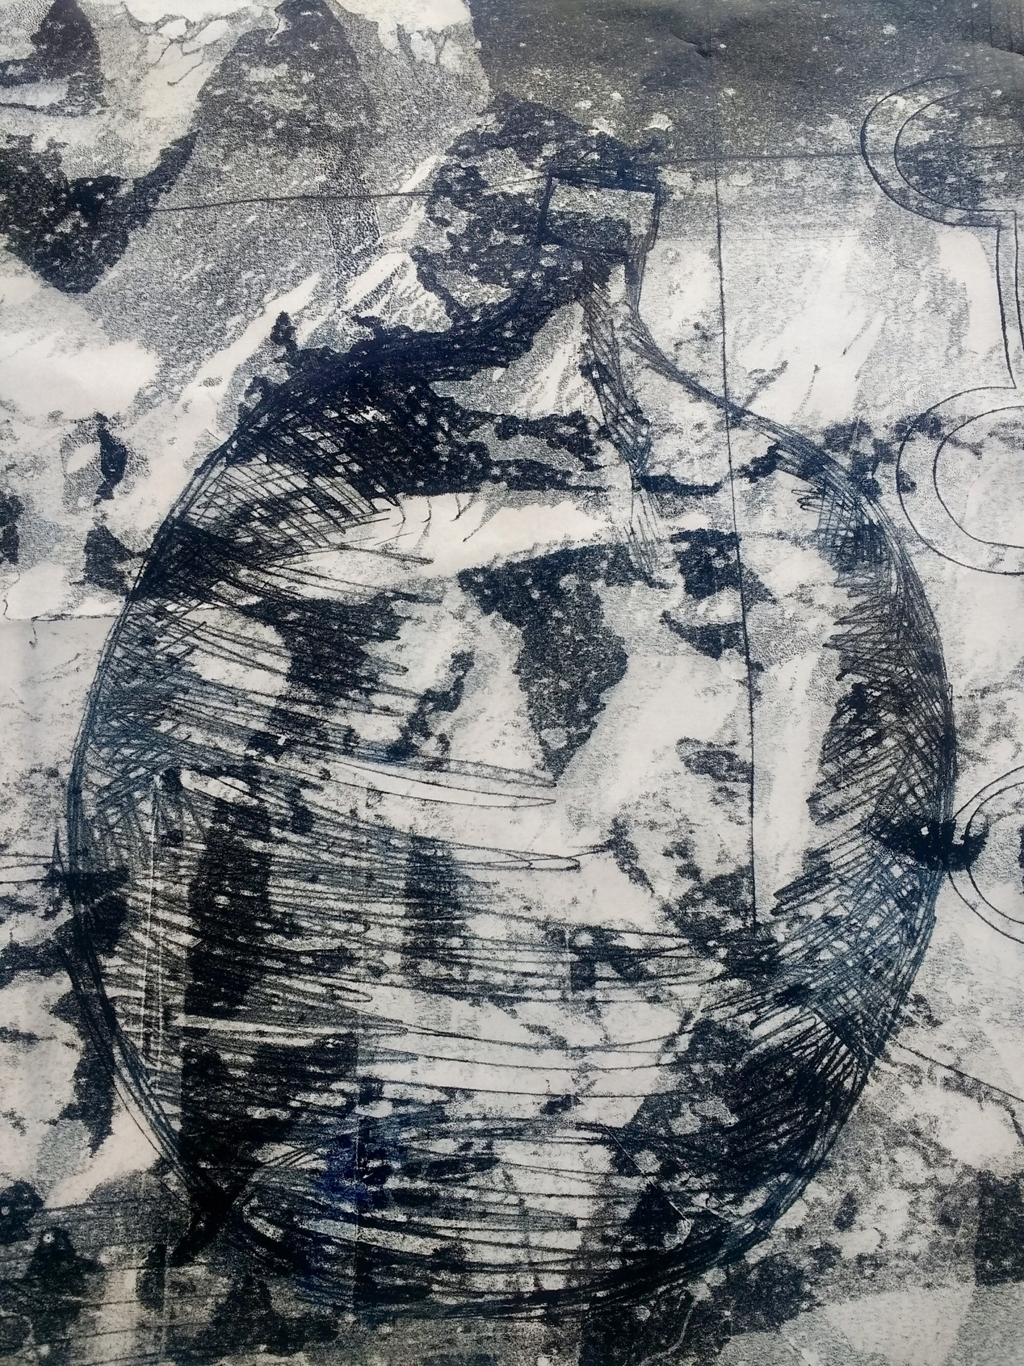
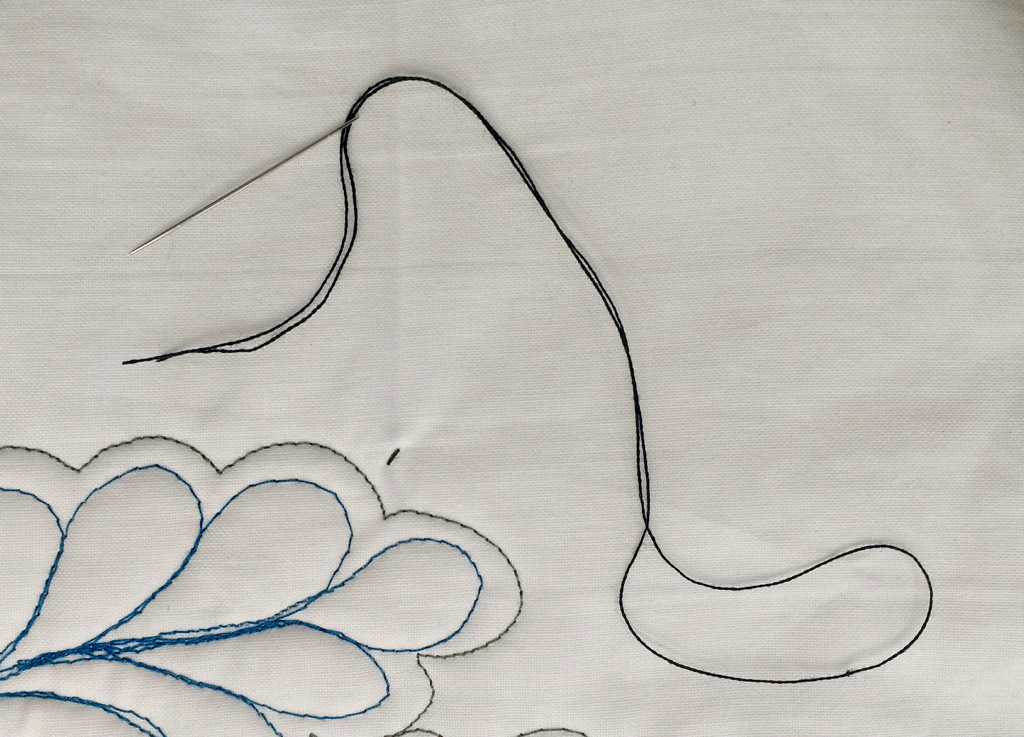
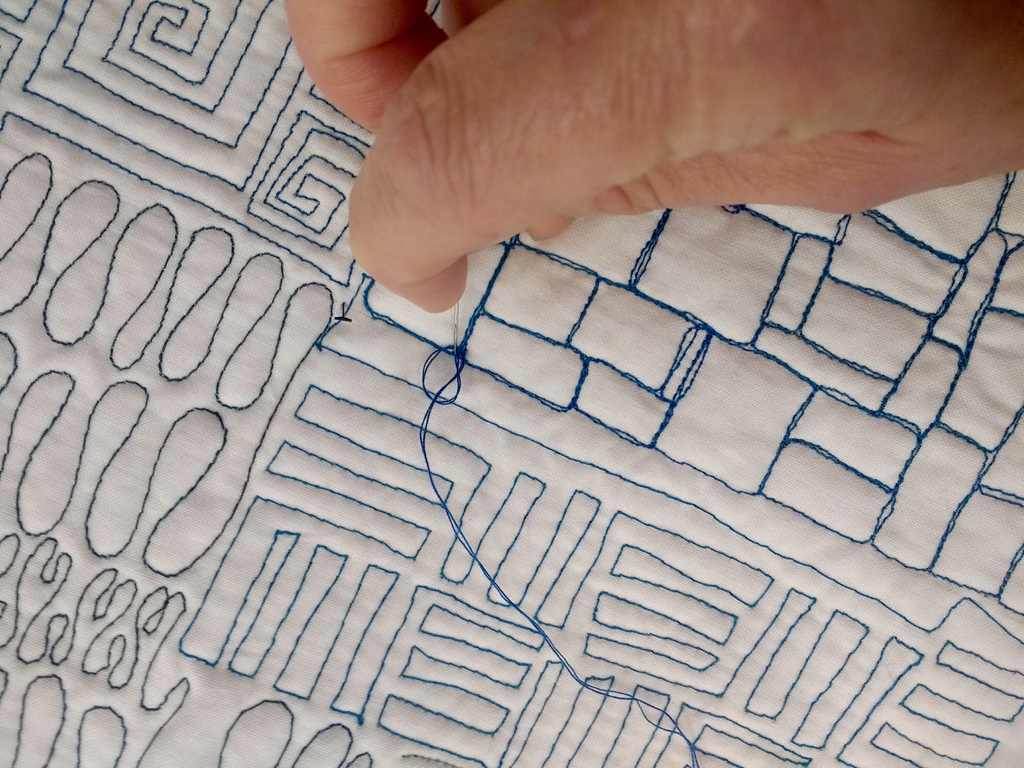
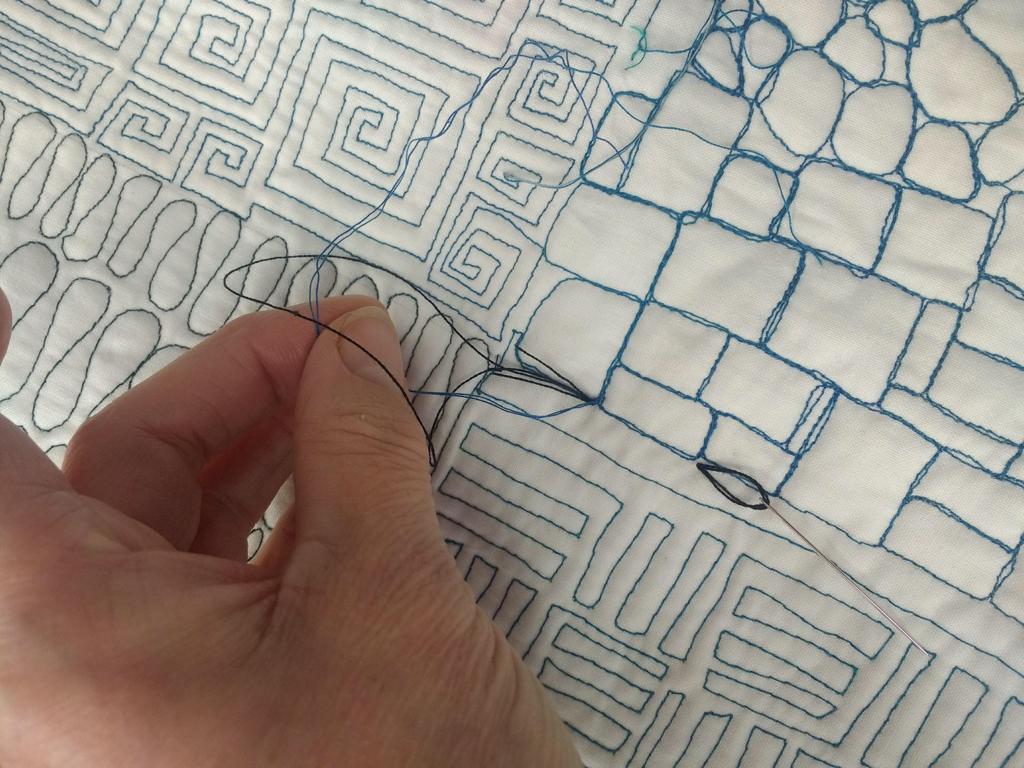
I used a cotton sateen fabric, which I 'floated' over the surface, letting it drop very gently onto the inked plate.  I nearly stopped breathing at this point, but as the fabric settled I could see that I had finally achieved the correct level of ink on the plate - the fabric settled but did not absorb ink.   As you can see,  this meant I achieved really clear marks and lines: I'm very pleased, and relieved!
Picture
In today's world instant gratification seems to be taken for granted - from ready made and fast food, the pinging of texts or emails on your phone to the  ever increasing ways to access online data.  We don't even need to stand in line anymore because more and more we buy on-line. 

But in the creative world it's good to travel a slower road, taking the time to play and experiment, to explore the 'what if's', celebrate our successes - and mistakes, because after all a mistake is just a creative opportunity! Often students roll their eyes at us when we say ' I don't know, have you tried making a sample?'  Terry and I are both firm believers in 'doing', having a go, trying things out.  It's only through the act of doing  will you ever find out what will work, and what won't, which techniques are suitable and which aren't.  Time spend in practical exploration is never time wasted - besides which, look at all the fun and joy you will have on the way.   

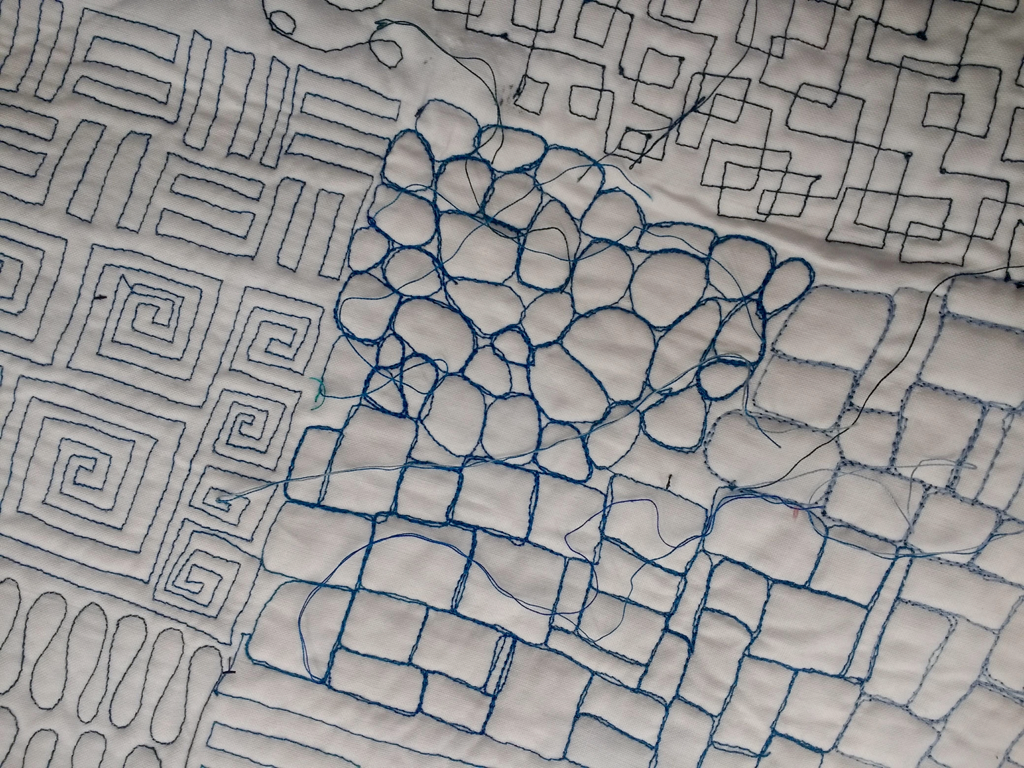
Meanwhile I have to wait patiently for the fabric pieces to cure and then I can start to add colour before layering up and stitching.  I'm so excited, and not a little impatient, to get started....

Hazel & Terry

P.S. You didn't think I'd be throwing away the over inked first attempts did you??  They've been put to one side to dry with the rest of my trials and will be added to the stash of creative papers ready for including into sketchbooks some day!
* as with many things we have in the InStitches Studio these had had a previous life and were heading off to the scrap yard!
0 Comments

...and breathe!

25/1/2019

0 Comments

 
This quilt was made by one of our students, who first started quilting with us and then put in many hours of practice! Free motion quilting is a skill, it can be taught and therefore learned: no one is born a free motion quilter!  ​
Picture
Our free motion quilting (FMQ) course is one of our most popular and this week we started off not one, but two classes.  Whilst we're having a welcome coffee we introduce the course structure and give lots of information about needles, threads and various ways on how to deal with T-issues*
Picture
To begin with we always first draw out the pattern in a book, on the white board or even on the iPad  because it gives a chance to see where you're going, improves hand-eye coordination and promotes muscle memory, as well as giving you problem solving thinking time - how are/ where are you going to start and stop the pattern etc 
Picture
Then it's time to start stitching.  A simple 'head & shoulders' pattern is a great pattern to start with as you have to move up and  down as well as left to right and then as you move down to the row below, right to left.  Start stitching at your default size to begin with and then try going larger and smaller in scale.

Even after all the years we've been stitching, if we haven't free motion quilted for a while we still do this as our warm-up exercise.  It also is a great way to check that your machine is running smoothly and that there are no tension issues.
Picture
Wear quilting gloves also helpful when you FMQ as they'll give you extra grip when manoeuvring the quilt sandwich under the needle.  

You may be puzzled by the blog title, but throughout the first day we find students have a tendency to hold their breath as they sew, so we like to remind them: pop your tongue in and....breathe!

If you would like to learn how to  free motion quilt or to improve your technique why not subscribe to our newsletter as we'll shortly be releasing the dates of our next courses?
​
Hazel & Terry

* tension!
0 Comments

Creative warm-ups: working big

29/11/2018

0 Comments

 
Picture
It’s a useful skill to be able to draw on all different scales and this exercise will help you expand your drawing to fill the page – whatever the size!
Picture
You will need:
  • ​paper - if you always use A4 then try A3
  • charcoal sticks - they come in different sizes - you can't do small detailed pictures with a piece of charred wood!
  • something to draw; preferably (but not essential) something bigger than the paper you are going to drawn on.
Picture
Before you start, spend a few minutes looking at the item you have chosen to draw – look at its overall shape, its relationship to other items on the table and/or the back ground etc

Read More
0 Comments

No horses were harmed in the writing of this blog-post...

9/11/2018

2 Comments

 
Picture
This week was the second session of our ever popular Introduction to free motion quilting course.  As well as teaching many different patterns we also share lots of tips and advice  and one of the ones this week was how to finish the thread ends.  ​
Picture
It's always a good idea to do this at either the beginning or end of every session or even as you go along.  There's nothing worse than finishing a quilt top only to realise you have countless ends of thread to deal with!
Picture
One of the easiest way to do this is the lasso method using a large eyed embroidery needle  and a double length of thread.
Picture
Take the two lengths of thread (ie: the top and bottom threads) and tie using an over-hand knot, running it down the needle to the end of the stitching.  This knot will anchor itself in the wadding when pulled through.
Picture
Push the threaded lasso needle into the work, at the end of the line of stitching.  Go through the top layer, into the wadding but not through to the back.  Travel the needle about an inch and pop it out: do not pull through!  
Picture
With your other hand grab the stitching threads and pull them through the lasso, then pull the needle, allowing the lasso to pull the thread right through. The thread tail can then be carefully snipped.
We made a little video to show you here:
Click on the image below to see the video Subhashini made when I taught it in class! 
Picture
Until next week,
Hazel & Terry
2 Comments

    Welcome to our blog! Here you'll find out what's been going on, plus plenty of ideas and inspiration and the odd cake recipe!

    Check back often to see what we're up to - it's great to have you along

    Hazel & Terry
    Picture

    Enter your email address:

    Delivered by FeedBurner

    RSS Feed

    Categories

    All
    #10minutedrawingproject
    And There Was Cake!
    Artists To Inspire You
    Blog Changeover
    Bringing Colour To Life
    Colour
    Craft Ptoject
    Creative Play
    Creative Warm Ups
    Creative Warm-ups
    Festival Of Quilts
    Finding Inspiration
    How To...
    Inspired By Cloth
    #institchescreative2020
    Line
    Places To Inspire You
    Quilt Shows
    Take Two Stitches
    Text
    Texture
    The Story Behind The Quilt
    Tools Of The Trade

    InStitches travelblog
    InStitches textiles travel blog
    Picture
    Picture

    Archives

    June 2020
    May 2020
    April 2020
    March 2020
    February 2020
    April 2019
    March 2019
    February 2019
    January 2019
    December 2018
    November 2018
    October 2018
    September 2018
    August 2018
    July 2018
    June 2018
    May 2018
    April 2018
    March 2018
    February 2018
    January 2018
    December 2017
    April 2016
    March 2016
    October 2015
    September 2015
    August 2015
    July 2015
    June 2015
    May 2015
    April 2015
    March 2015
    February 2015
    January 2015
    December 2014
    November 2014
    October 2014
    September 2014
    August 2014
    July 2014
    June 2014
    May 2014
    April 2014
    March 2014
    January 2014
    November 2013
    October 2013

    Visit InStitches's profile on Pinterest.
InStitches: exciting courses for people who love textiles, dyeing, design, stitching and sketchbooks

Connect with us

follow us on Facebook
read our blog
Instagram inspiration
Pinterest pinnings
newsletter signup
follow us on Facebook
read our blog
Instagram inspiration
Pinterest pinnings
newsletter signup

Courses and workshops

Courses and workshops at a glance
Create your own Cloth
Creative Journeys
Guest tutors 2025
​Guest tutors 2026
​Online workshop


InStitches

About
How to find us

Support

Contact
​
The small print
Privacy policy

Our address

Sunfield Studio,
Unit 12, Sunfield Business Park
New Mill Road
Finchampstead
Wokingham
RG40 4QT
We support
Just a Card logo
Copyright © InStitches 2010-2025
All rights reserved.