Welcome to the first #institchescreative2020 - it's great to have you along!
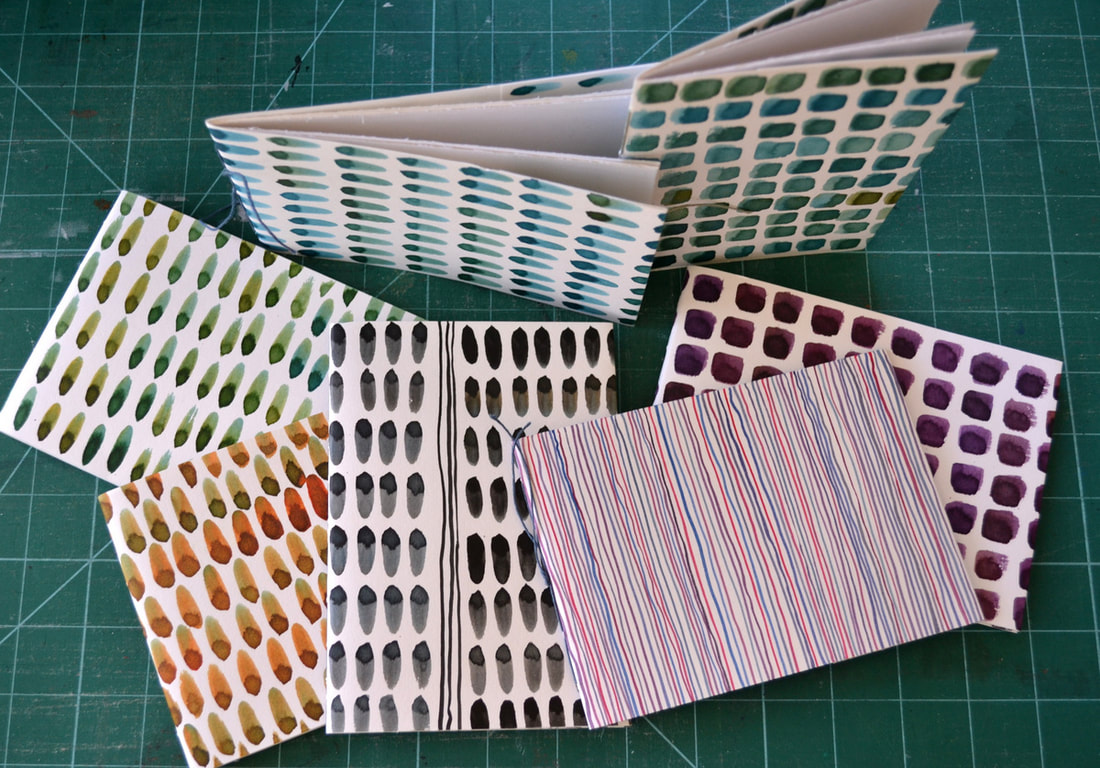
Those of you who know us at InStitches will know that we love everything about hand-made books, so when we were planning this series this was an obvious place to start! These simple little books are easy to make and very versatile. You can make them any size, and if you make several the same size they can be linked together (more later) to form a much bigger volume. They are a great place to keep all your paper-based explorations and a useful small book to take with you on a (solitary) walk to record what you see in words and scribbles. They also make great little gifts to include with a card.
Those of you who know us at InStitches will know that we love everything about hand-made books, so when we were planning this series this was an obvious place to start! These simple little books are easy to make and very versatile. You can make them any size, and if you make several the same size they can be linked together (more later) to form a much bigger volume. They are a great place to keep all your paper-based explorations and a useful small book to take with you on a (solitary) walk to record what you see in words and scribbles. They also make great little gifts to include with a card.
So let’s get started – here’s what you will need:
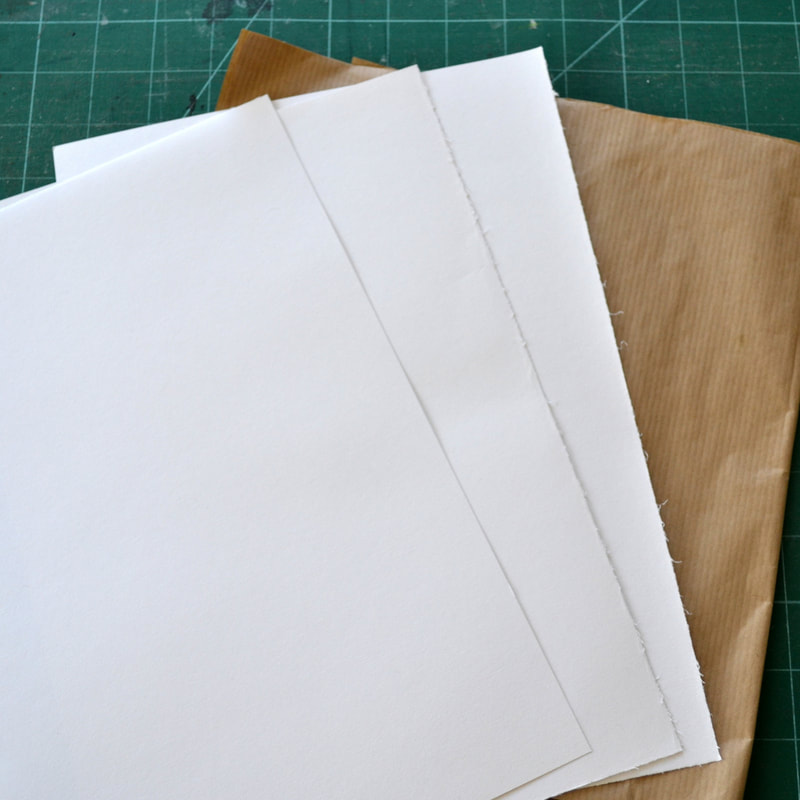
- Paper – ideally cartridge, as this will accept paint and other wet media as well as pen and pencil; but you can also use copy paper, brown paper, coloured papers, old paper bags and envelopes, old maps etc – why not use a mixture? In some of the images I'm using a carrier bag from that well-known seaside clothing shop, plus a (clean) cardboard takeaway food tray for the cover.
- For a single small A6 book you will need the equivalent of two or three A4 sheets (or one and a half A3 sheets). For an A5 book you will need four to six A4 sheets (two or three A3 sheets).
- A sheet of heavier weight paper for the cover (optional)
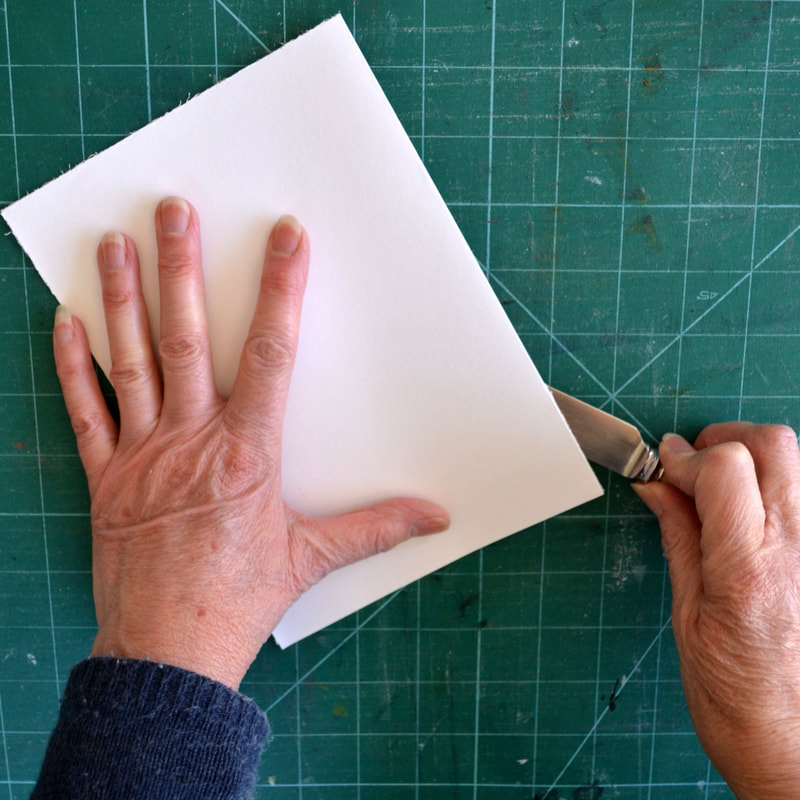
- Cutting mat, craft knife and ruler OR scissors OR a blunt knife (like a butter knife) for tearing paper
- Sturdy needle and strong thread (ideally not thin sewing thread, but this would do at a pinch) OR large elastic band OR thin ribbon
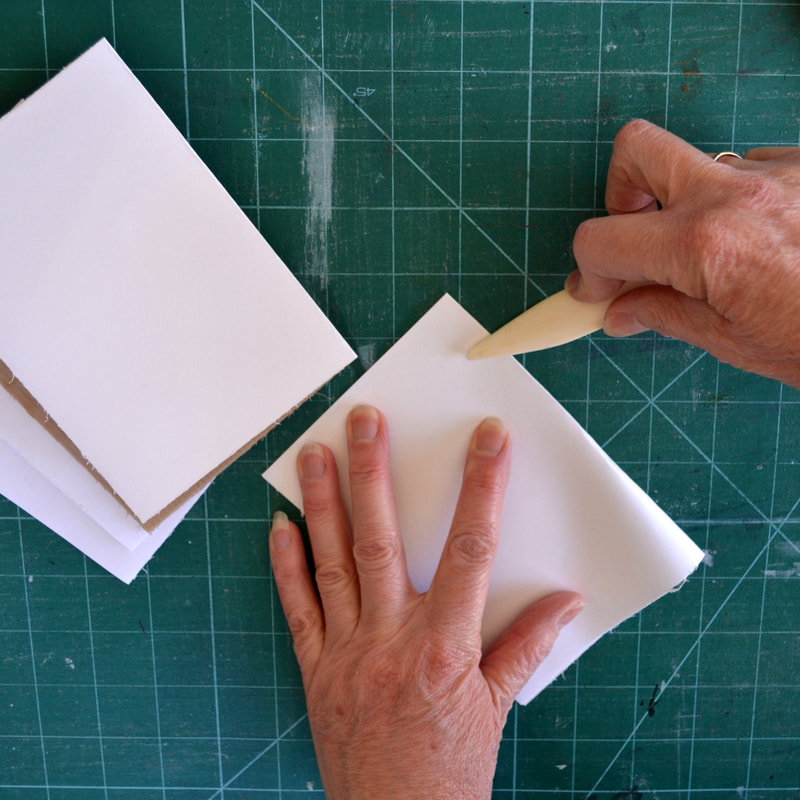
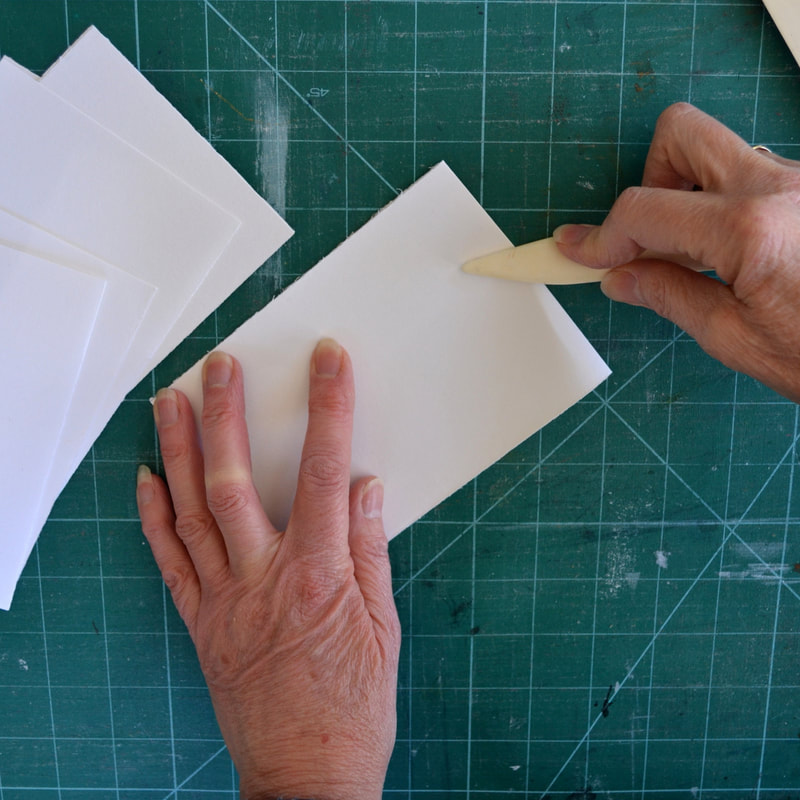
- If you have them: bone folder for creasing paper (not essential) and awl for pricking holes (a chunky needle held in a cork makes a great substitute)

A word about paper grain
All machine-made paper has a grain – where the fibres align in one direction as the paper is made. You may have noticed that paper is easier to tear in one direction (along the grain) than the other. Hand-made papers don’t have a grain.
When you are making books, ideally the grain of the paper should run parallel to the spine of the book. This makes the pages lie flat when it is open and ensures it closes properly too. When we are making small books like these, this is not essential, but is a good habit to get into if you can, and really starts to matter when page size gets bigger.
Determining the grain of your paper – two easy methods:
1. gently bend the paper, first edge to edge in one direction, then rotate through 90 degrees and repeat. You will notice that there is more ‘give’ one way than the other – it is easier to bend the paper along the grain.
2. tear a piece of the paper – again in both directions. You’ll find it tears in a much straighter line along the grain and a ragged line across it.
Right, let’s get making books!
We are going to give instructions for an A6 sized pamphlet, which is a great size to begin with. You can adapt them to any size, even square formats, to suit the paper you have available. First, you have some decisions to make:
1. Decide on the size your book will be: you might choose a classic A size – A6 or A5 (an easy option if you are starting with A sized paper). Decide also whether you would like portrait or landscape format. You might like to mix things up with a square format, or long and thin.
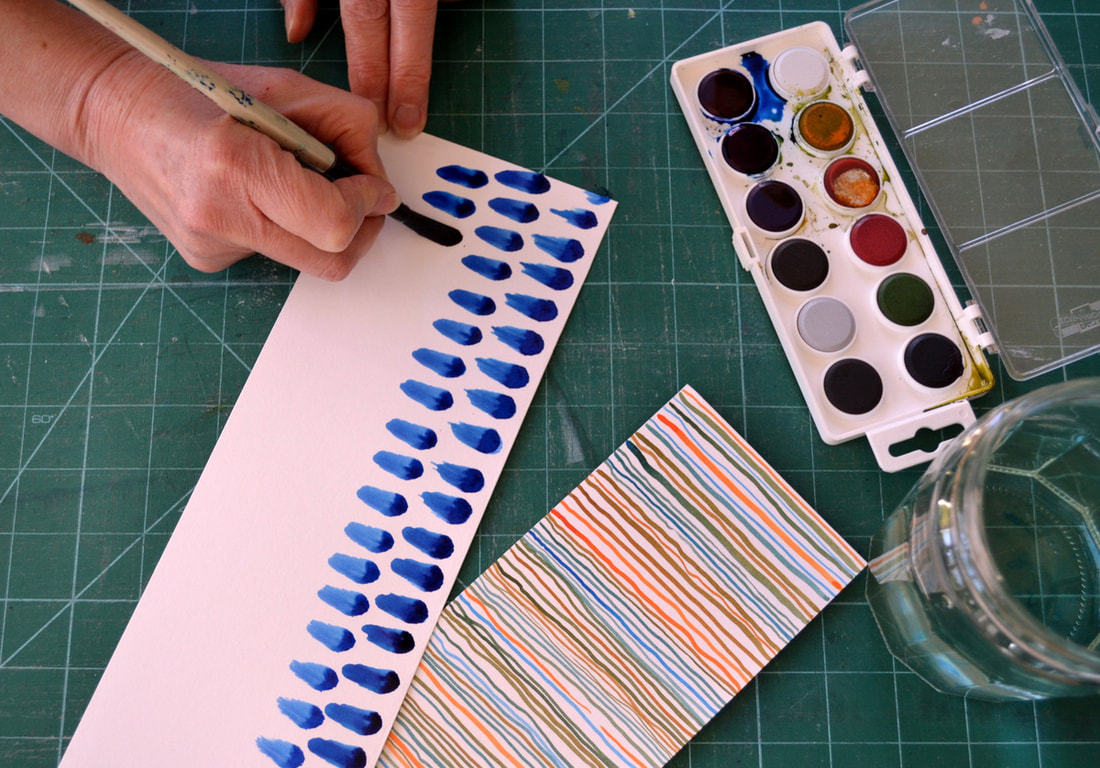
2. Decide whether you want to have a cover – you could make this from slightly heavier paper and decorate it with paint or inks.
We are going to give instructions for an A6 sized pamphlet, which is a great size to begin with. You can adapt them to any size, even square formats, to suit the paper you have available. First, you have some decisions to make:
1. Decide on the size your book will be: you might choose a classic A size – A6 or A5 (an easy option if you are starting with A sized paper). Decide also whether you would like portrait or landscape format. You might like to mix things up with a square format, or long and thin.
2. Decide whether you want to have a cover – you could make this from slightly heavier paper and decorate it with paint or inks.
Preparing your pages
3. Portrait format: take one A4 sheet and fold it in half short sides together, making sure you align the corners and edges before creasing the fold. Cut or tear along this fold (we like the rustic charm of torn edges) – you will now have two A5 sheets. Repeat with the other sheet(s), to give 4 (6) smaller pieces in total.
3. Portrait format: take one A4 sheet and fold it in half short sides together, making sure you align the corners and edges before creasing the fold. Cut or tear along this fold (we like the rustic charm of torn edges) – you will now have two A5 sheets. Repeat with the other sheet(s), to give 4 (6) smaller pieces in total.

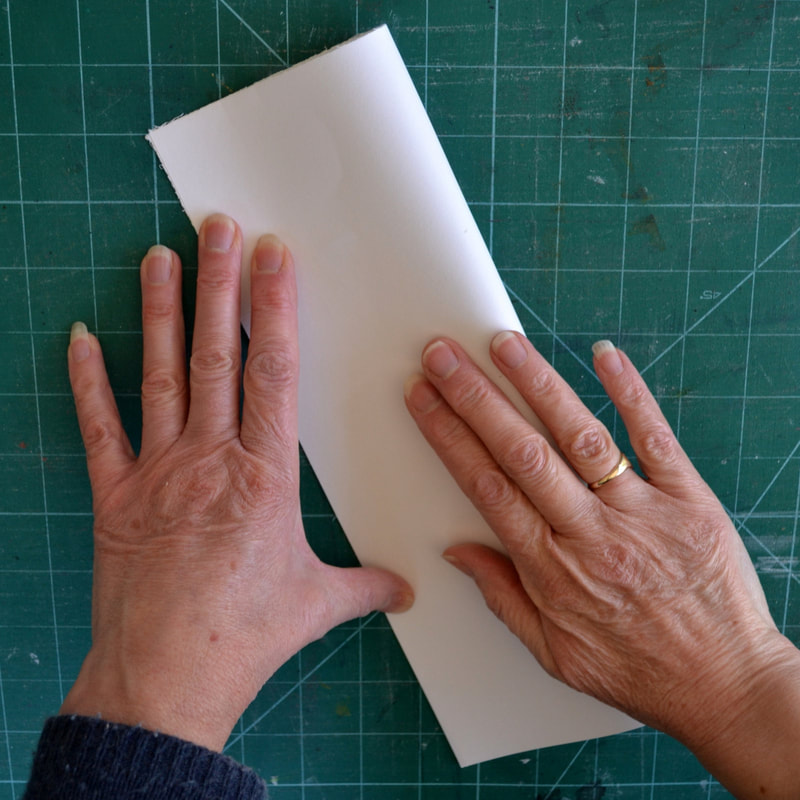
4. Landscape format: take one A4 sheet and fold it in half with the long sides together, making sure you align the corners and edges before creasing the fold. Cut or tear along this fold (we like the rustic charm of torn edges) – you will now have two long, thin sheets. Repeat with the other sheet(s), to give 4 (6) smaller pieces in total.

5. Both formats: Cut a corresponding piece of heavier paper for the cover. If you make this wider than you need you will be able to fold flaps to strengthen the outside edges, and form little pockets, but this is not essential.
6. Fold the sheets in half individually, ensuring the corners match, the press the fold. Nestle the sheets inside each other to form a pamphlet.
6a. If you want to insert thinner pages now is the time to do it; cut or tear them to the correct size and fold as above. Generally speaking four or five sheets of cartridge paper is the maximum that works well for a pamphlet book (otherwise the open edge protrudes too much; and it is harder to pierce holes) but you can add or substitute one or two thinner sheets – experiment with tracing paper, brown paper tissue paper etc.
6a. If you want to insert thinner pages now is the time to do it; cut or tear them to the correct size and fold as above. Generally speaking four or five sheets of cartridge paper is the maximum that works well for a pamphlet book (otherwise the open edge protrudes too much; and it is harder to pierce holes) but you can add or substitute one or two thinner sheets – experiment with tracing paper, brown paper tissue paper etc.
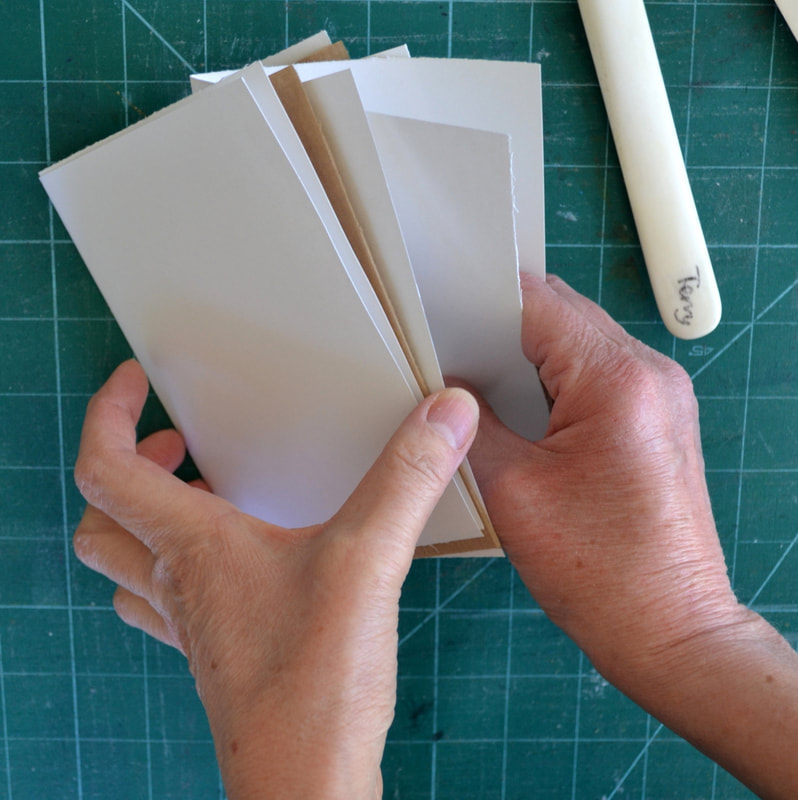
7. Decorate the cover sheet, if you’re having one, in any way you like, then fold it in half too. Place it outside the inner pages.
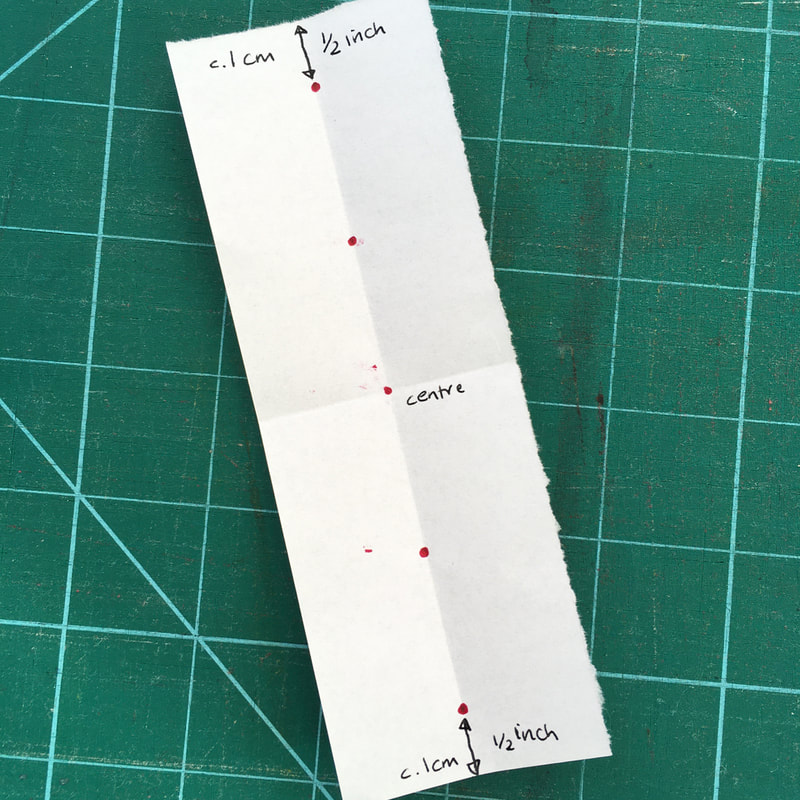
Make a pricking template
8. From a piece of waste paper cut a strip 5cm (2”) wide and the same length as the spine of the book. Fold it in half along its length, crease and open out. This will be your pricking template.
9. You will always need an odd number of holes to stitch your pamphlet together. This could be three (eg if you have a landscape format A6 book) or five (eg A6 portrait) or seven (larger books with longer spines). To mark your holes:
a. First fold your template in half short sides together to find the centre.
b. Mark a dot on the inside where the two folds cross.
c. Mark two more dots on the long crease 1-1.5cm (half an inch) or so from each end.
d. Mark any other dots you need evenly spaced between these three. NB you need an odd number!
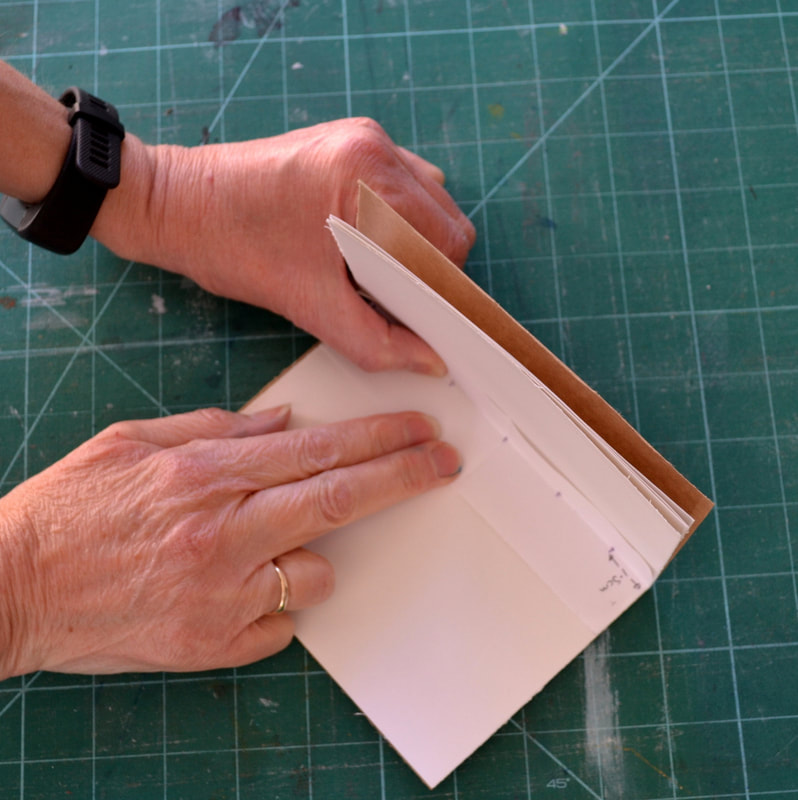
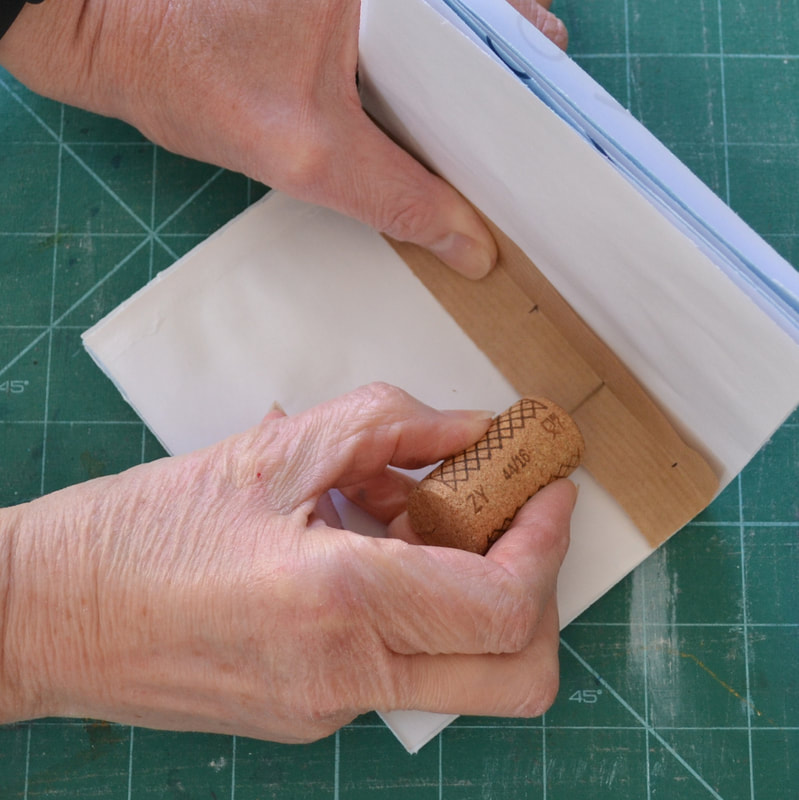
Prick your holes
10. Place your pricking template into the inner fold of your nestled pages and ensure that everything is well lined up at the top and bottom and in the crease. Hold your pages so that there is an angle at the spine, with half the book lying flat and the other half sticking straight up.
10. Place your pricking template into the inner fold of your nestled pages and ensure that everything is well lined up at the top and bottom and in the crease. Hold your pages so that there is an angle at the spine, with half the book lying flat and the other half sticking straight up.
11. With your awl, or a chunky needle (pushed into a cork for easy handling), pierce on the marked dots through the template, all the pages and the cover to the outside. Use the reverse of your cutting mat, or a newspaper or magazine to protect your work surface. Keep holding the pages securely.
If it’s hard to go through the pages and the cover all at once you could do them separately, that’s the beauty of having a pricking template. Just make sure you have marked the top of everything so they go back together the right way round.
If it’s hard to go through the pages and the cover all at once you could do them separately, that’s the beauty of having a pricking template. Just make sure you have marked the top of everything so they go back together the right way round.
Stitch your pamphlet
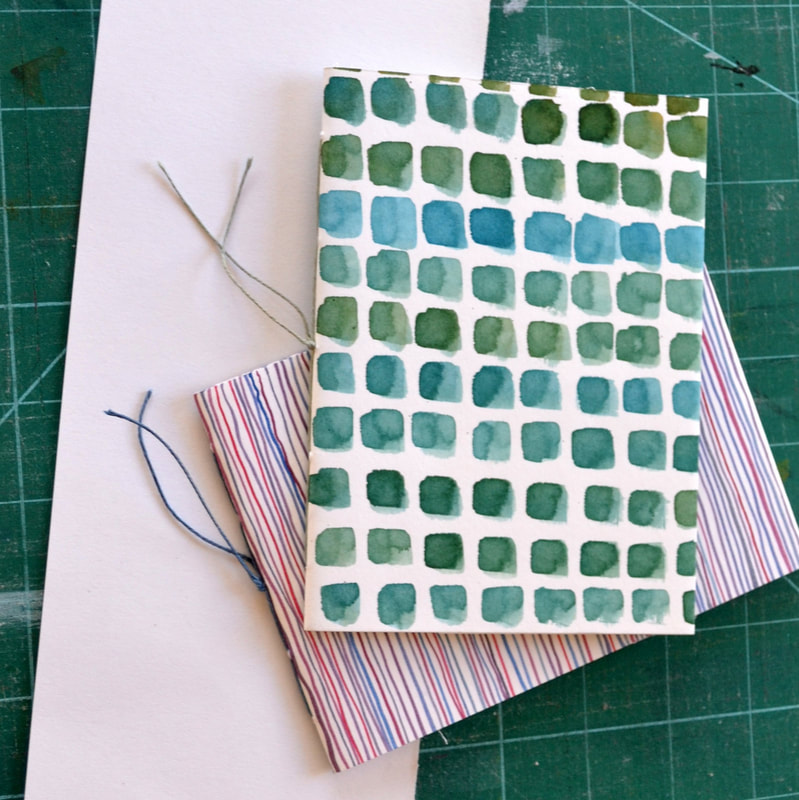
12. Take a length of thread three times the length of the spine and thread your needle.
13. We are assuming you have five holes. Read through the instructions and adapt for different numbers.
a. Start at the middle hole (3), on the inside of the spine, go through the hole, leaving a tail about 5cm (hold on to it or tape it down with masking tape).
b. Going up towards the top of the book, sew back in through the next hole (2), and out through the next hole (1 - the top). Make sure your stitches are firm and not baggy (be careful to pull perpendicularly to the paper so you don’t cut into it).


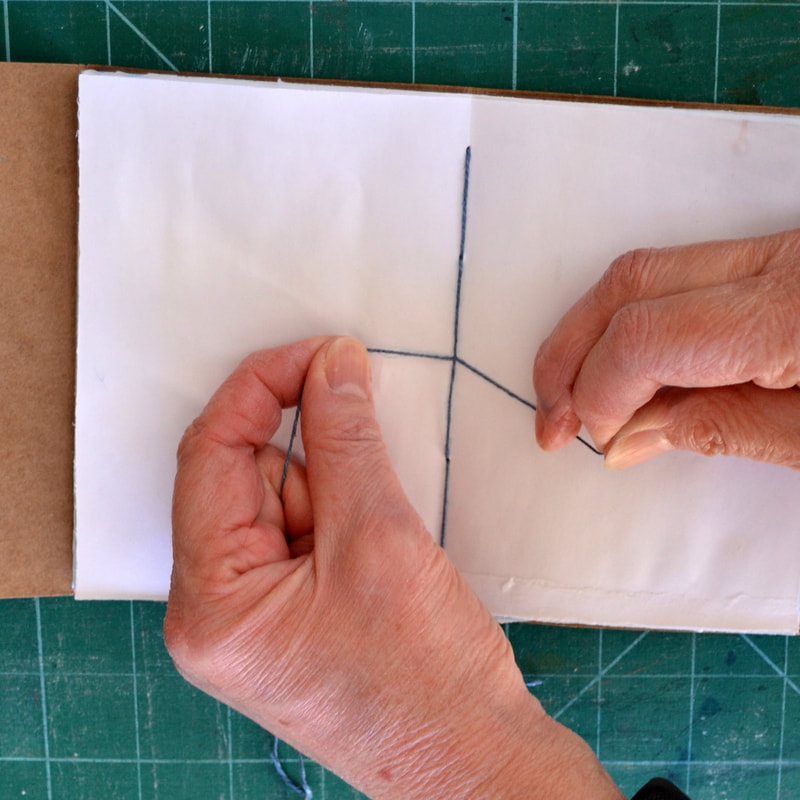
c. Sew back in through the next hole down (2), being careful not to split the thread already in the hole. SKIP OVER the middle hole (3), then out through the fourth hole and in through the fifth.
d. Working back up, sew out through the fourth hole and back in through the middle hole
d. Working back up, sew out through the fourth hole and back in through the middle hole

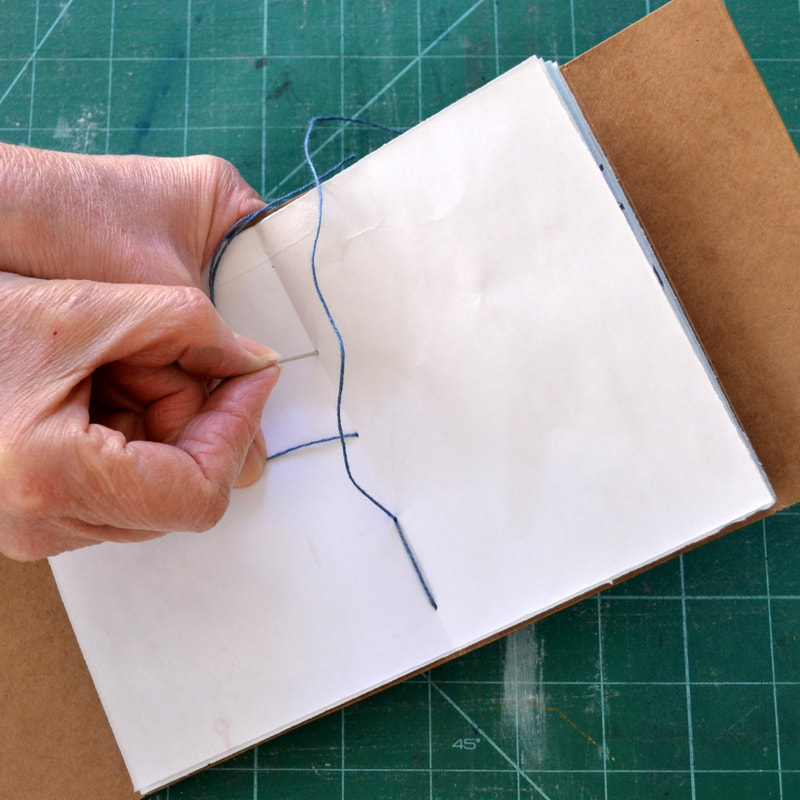
e. Arrange your threads on the inside so that the ends are on either side of the long thread crossing the middle hole. Have a final check that your stitches are firm.
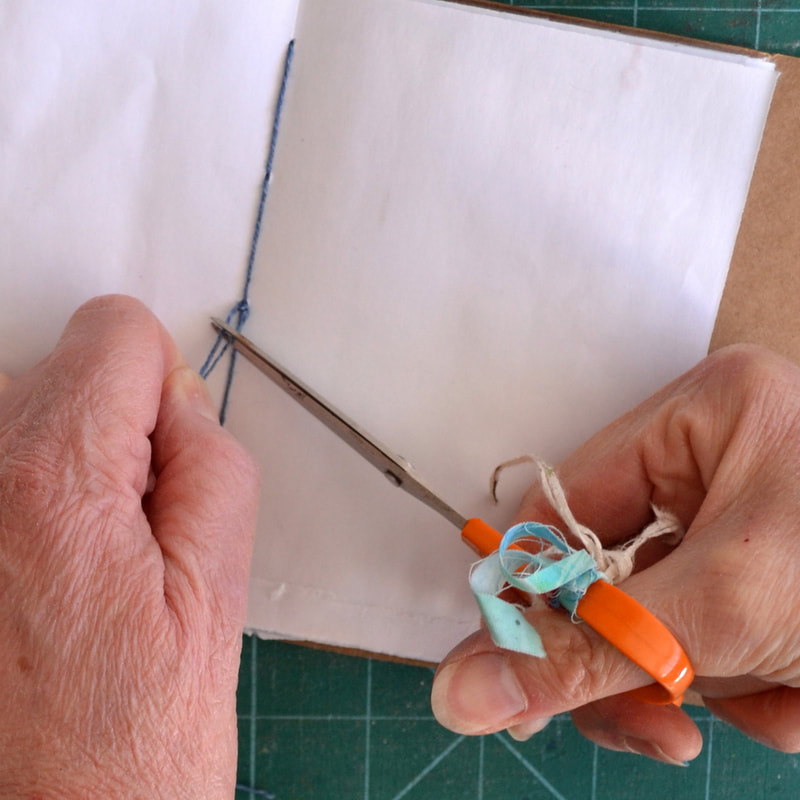
f. Tie a reef knot (left over right and under; right over left and under) and trim the ends short. If you are worried the knot might come undone you can massage in a dot of glue (don’t close the book till it’s dry!).
f. Tie a reef knot (left over right and under; right over left and under) and trim the ends short. If you are worried the knot might come undone you can massage in a dot of glue (don’t close the book till it’s dry!).
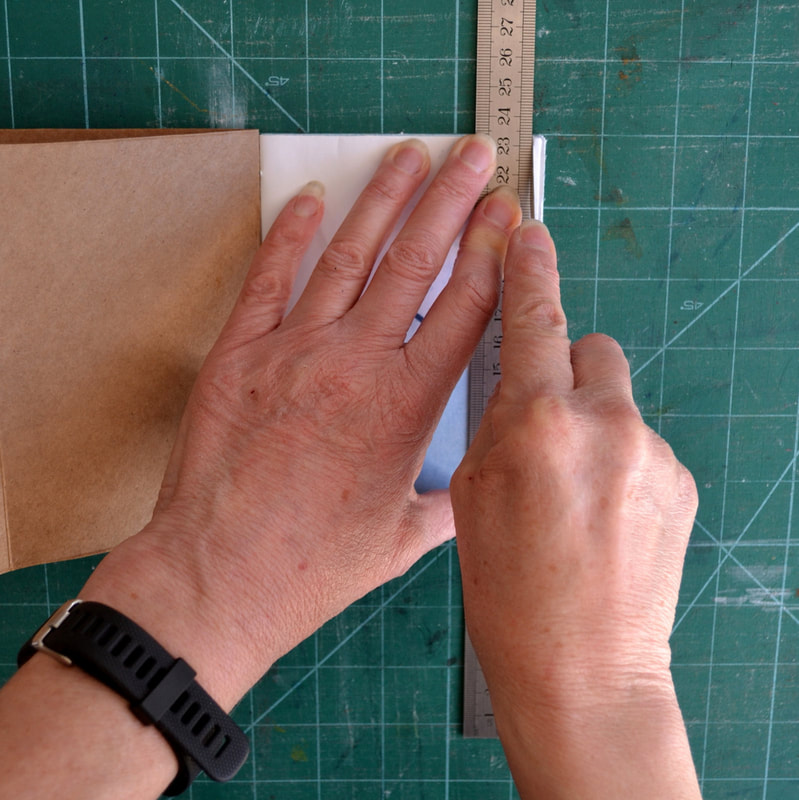
14. If you find the edges of your pages are sticking out proud of the cover, use a ruler and a knife to trim them level. Fold the covers out of the way, align the page edges then work gently downwards with several strokes, rather than trying to cut through all the pages at once.
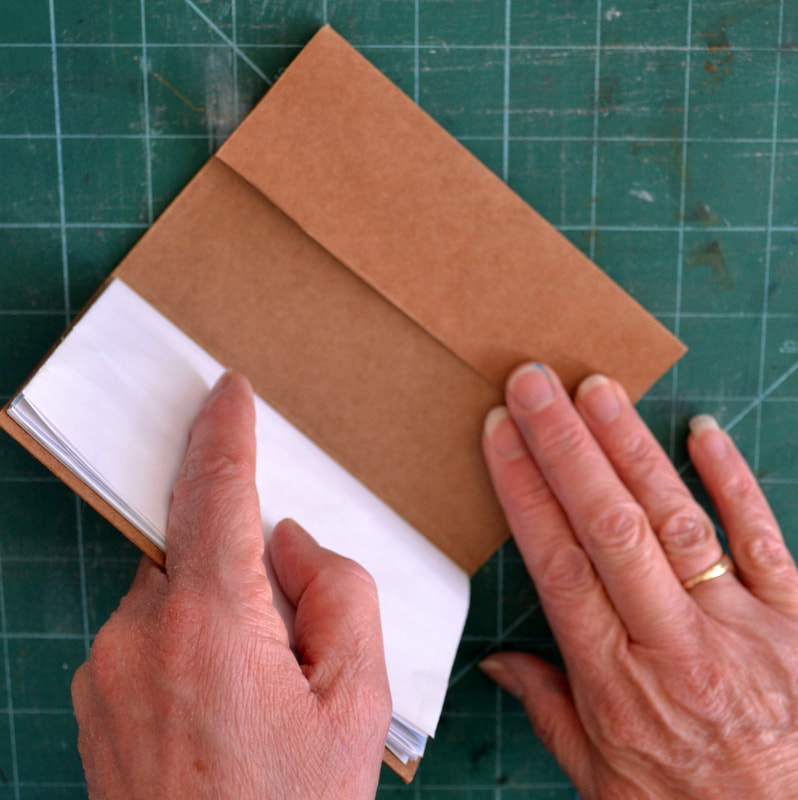
15. If you have made an extra wide cover, now is the time to score and fold it inwards. You could stick the edges with double sided tape to form pockets.
15. If you have made an extra wide cover, now is the time to score and fold it inwards. You could stick the edges with double sided tape to form pockets.

And there it is - one (or in my case two) little pamphlet-bound book ready for you to fill in the coming weeks! Why not make several in different sizes to experiment with? Don't forget to tag us if you post your creations to FB or IG: #institchescreative2020 and #institches2013 - we'd love to see what you come up with! Here are some variations to start you off....
Variation 1
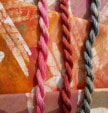
Instead of starting with your thread end on the inside, you can start on the outside of the spine. This means that the final knot will be outside the spine, giving you the opportunity to make a feature of the thread tails – add beads, charms, tassels or any other decoration….
Instead of starting with your thread end on the inside, you can start on the outside of the spine. This means that the final knot will be outside the spine, giving you the opportunity to make a feature of the thread tails – add beads, charms, tassels or any other decoration….
Variation 2
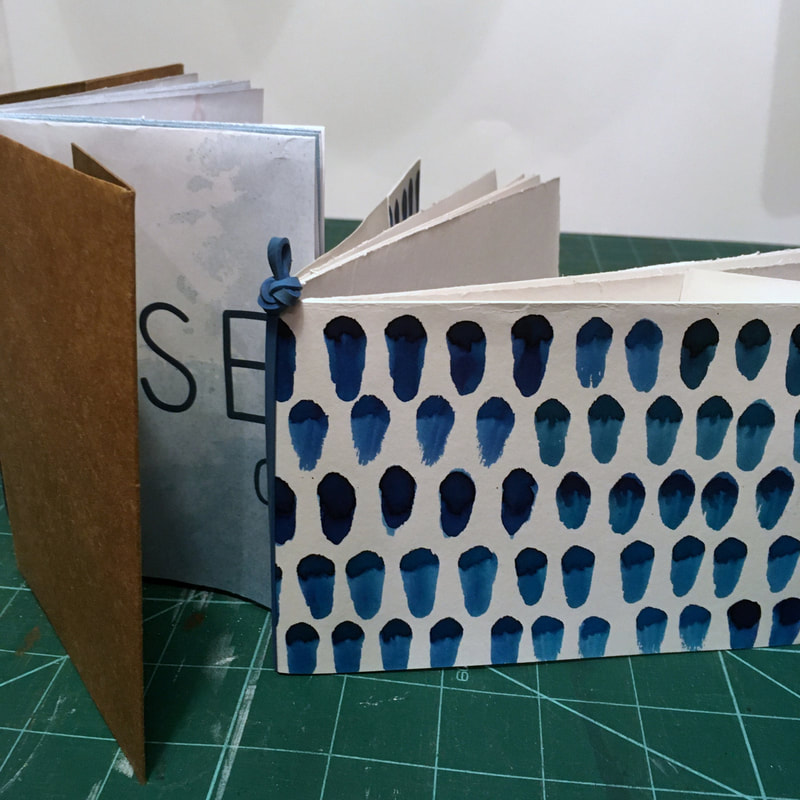
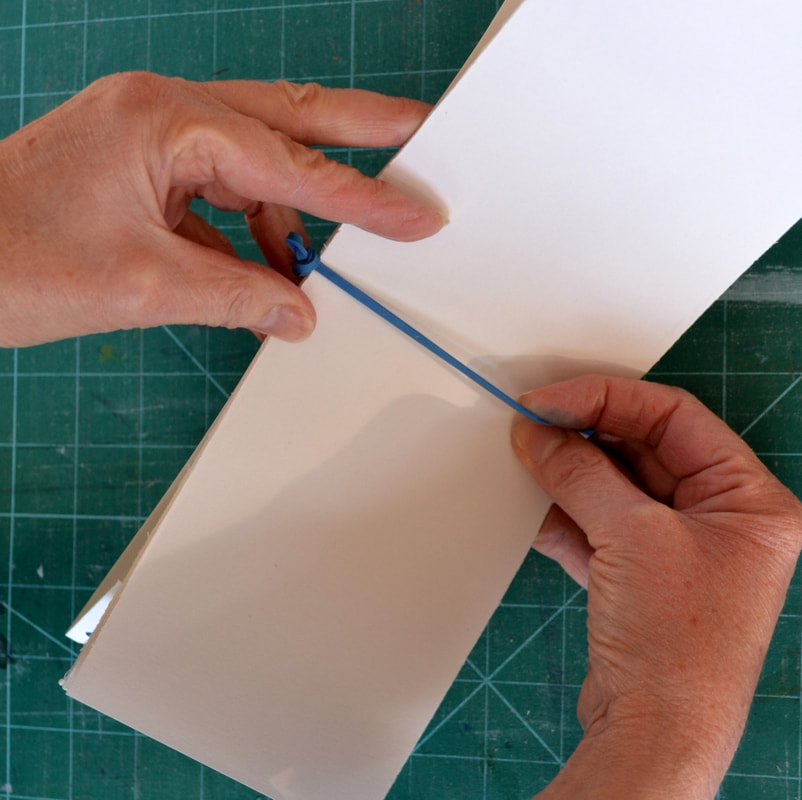
If you have no needle and thread, you can still make a pamphlet book in the way Hazel’s nieces do, using an hair-elastic (ever inventive!). Work along with the instructions until the end of 7. Then choose an elastic band or hair elastic which is a good length for the spine of your book (not too tight or the book will buckle) and slip it over the pages to the fold to hold them together. It’s not as secure as stitching but will work. Alternatively, you could tie a thin ribbon around the spine, or use it to sew with.
If you have no needle and thread, you can still make a pamphlet book in the way Hazel’s nieces do, using an hair-elastic (ever inventive!). Work along with the instructions until the end of 7. Then choose an elastic band or hair elastic which is a good length for the spine of your book (not too tight or the book will buckle) and slip it over the pages to the fold to hold them together. It’s not as secure as stitching but will work. Alternatively, you could tie a thin ribbon around the spine, or use it to sew with.
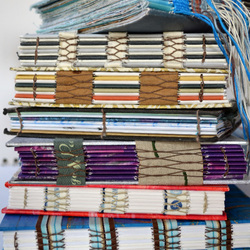
Variation 3
Make several pamphlets all the same size, with the same number of holes, with or without covers. You can bind them together into a larger, chunky book by weaving decorative threads through the binding threads on the spines (those are all my outside thread tails as variation 1 tied in a knot to keep them out of the way!)
Make several pamphlets all the same size, with the same number of holes, with or without covers. You can bind them together into a larger, chunky book by weaving decorative threads through the binding threads on the spines (those are all my outside thread tails as variation 1 tied in a knot to keep them out of the way!)

Until next time - stay safe and well
Terry & Hazel
Terry & Hazel

 RSS Feed