Welcome to the last in this series of #institchescreative2020 blogs for the moment. As lockdown is gradually being eased, we feel the time is right to concentrate on new courses and workshops so that we are ready to go when we are at last able to open the studio again. If, (Heaven forbid!), that time never comes, or for those people who may still be unable to attend a physical course, we want to spend some time working out what other types of workshop we could offer.
Above all we want to be able to continue to bring you all inspiring things in the future…watch this space for news of tutorials, courses and workshops and other exciting things coming your way soon.
Thank you to everyone who has worked along with us and left comments and images of your own creations. It really means a lot to us.
Meanwhile, read on for part two of the little books blog....
Join them together...
If you have several books of the same size you can connect them together with a concertina strip of paper. Here’s how:
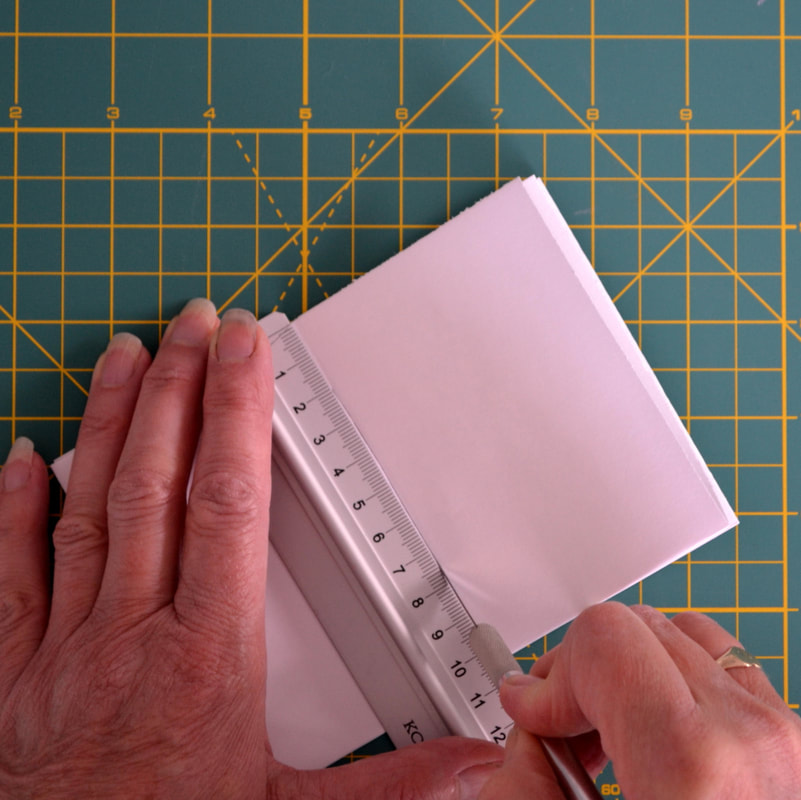

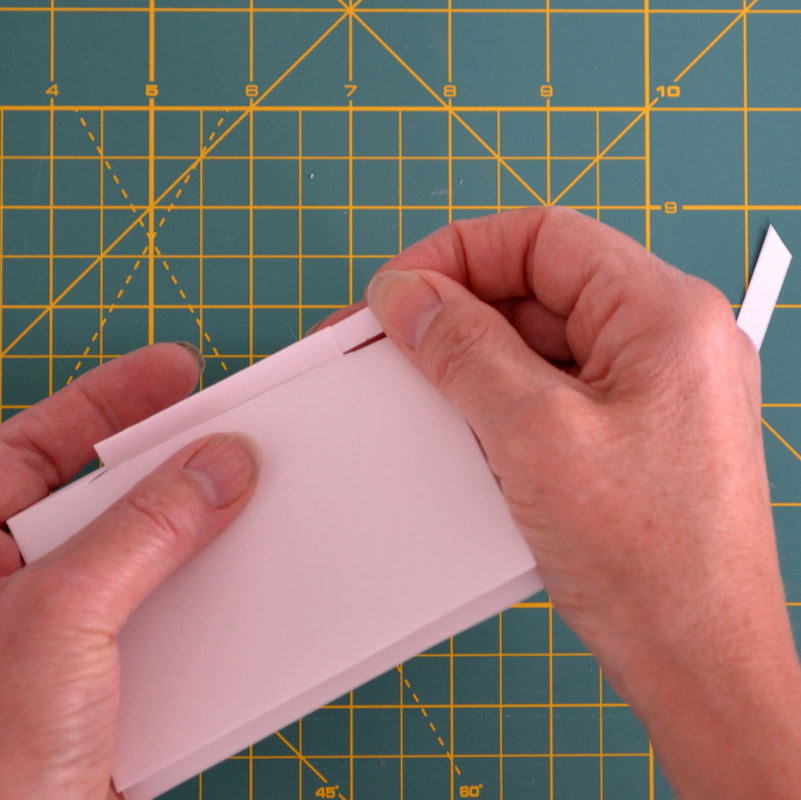
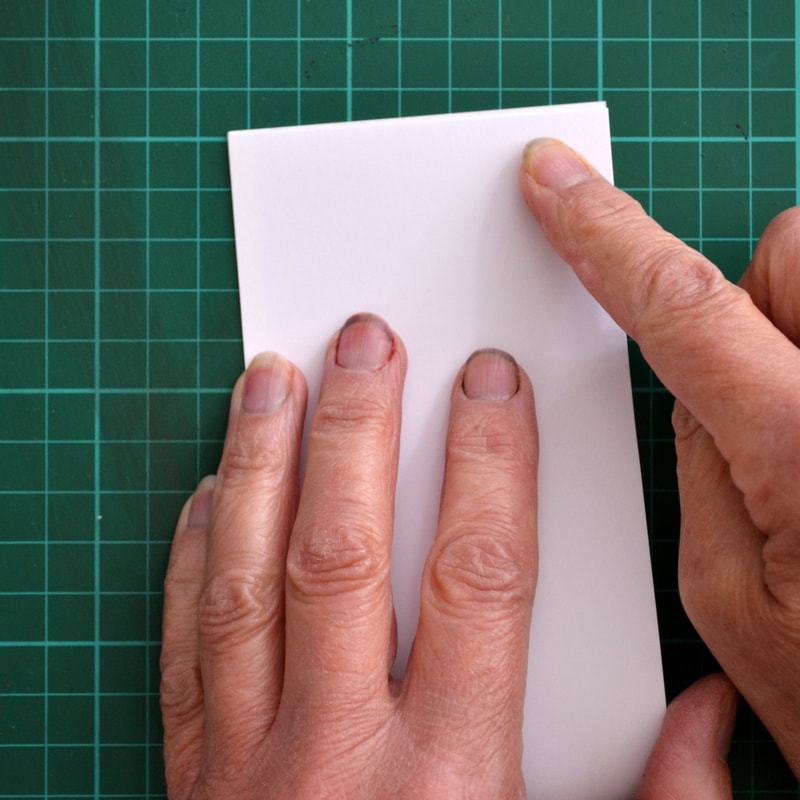
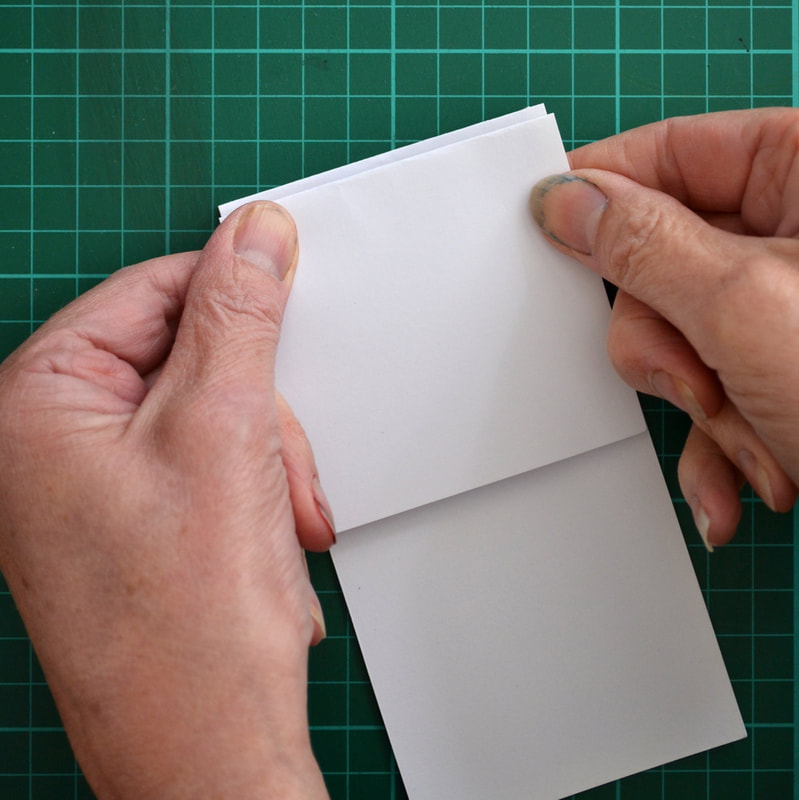
1. In the centre of the spine of each booklet cut a vertical slit starting and ending at least 1.5cm from the top and bottom edges
2. Measure the length of the slit.
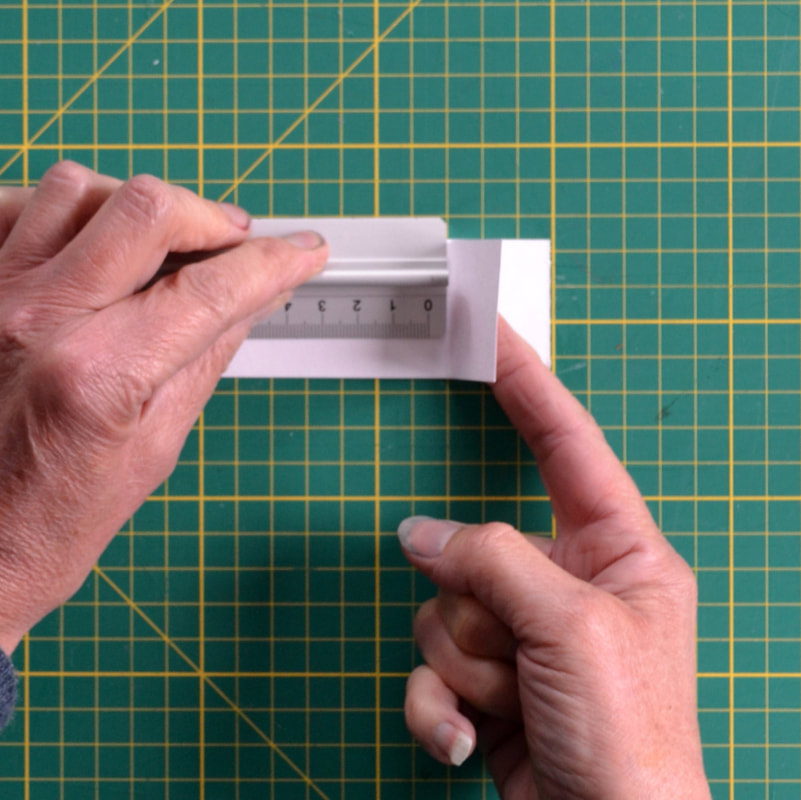
3. Cut a strip of paper with width measuring just less than the length of the slit , and length 2cm x number of booklets plus at least 2cm.
2. Measure the length of the slit.
3. Cut a strip of paper with width measuring just less than the length of the slit , and length 2cm x number of booklets plus at least 2cm.
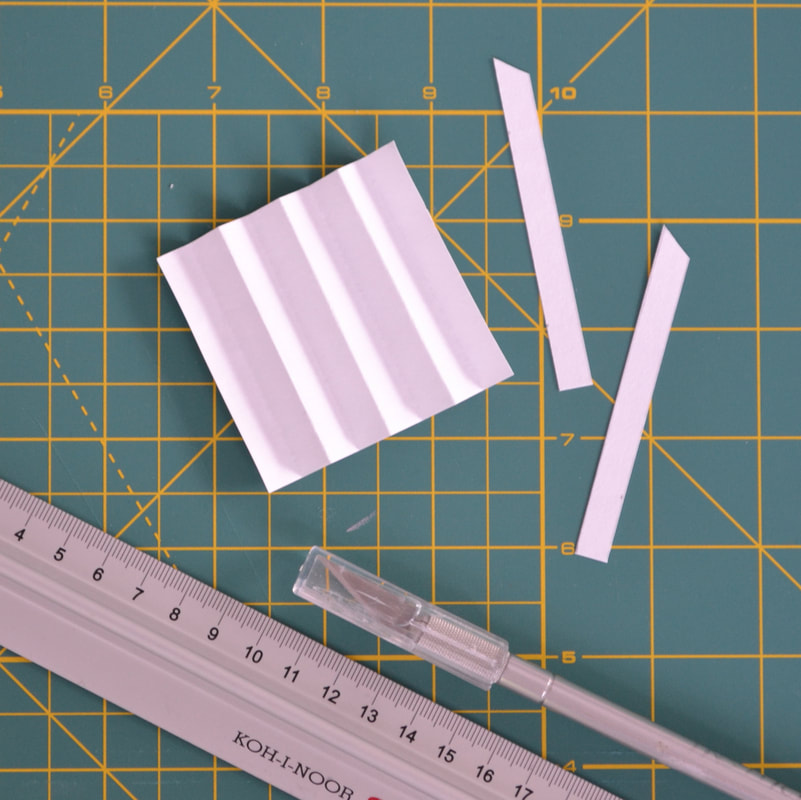
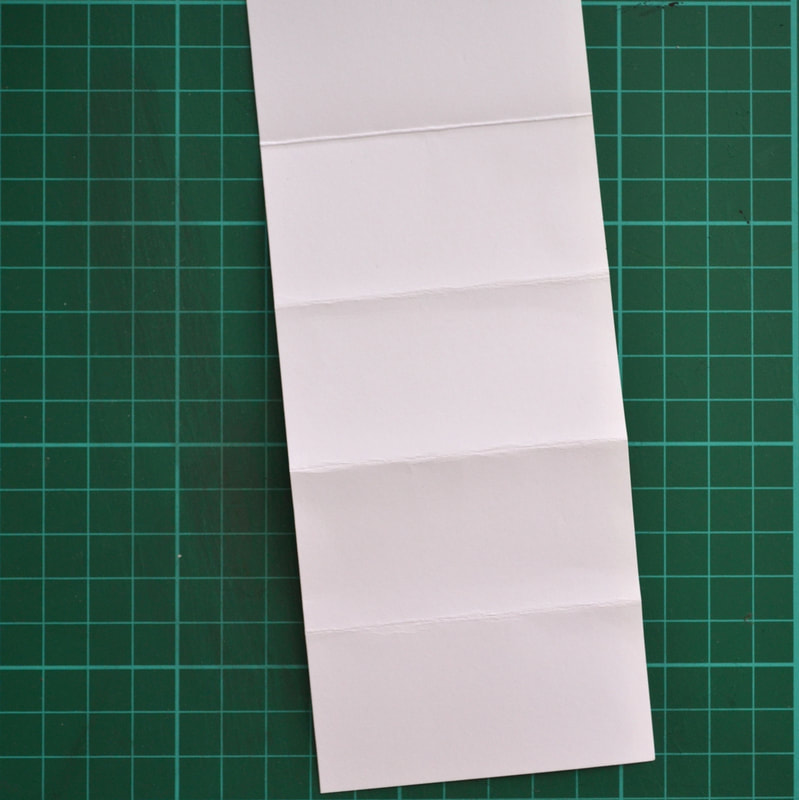
4. Fold a 1cm concertina, and place it with the ends pointing up like a W.
5. Push the mountain folds through the slits in the booklet spines from the outside.
5. Push the mountain folds through the slits in the booklet spines from the outside.

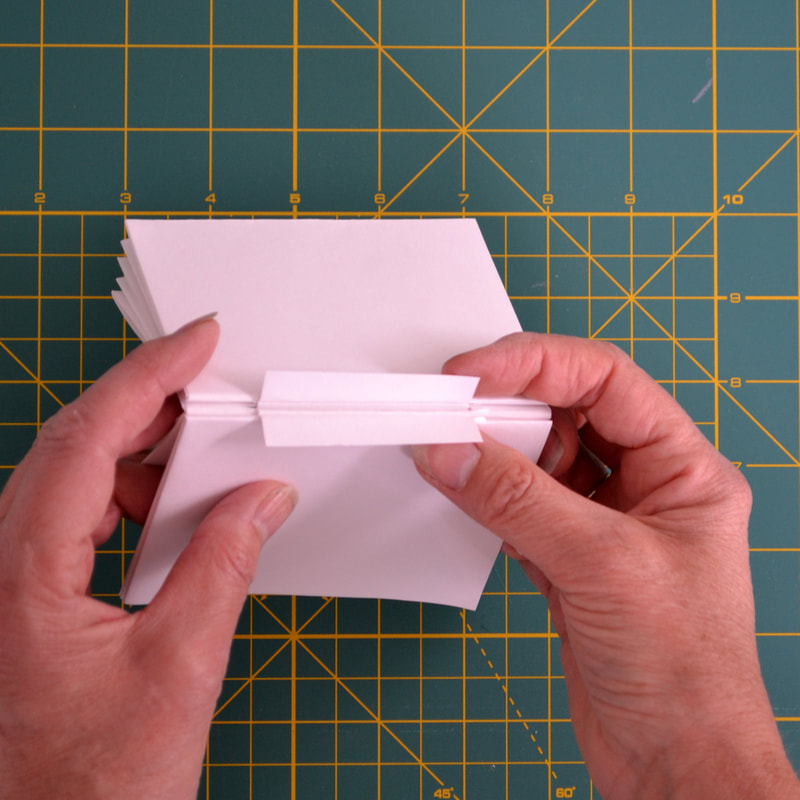
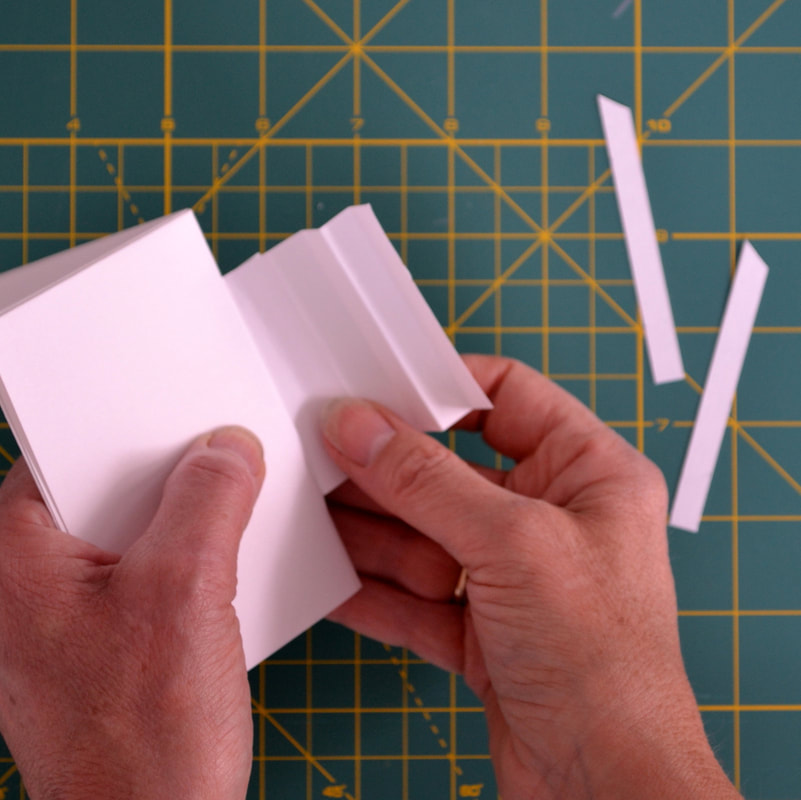
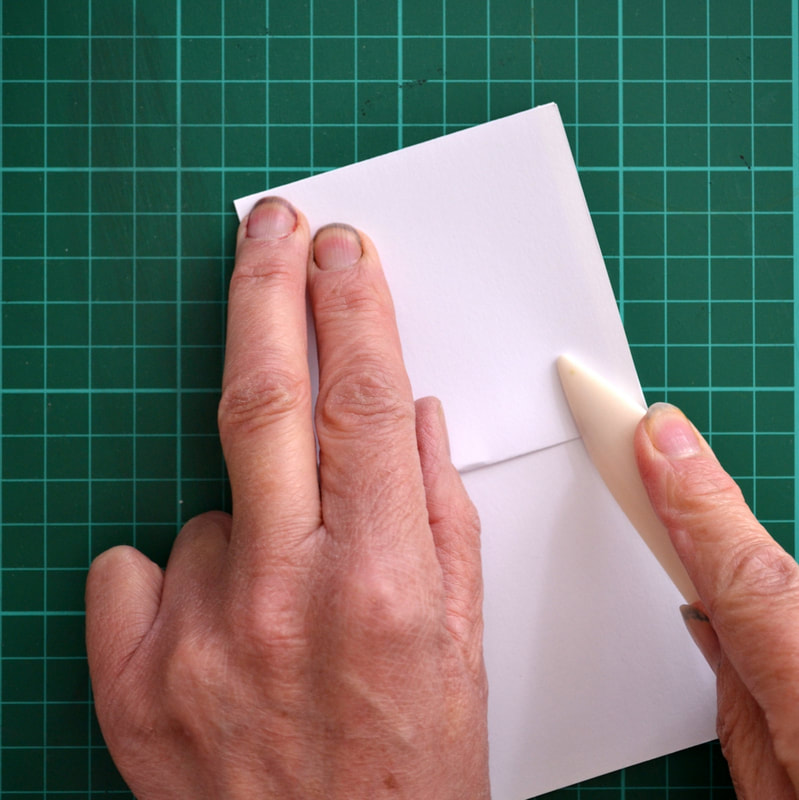
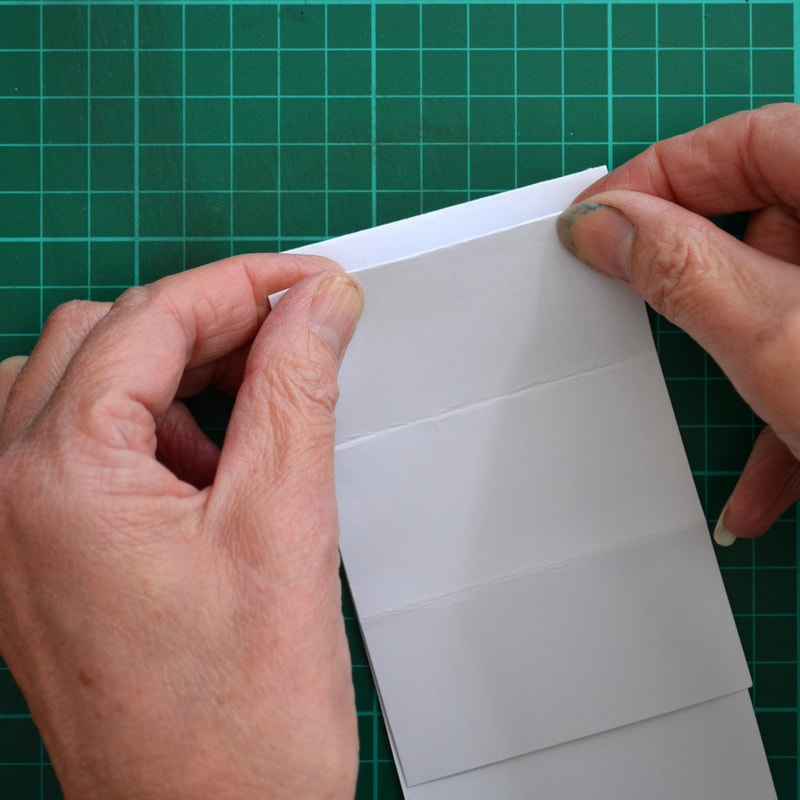
6. Cut strips of stiff paper 0.8cm x the height of the concertina plus 2cm. Snip one end so it is pointed.
7. Carefully push these strips, pointed end first, through the concertina folds on the inside of the book to secure them.
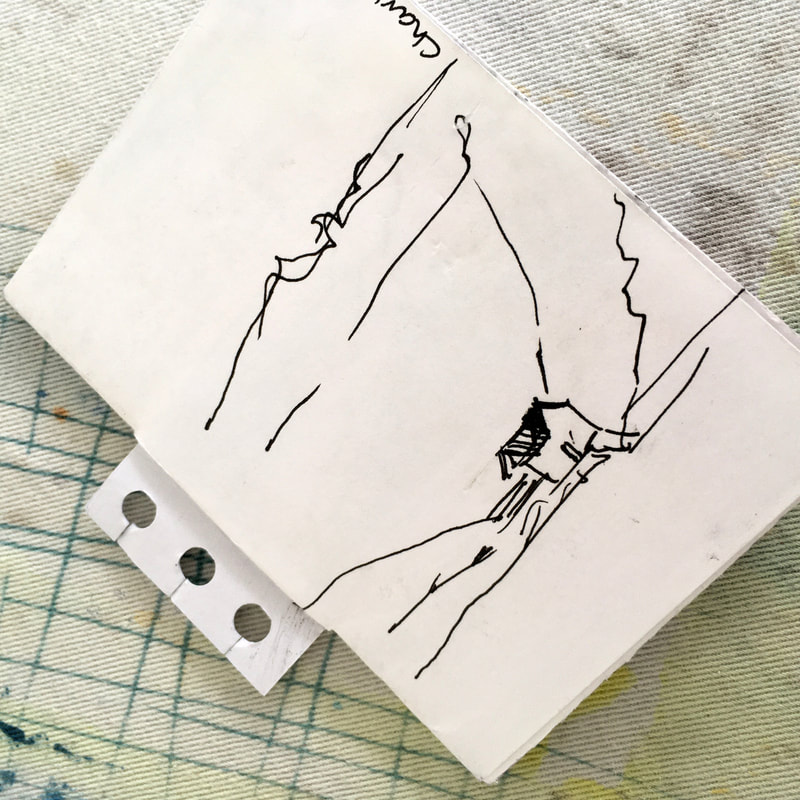
8. You can vary the length of the outside tabs - just add more than 2cm to the length of the concertina strip you cut, and be sure to start folding it from the middle - or punch holes in them to add them into a spiral-bound sketchbook.
7. Carefully push these strips, pointed end first, through the concertina folds on the inside of the book to secure them.
8. You can vary the length of the outside tabs - just add more than 2cm to the length of the concertina strip you cut, and be sure to start folding it from the middle - or punch holes in them to add them into a spiral-bound sketchbook.
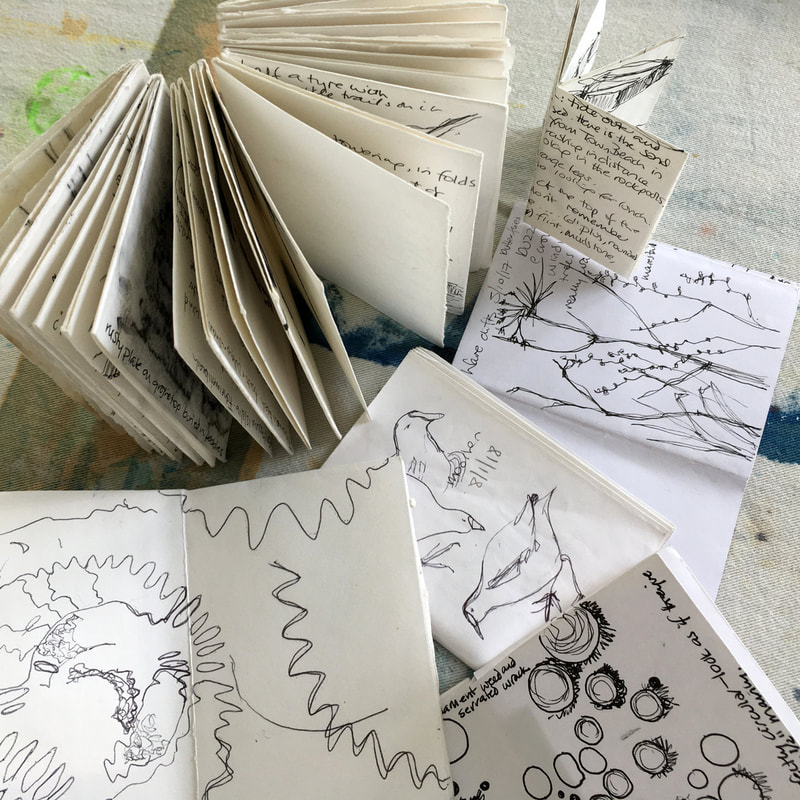
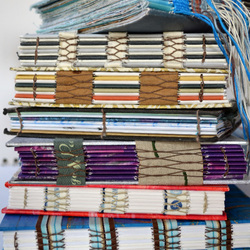
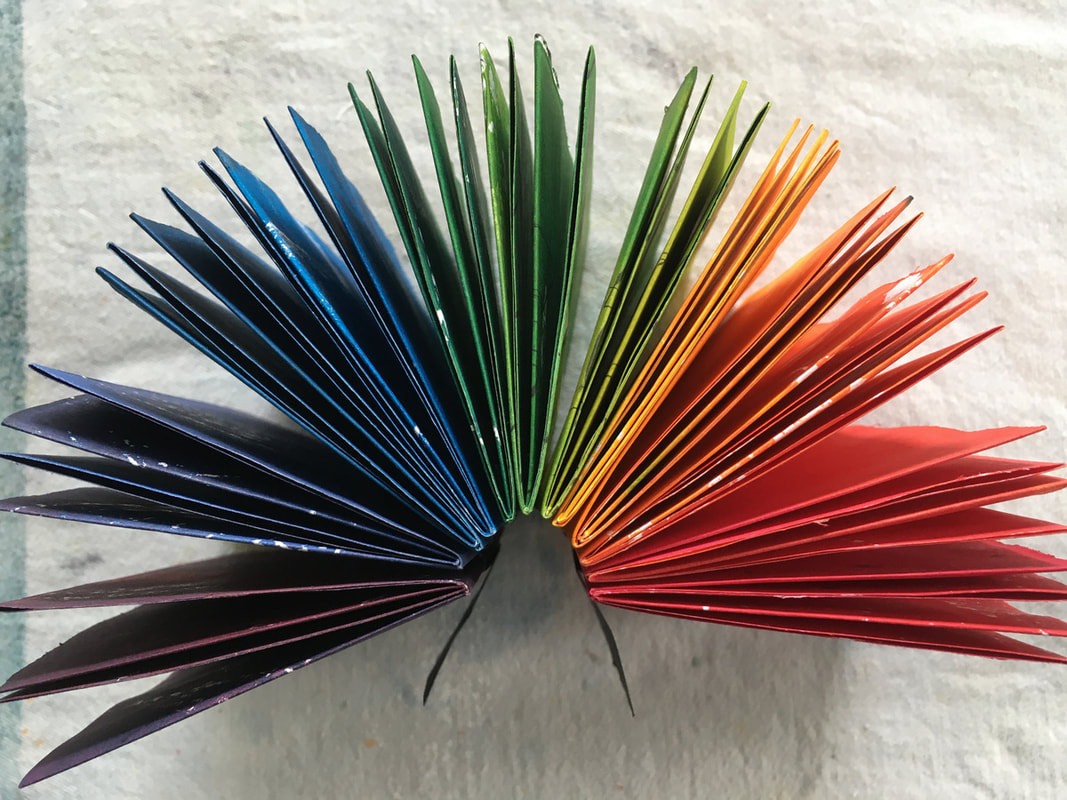
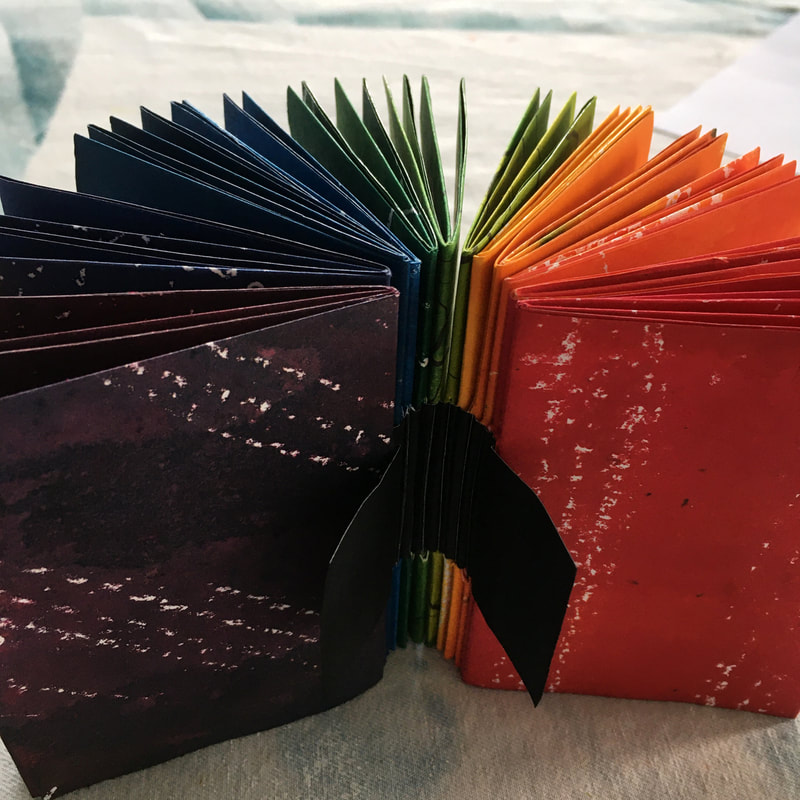
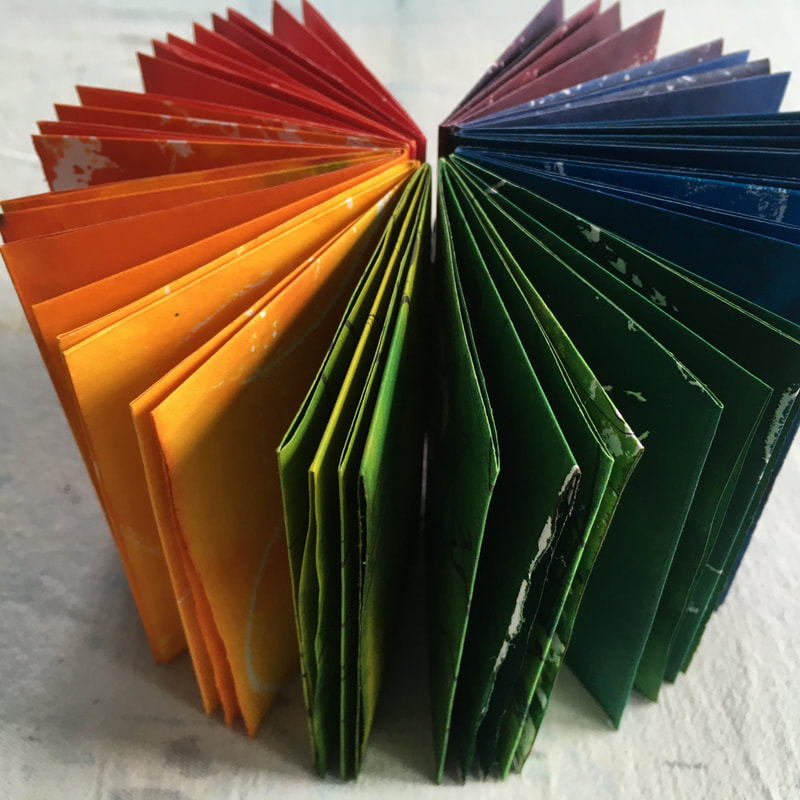
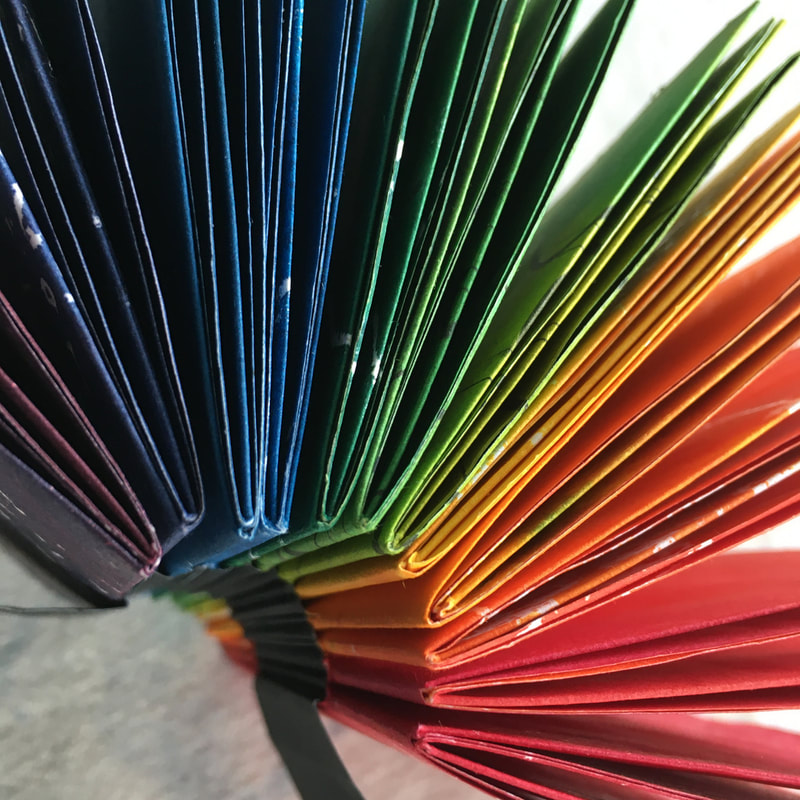
As I usually use my little books for sketching and note-taking while I am out walking they are white and therefore don’t look very exciting. This week we’ve been teaching our Inspiration to Stitch students (via Zoom) how to make another form of folded book filled with ideas curated from their course sketchbooks, and the resulting books were a riot of colour.
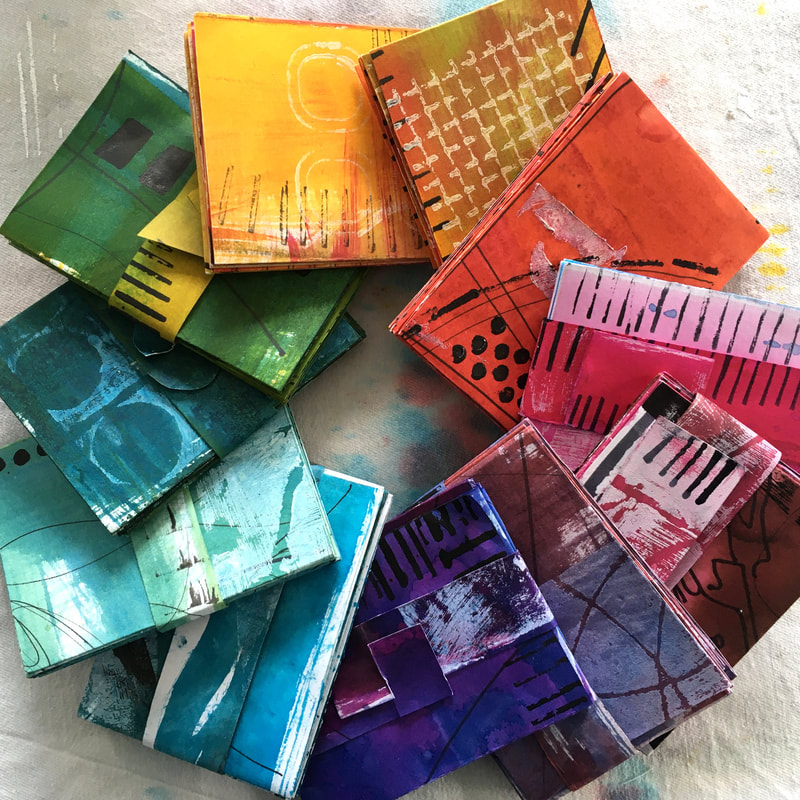
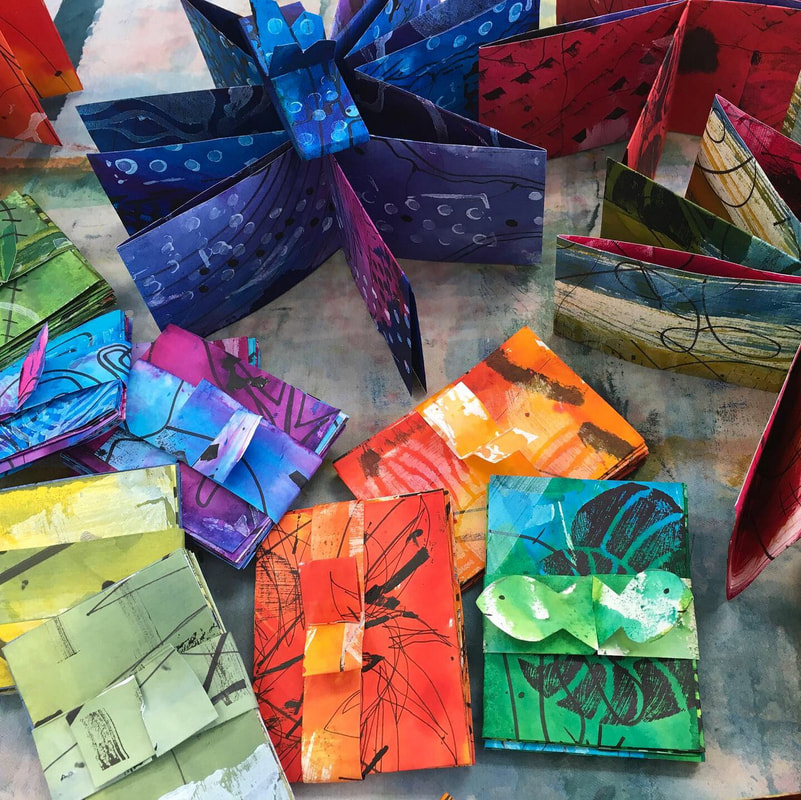
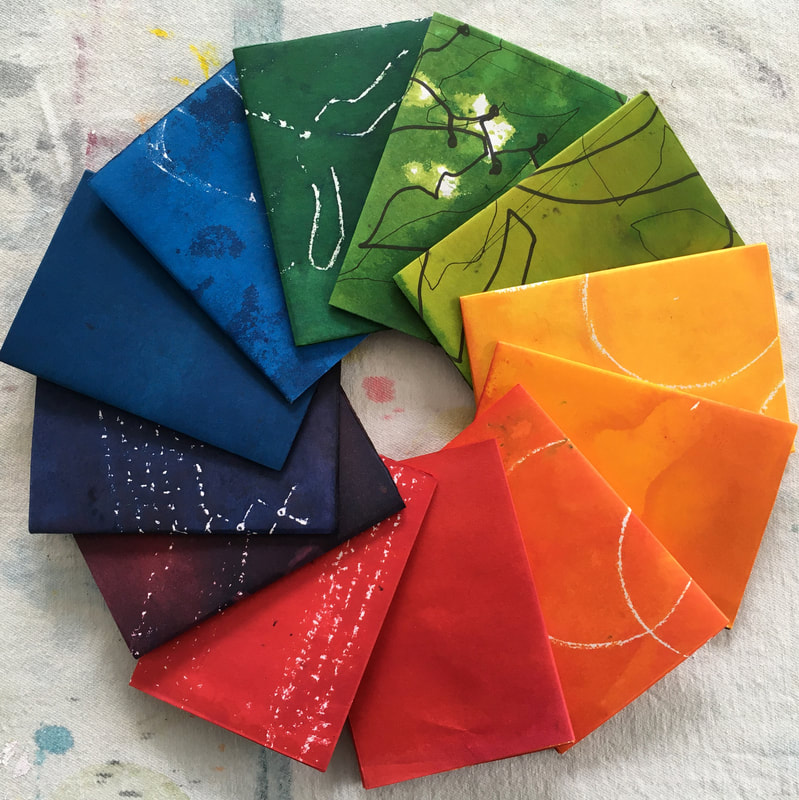
So yesterday I had an urge to colour paper with spent Procion dye (which we always have in our dye fridge in the studio) and make some colourful books myself. I ended up with a rainbow of 12 sheets (and coloured fingernails again – will I ever learn to wear gloves?), and folded each into one of these easy booklets.
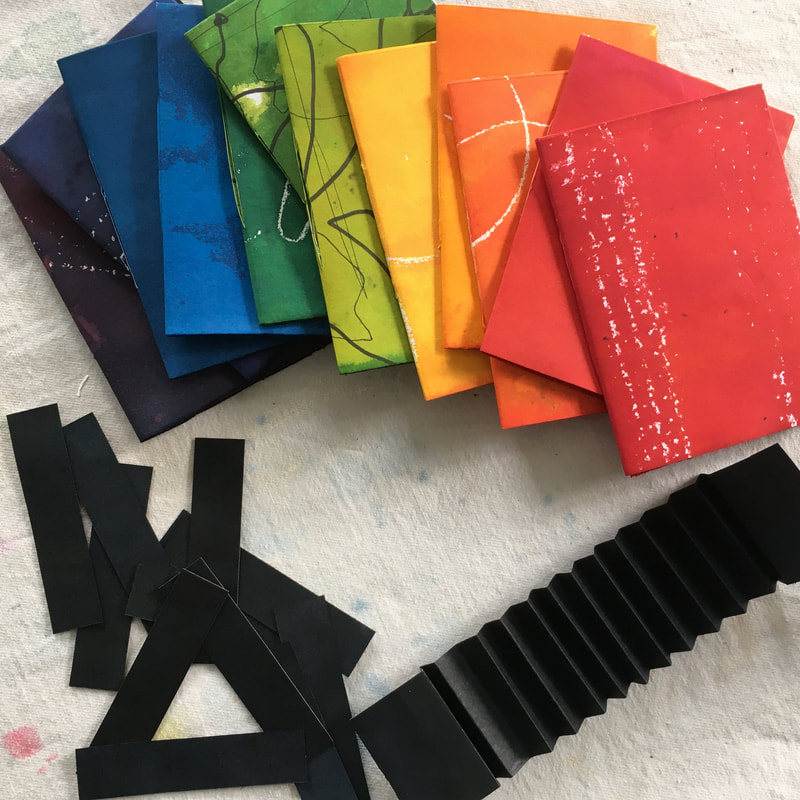
The final step will be to connect them together with a black concertina-folded strip. As there are 12 booklets I’ll need 12 x 1cm zig-zags, so I will cut this 12x2cm long. And I’m going to add around 3cm to each end for the flaps – so it handily uses a strip cut from the long side of a piece of A4 paper, which I’m going to make 4cm wide.
I will also need 12 0.8cm x 6cm strips of stiff paper (I’m actually using doubled-over cartridge) to anchor the concertina inside the booklets.
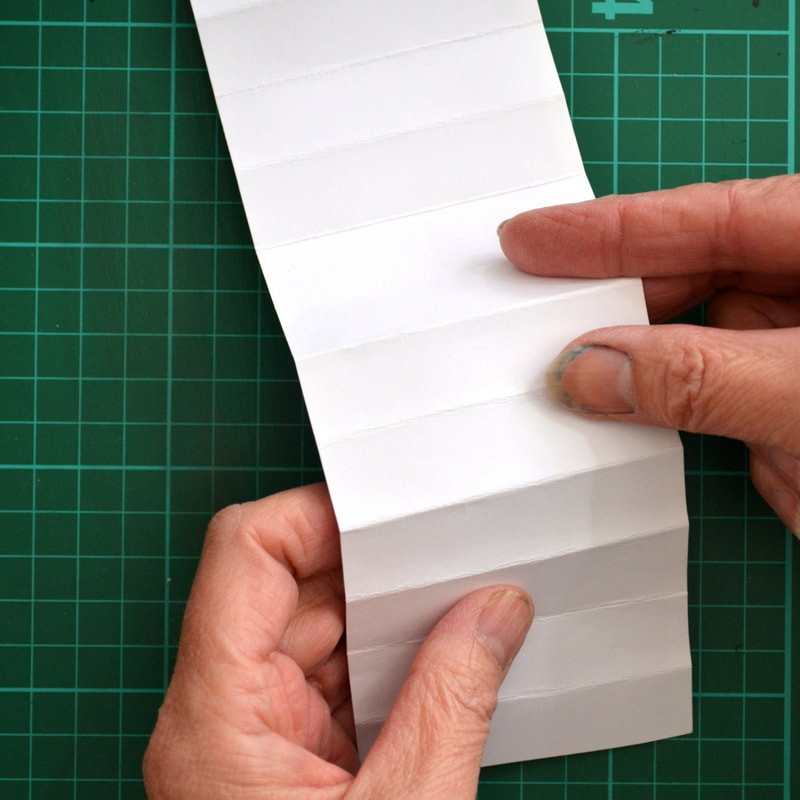
How to fold a perfect concertina
Do you ever find when you are making long concertina-folded strips that they tend to start to wander off true? The trick is to start in the middle, not at one end. I was shown this method by book-binder Nesta Rendall Davies, who has been one of our guest tutors on several occasions, and with a bit of care you get a perfect concertina every time. I hope I’ve remembered it correctly!
Do you ever find when you are making long concertina-folded strips that they tend to start to wander off true? The trick is to start in the middle, not at one end. I was shown this method by book-binder Nesta Rendall Davies, who has been one of our guest tutors on several occasions, and with a bit of care you get a perfect concertina every time. I hope I’ve remembered it correctly!
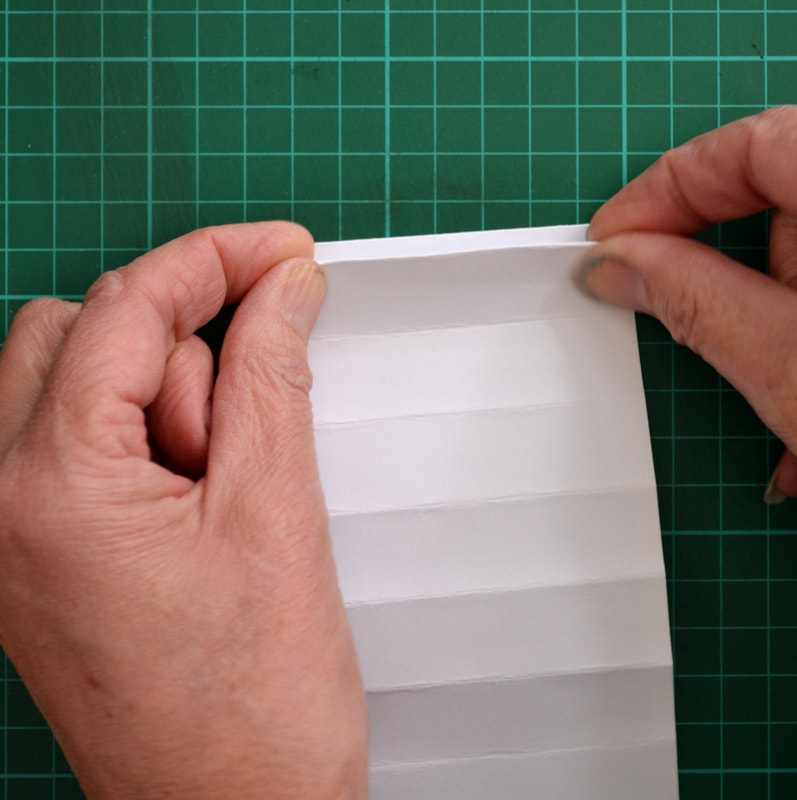
1. Fold your strip in half (short ends together).
2. If you have allowed for longer tabs at the outside edges, measure and fold these next, then treat that fold as the end of the paper.
2. If you have allowed for longer tabs at the outside edges, measure and fold these next, then treat that fold as the end of the paper.


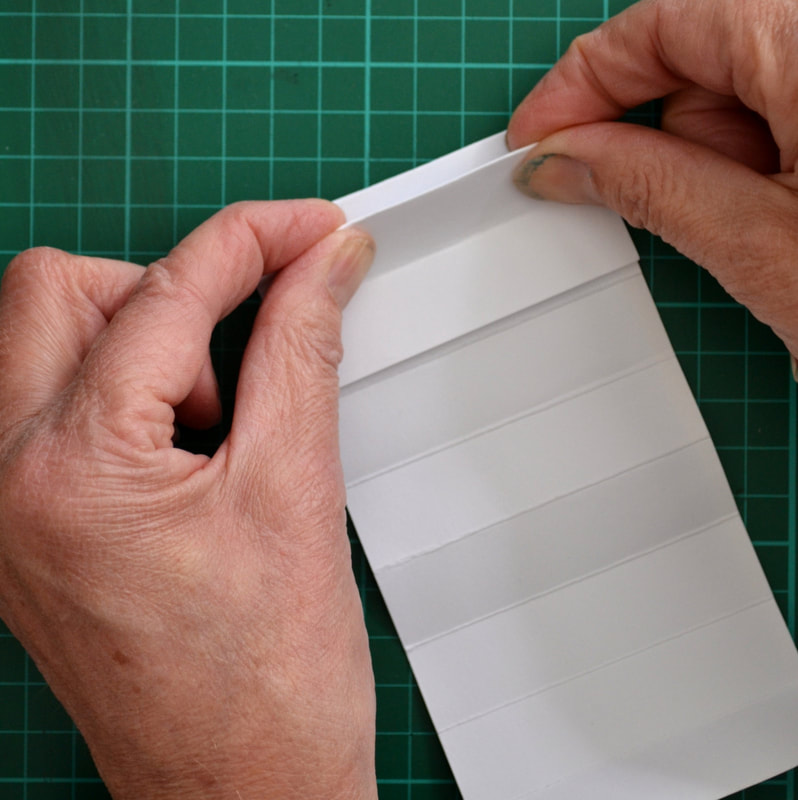
3. Keeping the strip folded in half, bring one end (or the fold of the flap) to the central fold. Crease the new fold that forms (it’ll be a valley fold – V shaped).
4. Reverse this new fold (so it becomes a mountain fold - ꓥ shaped) and bring this to the central fold. Crease the new fold.
5. Fold the end to meet the central fold and crease the new fold well - 2 zigzags on this side.
4. Reverse this new fold (so it becomes a mountain fold - ꓥ shaped) and bring this to the central fold. Crease the new fold.
5. Fold the end to meet the central fold and crease the new fold well - 2 zigzags on this side.

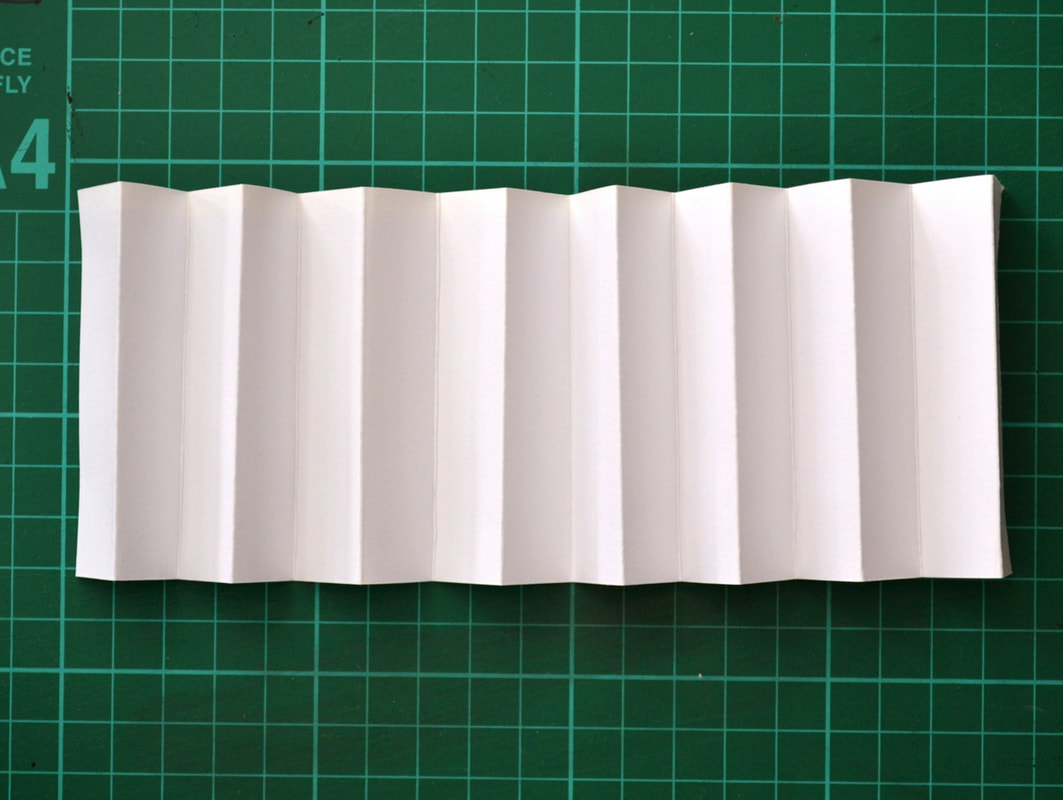
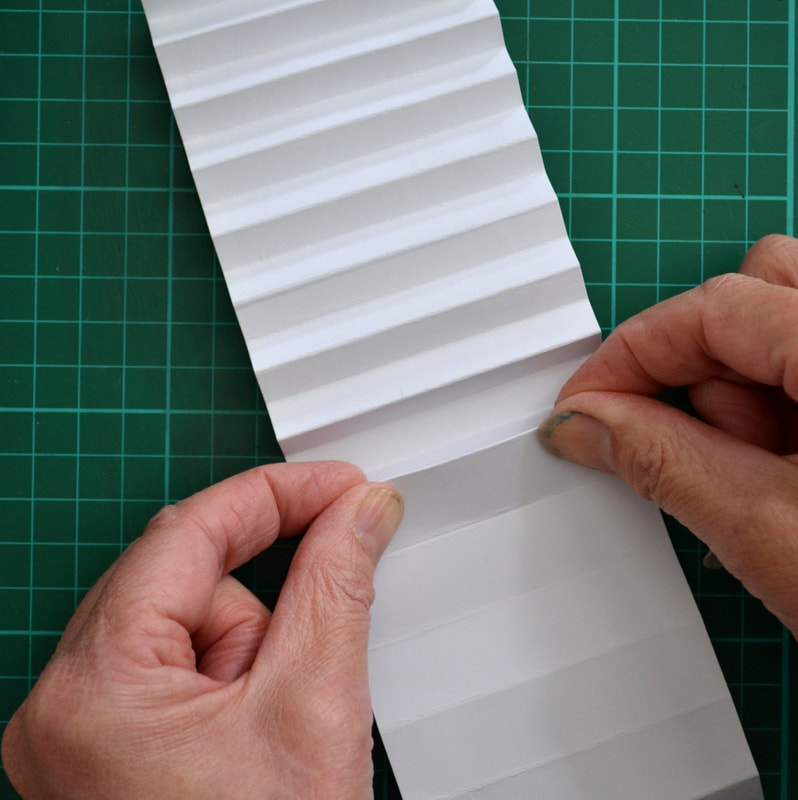
6. Reverse the valley folds into mountain folds, then fold the strip in half at the central fold again. Repeat bringing each fold in turn to the central fold to divide all the sections in two. You’ll now have 4 zigzags on that side.
7. Repeat with the other side of the strip – 8 zigzags in total.
7. Repeat with the other side of the strip – 8 zigzags in total.


8. If you need more sections make the new valley folds into mountain folds, re-fold the central fold, and fold each new section in half to the central fold, until you have 16 zigzags. Don’t forget to crease each new fold well.
It really is easier to do than to describe in words!
It really is easier to do than to describe in words!
This works when the number of zig-zags you need is 2, 4, 8, 16, 32 etc – anything that works by doubling 2.
If you need 12 zigzags, like I did, you need to work in 3 lots of four – ie divide your strip into three equal sections (by folding) and then do the folding and re-folding process until you have four zigzags in each section.
If you need 12 zigzags, like I did, you need to work in 3 lots of four – ie divide your strip into three equal sections (by folding) and then do the folding and re-folding process until you have four zigzags in each section.
I hope I've encouraged you to look more closely when you are in your garden or out and about, and maybe even record what you see on paper! The chance to get lost in observation can really help us gain a bit of calm at times like these.
If you have made some little booklets and, even better, started to fill them, we’d love to see how you got on … take a quick snap and post it over on Instagram using the hash tags: #institchescreative2020 and #institches2013. Don't forget to follow both us and the hashtags to see what everyone else is creating too!
On Facebook reply to the relevant week's post with your comments and images. And don't forget to actually follow InStitches on Facebook to see what everyone else is up to.
Keep the creativity flowing...
Terry & Hazel

 RSS Feed